
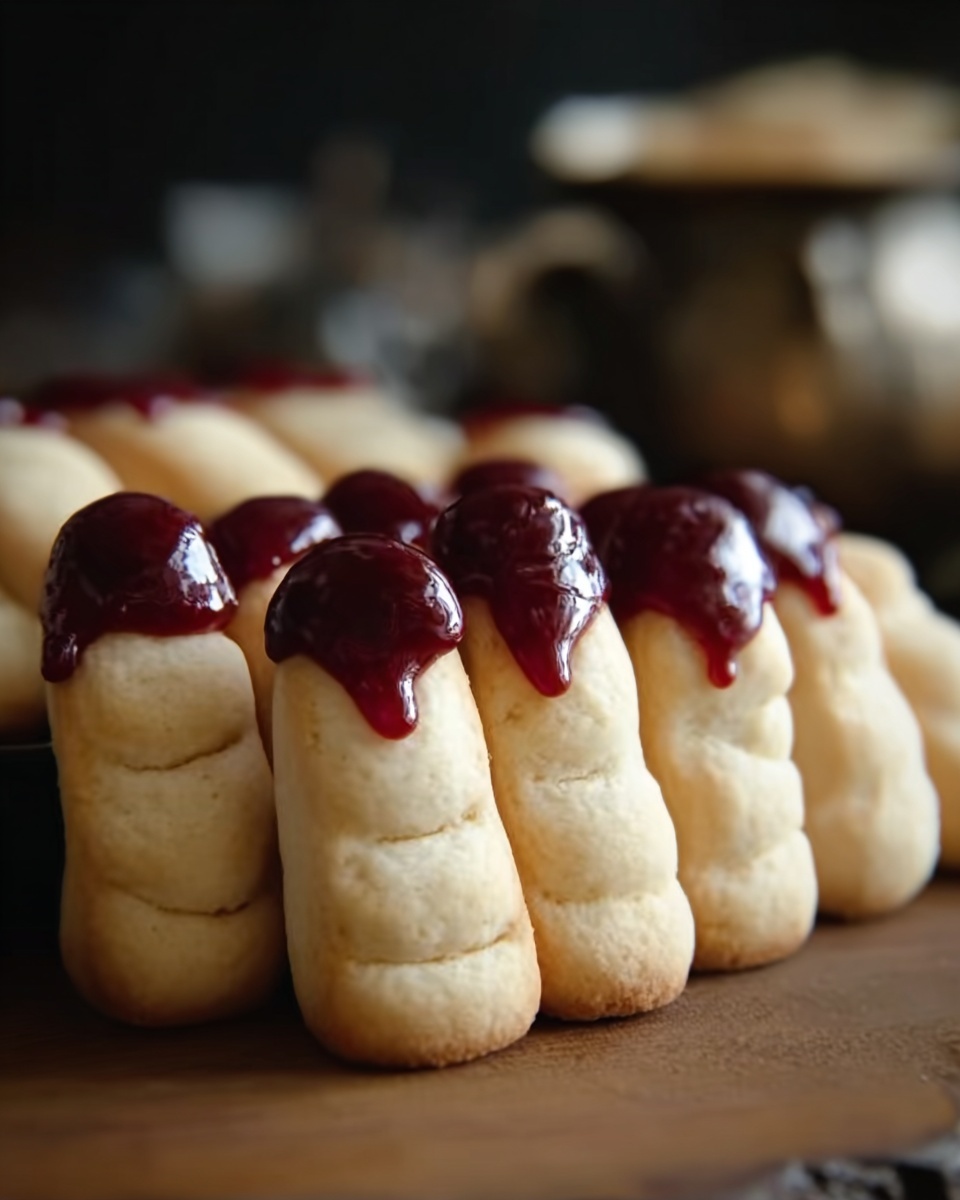
If you’re looking for a delightfully spooky treat that’s as fun to make as it is to eat, the Witch Finger Cookies Recipe is an absolute must-try this season. These eerie, yet utterly delicious cookies combine buttery almond dough shaped into creepy fingers, topped with blood-red almonds that look just like fingernails. Perfect for Halloween or any themed party, this recipe delivers a playful crunch and a subtle almond aroma that will have everyone asking for more. It’s easy to bring some magic to your kitchen with this charmingly creepy dessert!
Ingredients You’ll Need
Gathering the right ingredients is key to nailing the perfect texture and flavor of the Witch Finger Cookies Recipe. Each component plays an important role, from the softness of the butter to the crispness of the almonds, coming together to create a cookie full of character and taste.
- Blanched almonds (48 whole): These become the iconic fingernails and add a satisfying crunch to each cookie.
- Red gel food coloring (2 tsp): Used to paint the almonds, giving the nails a spooky and striking appearance.
- Unsalted butter (8 oz, room temperature): Provides richness and creates a tender crumb in the cookie dough.
- Powdered sugar (8 oz or 2 cups): Ensures a smooth sweetness and helps the cookies maintain a delicate texture.
- Large egg (1, room temperature): Acts as a binder for the dough and adds moisture.
- Vanilla extract (1 tbsp): Offers sweet, aromatic warmth to balance the almond flavors.
- Almond extract (2 tsp): Intensifies the nutty flavor, making these cookies uniquely almond-y and delicious.
- All-purpose flour (15 oz or 3.5 cups): The base of the dough, ensuring structure and firmness.
- Almond flour (2.5 oz or ¾ cup): Adds extra almond flavor and a moist, delicate texture to the cookies.
- Salt (1 tsp): Enhances all the flavors and balances the sweetness perfectly.
How to Make Witch Finger Cookies Recipe
Step 1: Prepare the Almond Fingernails
Start by transforming your almonds into creepy, blood-red fingernails. Use a small food-safe paintbrush to carefully dab red gel food coloring onto the flat side of each almond. Once painted, set them aside on a paper towel and let them dry completely. This step can be done a few days ahead to save time later, making your baking process smoother and more fun!
Step 2: Preheat and Prep Your Oven
Heat your oven to 350°F (175°C) to ensure it is ready when your cookies are shaped. Line multiple baking sheets with parchment paper so the cookies will bake evenly and clean-up is a breeze. Getting your workspace oven-ready is key for a stress-free baking session!
Step 3: Mix the Dry Ingredients
In a medium bowl, whisk together all-purpose flour, almond flour, and salt. This mixture gives the cookies their structure and that subtle almond hint. Setting this aside helps streamline the mixing process so you can move on to the wet ingredients without a hitch.
Step 4: Cream the Butter and Sugar
In a large bowl, use an electric mixer or vigorous stirring to cream the softened butter and powdered sugar until the mixture is light, fluffy, and creamy. This step creates the perfect base for your dough, ensuring the cookies bake up tender with just the right amount of sweetness.
Step 5: Combine Wet Ingredients
Add the egg, vanilla extract, and almond extract to the butter and sugar mixture. Mix well until everything is uniformly combined. These ingredients bring moisture and imbue the dough with warm, nutty aroma that makes these Witch Finger Cookies Recipe truly stand out.
Step 6: Incorporate Dry Ingredients into Wet
Gradually add your flour mixture into the wet ingredients. Stir until fully incorporated into a smooth dough. The gradual addition prevents lumps and ensures the right consistency for shaping. You’ll notice the dough becoming soft yet sturdy—a perfect sign for cookie shaping.
Step 7: Shape the Fingers
Now for the fun part! Roll walnut-sized balls of dough into long, thin snakes about the length and thickness of actual fingers. Place them on the baking sheet. Gently press your finger down the middle to form knuckles, then use a toothpick to etch subtle lines above and below each knuckle, giving your fingers an eerie knobby look.
Step 8: Add the “Fingernails”
Press one red-painted almond into the tip of each finger cookie. This is what truly brings the Witch Finger Cookies Recipe to life, turning them from simple almond cookies into spooky little treats that are sure to impress.
Step 9: Bake to Perfection
Bake your witch fingers for about 10 minutes, or until the edges become firm while the cookies remain pale. This keeps the texture just right—crisp on the outside and tender inside. Allow them to cool completely on the baking sheet before moving them to a plate, so they keep their shape perfectly.
How to Serve Witch Finger Cookies Recipe

Garnishes
To elevate the creepy factor, sprinkle a light dusting of powdered sugar or drizzle with extra red gel for a fresh “bloody” effect. You can even add tiny drops of dark chocolate to resemble dried blood beside the fingernail for dramatic flair. These little touches make the presentation pop and enhance your Halloween spread.
Side Dishes
Pair these eerie witch fingers with a glass of cold milk, warm spiced cider, or a rich hot chocolate. The smoothness of these beverages balances the almond flavor and adds comfort, keeping the experience inviting and cozy, perfect for a festive treat-sharing session.
Creative Ways to Present
For a party presentation, serve the Witch Finger Cookies Recipe in a cauldron-shaped bowl or on a platter decorated with faux cobwebs and mini pumpkins. You can also nestle them standing upright in a “mysterious” purple or green frosting base to mimic fingers rising from a grave! These playful ideas turn simple cookies into a conversation-starting centerpiece.
Make Ahead and Storage
Storing Leftovers
If you have any leftover witch fingers (though they rarely last long), keep them in an airtight container at room temperature. They stay fresh and delicious for up to a week, ready for snacking without losing their delightful texture.
Freezing
You can freeze baked Witch Finger Cookies by placing them in a single layer on a baking sheet until solid. Then transfer to a freezer-safe container or bag. They’ll keep well for 2-3 months. When hunger strikes, simply thaw at room temperature for a quick spooky snack.
Reheating
For that freshly-baked warmth, reheat your cookies in a 300°F oven for 5-7 minutes. This refreshes their crispness without drying them out. Avoid using the microwave as it can soften the texture too much.
FAQs
Can I use regular food coloring instead of gel for the almonds?
Gel food coloring is preferred because it’s thicker and less watery, making the red color on the almonds more vibrant and less likely to run. However, if you only have liquid food coloring, apply it carefully and sparingly to avoid soggy almonds.
What if I don’t have almond flour?
You can substitute almond flour with finely ground blanched almonds or use all-purpose flour instead. Just keep in mind that almond flour adds moisture and almond flavor that’s key to these cookies, so the taste and texture may be slightly different.
Can I make the cookie dough in advance?
Yes! The dough can be refrigerated for up to 2 days before baking. This actually helps the flavors meld and makes shaping easier. Just remember to let the dough soften slightly at room temperature before rolling into fingers.
Are these cookies gluten-free?
Unfortunately, no, as this recipe contains all-purpose flour. However, you can experiment with gluten-free flour blends that substitute all-purpose flour one-to-one, keeping the almond flour for texture and flavor.
How do I prevent the cookies from cracking when baking?
Make sure your butter is at room temperature and mix the dough thoroughly but gently. Avoid overbaking; remove the cookies as soon as the edges firm up but before they brown to keep them soft and crack-free.
Final Thoughts
Making the Witch Finger Cookies Recipe is such a joyful way to add spooky charm to your baking routine. These creepy little treats manage to be creepy and inviting all at once, delighting guests with their perfect crunch and authentic almond flavor. Whether it’s for a Halloween party or just because you crave something whimsically delicious, I encourage you to give this recipe a whirl. Trust me, your kitchen will be filled with magic, laughter, and the irresistible aroma of almond goodness in no time!
Print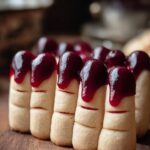
Witch Finger Cookies Recipe
- Prep Time: 25 minutes
- Cook Time: 10 minutes
- Total Time: 35 minutes
- Yield: 30 servings
- Category: Dessert
- Method: Baking
- Cuisine: American
Description
Witch Finger Cookies are spooky, fun, and delicious Halloween treats made with a buttery almond-flavored dough shaped into creepy fingers topped with red-painted almond fingernails. Perfect for parties and festive gatherings, these cookies combine tender crumbly texture with an eye-catching eerie presentation.
Ingredients
Almond Fingernails
- 48 whole blanched almonds
- 2 tsp red gel food coloring
Cookie Dough
- 8 oz unsalted butter, at room temperature
- 8 oz powdered sugar (2 cups)
- 1 large egg, at room temperature
- 1 tbsp vanilla extract
- 2 tsp almond extract
- 15 oz all-purpose flour (3.5 cups)
- 2.5 oz almond flour (¾ cup)
- 1 tsp salt
Instructions
- Paint the Almond Fingernails: Use a small food-safe paintbrush to evenly apply red gel food coloring to the top of each whole blanched almond. Set aside on a paper towel to dry completely. This can be done a few days ahead for convenience.
- Preheat Oven: Set your oven to 350°F (175°C) and line several baking sheets with parchment paper to prepare for baking the cookies.
- Mix Dry Ingredients: In a medium bowl, whisk together the all-purpose flour, almond flour, and salt until evenly combined. Set this mixture aside.
- Cream Butter and Sugar: In a large mixing bowl, use a mixer to cream the room temperature butter with the powdered sugar until the mixture is light, fluffy, and pale in color.
- Add Wet Ingredients: Beat in the egg, vanilla extract, and almond extract to the creamed butter and sugar mixture until fully incorporated and smooth.
- Combine Dry and Wet Ingredients: Gradually add the flour mixture to the wet ingredients, mixing continuously until all flour is absorbed and a smooth dough forms.
- Shape the Cookies: Take walnut-sized portions of dough and roll each into long, thin snake-like shapes to resemble fingers. Place them on the prepared baking sheets. Press your finger gently down the center of each to create knuckles, then use a toothpick to make small lines above and below the knuckle marks for detail.
- Add Almond Fingernails: Press one red-painted almond firmly onto one end of each cookie to replicate a bloody fingernail.
- Bake: Place the baking sheets in the preheated oven and bake for about 10 minutes, or until the edges are firm but the cookies remain pale in color. Remove and allow them to cool completely on the baking sheets before handling or serving.
Notes
- Painting almonds a few days in advance allows ample drying time and reduces prep time on baking day.
- Make sure the butter is at room temperature for easier creaming and better cookie texture.
- Press your finger gently to make knuckles but avoid flattening the cookies entirely.
- Store cookies in an airtight container at room temperature for up to 5 days.
- For a gluten-free version, substitute all-purpose flour with a gluten-free baking blend in equal measurements.


