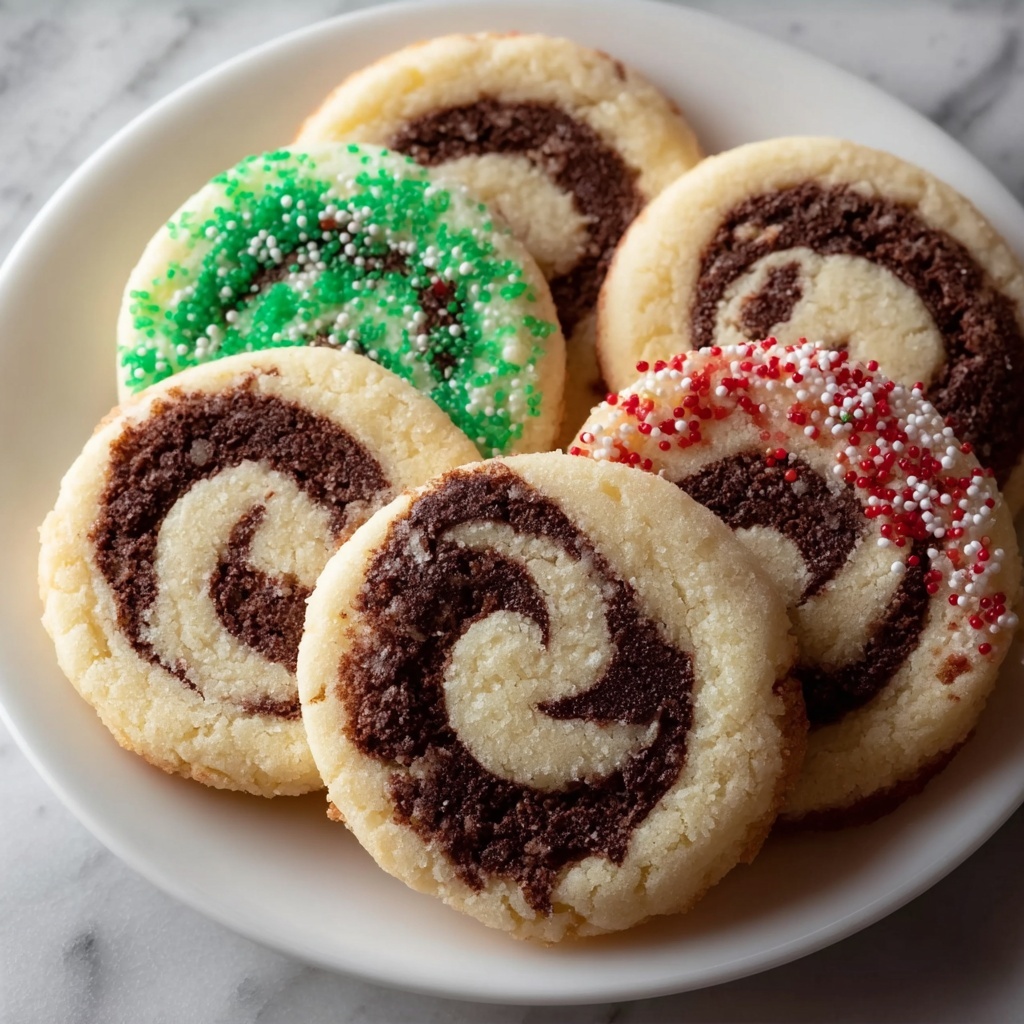
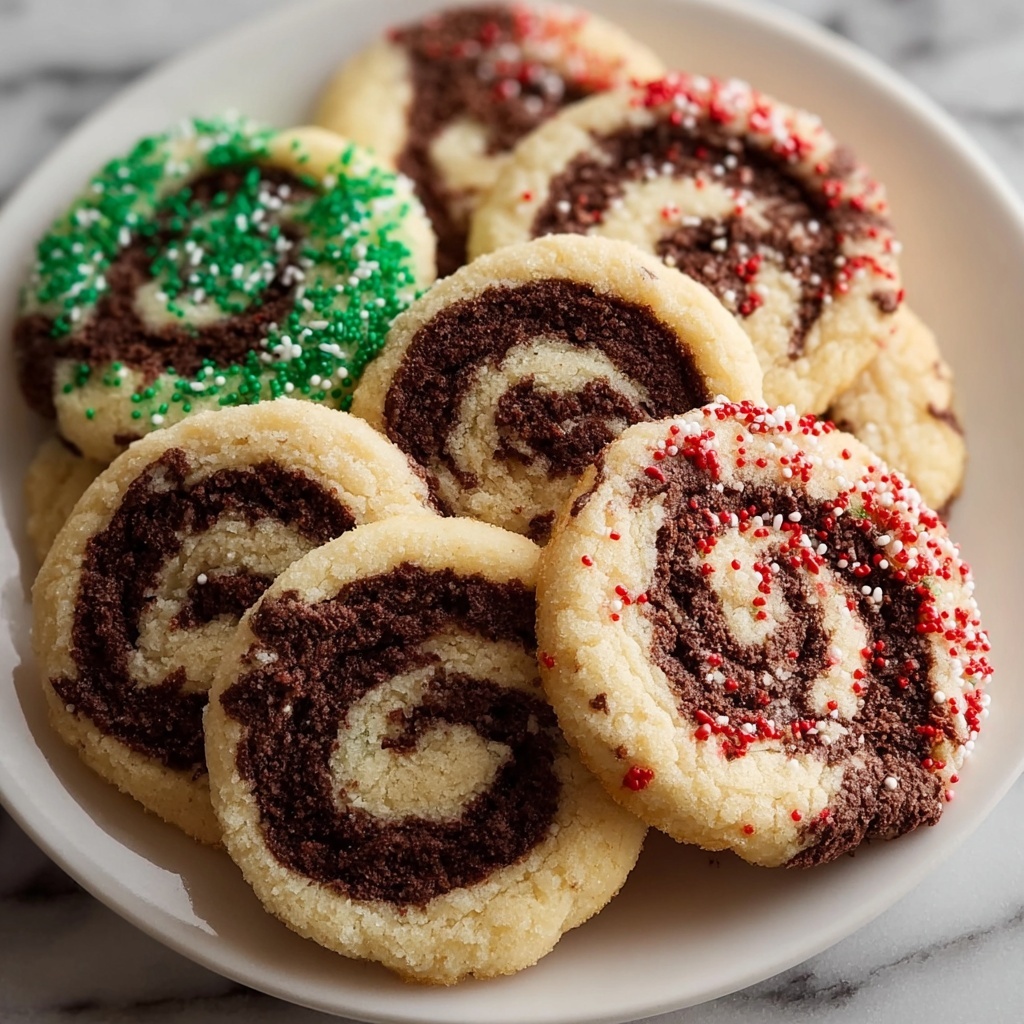
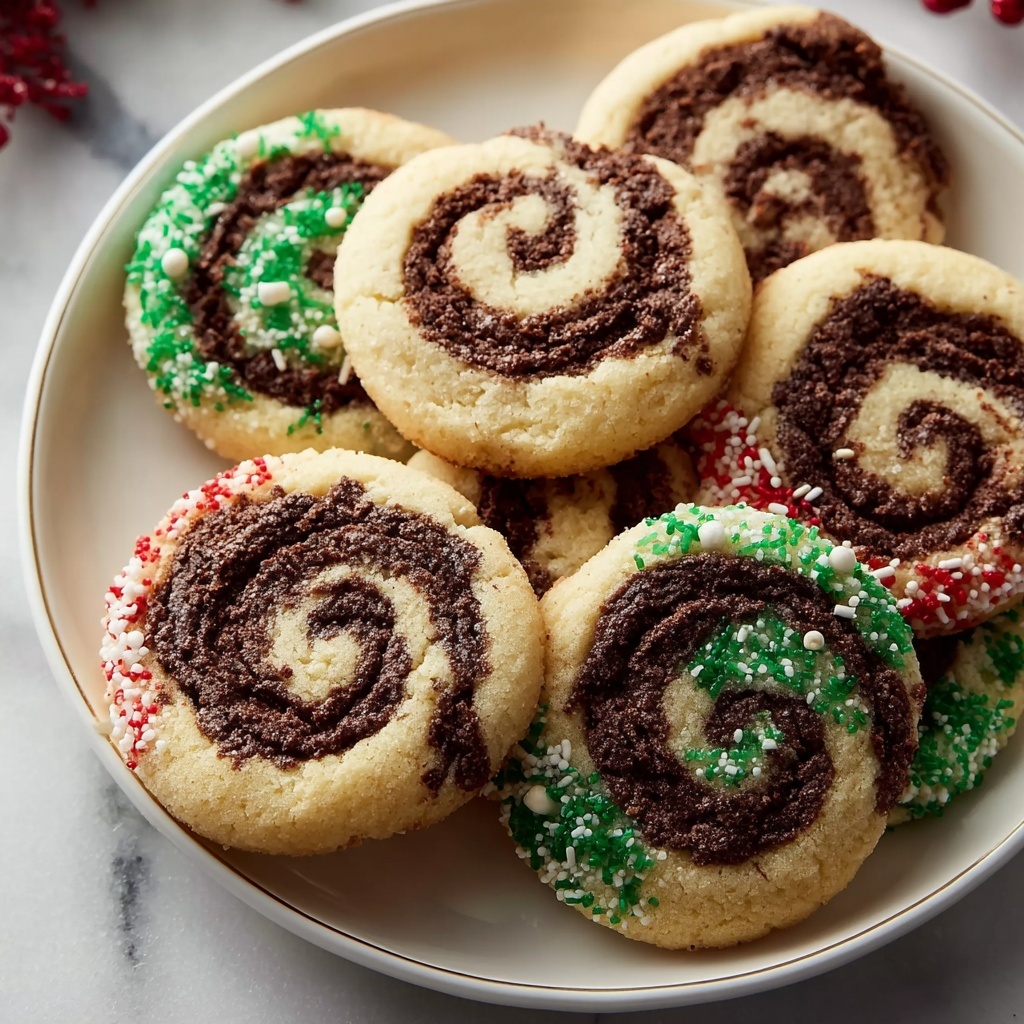
The Swirled Christmas Cookies Recipe is a festive treat that perfectly blends rich cocoa and classic vanilla dough into a beautiful, eye-catching swirl that’s as delightful to look at as it is to eat. These cookies bring a warm, joyful spirit to your holiday gatherings with their tender texture, sweet powdered sugar dusting, and playful red and green sprinkles. Whether you’re baking for family, friends, or just to enjoy with a cozy mug of hot cocoa, this recipe feels like a warm festive hug in every bite.
Ingredients You’ll Need
The beauty of this recipe lies in its simple, pantry-staple ingredients that come together to create something truly magical. Each component plays an essential role in crafting the perfect texture, flavor, and festive look of the cookies.
- 2 3/4 cups all-purpose flour: Provides the structure ensuring your cookies hold their shape while staying tender.
- 1 teaspoon baking soda: Helps the cookies rise just the right amount for a soft chewiness.
- 1/2 teaspoon salt: Balances sweetness and enhances flavors.
- 1 cup unsalted butter, softened: Adds richness and moisture for that melt-in-your-mouth experience.
- 1 cup granulated sugar: Sweetens and contributes to a slight crispness on the edges.
- 1 cup packed brown sugar: Brings warmth and a subtle caramel depth to the taste.
- 1 teaspoon vanilla extract: A classic flavor booster that ties the dough together beautifully.
- 1 large egg: Binds ingredients and adds to the soft texture.
- 1 large egg yolk: Enriches the dough for extra tenderness.
- 1/4 cup unsweetened cocoa powder: Provides the chocolate swirl that distinguishes these cookies visually and flavor-wise.
- 2 cups powdered sugar (for decoration): Dusts the cookies with a snowy finish that screams holiday cheer.
- Red and green sprinkles (for decoration): Adds festive pops of color and fun to each sweet bite.
How to Make Swirled Christmas Cookies Recipe
Step 1: Prep Your Oven and Baking Sheets
Start by preheating your oven to 350°F (175°C). Line two baking sheets with parchment paper to ensure your cookies bake evenly and come off the pan smoothly without sticking.
Step 2: Mix Dry Ingredients
Whisk together the all-purpose flour, baking soda, and salt in a medium bowl. This dry mix ensures an even distribution of leavening and seasoning for balanced flavor in your cookies.
Step 3: Cream Butter and Sugars
In a large bowl, combine the softened butter with granulated and brown sugars. Beat until the mixture becomes light and fluffy—this aeration is key to a tender crumb and subtle crunch.
Step 4: Add Eggs and Vanilla
Mix in the egg, egg yolk, and vanilla extract with the creamed butter and sugar. These enrich the dough and help bring all elements together into a smooth, cohesive batter.
Step 5: Combine Wet and Dry Ingredients
Gradually add the flour mixture to the wet ingredients, mixing just until everything is incorporated. Avoid overmixing here to prevent tough cookies.
Step 6: Divide and Flavor the Dough
Split your dough into two equal parts. Stir cocoa powder into one half, creating a luscious chocolate dough, while leaving the other half plain for the classic vanilla component.
Step 7: Chill Dough Logs
On a clean surface, shape each half of dough into logs wrapped tightly in plastic wrap. Refrigerate at least an hour to firm up, making the dough easier to roll and swirl later.
Step 8: Roll Out Dough Rectangles
After chilling, roll each dough log into a thin, rectangular sheet about a quarter inch thick. This step prepares the dough for rolling into the signature swirl.
Step 9: Layer and Roll the Swirl
Place the chocolate dough rectangle on top of the plain dough rectangle. Starting at one end, roll the layered dough tightly into a log to form the beautiful swirl pattern inside.
Step 10: Chill the Swirled Log
Wrap the swirled dough log in plastic wrap and refrigerate again for another hour to firm it up, which helps maintain the swirl definition and makes slicing easier.
Step 11: Preheat Oven Again
If needed, preheat your oven again to 350°F to ensure it’s ready for baking when your dough comes out of the fridge.
Step 12: Slice the Cookies
Cut the chilled swirled log into 1/4-inch thick slices. Place each cookie slice on your prepared baking sheets, spaced slightly apart to allow even baking.
Step 13: Bake Until Golden
Bake for 10 to 12 minutes, or until edges turn a light golden brown. This timing locks in the tender center and offers just enough crisp on the edges.
Step 14: Cool Before Decorating
Let the cookies rest on the baking sheet for five minutes, then transfer them to a wire rack. Cooling thoroughly ensures your decorations stick perfectly and the cookies retain their shape.
Step 15: Decorate Festively
Once completely cool, lightly dust with powdered sugar and sprinkle with red and green holiday-colored sprinkles. This finishing touch highlights the cookie’s swirled design and adds that merry Christmas vibe.
How to Serve Swirled Christmas Cookies Recipe
Garnishes
Simple powdered sugar and a generous sprinkle of red and green sprinkles are perfect for adding an instant festive look. Consider pairing with a drizzle of white chocolate or a sprinkle of crushed peppermint for extra holiday flair.
Side Dishes
These cookies shine as a sweet companion to hot beverages like mulled cider, peppermint hot chocolate, or a classic cup of coffee. Serving them alongside a cheese board with sharp cheddar or creamy brie also creates a sound balance of savory and sweet.
Creative Ways to Present
Arrange Swirled Christmas Cookies Recipe slices in a circular pattern on a decorative platter for an eye-catching holiday centerpiece. You can also package them in clear cellophane bags tied with red and green ribbons for cute DIY gifts that spread the Christmas joy.
Make Ahead and Storage
Storing Leftovers
Store leftover cookies in an airtight container at room temperature for up to a week. This keeps them fresh and soft, preserving their delightful swirl pattern and festive toppings.
Freezing
For longer storage, freeze the baked cookies in a single layer on a baking sheet before transferring them to a freezer-safe container or bag. They will keep well for up to three months without losing their flavor or texture.
Reheating
To bring back that freshly baked warmth, gently warm the cookies in a low oven (about 300°F) for 5 minutes or pop a couple in the microwave for about 10 seconds. This melts the butter slightly and revives the chewy-soft texture.
FAQs
Can I use salted butter instead of unsalted butter?
Yes, but reduce the salt added to the dough slightly since salted butter already contains salt. This will help keep the balance of flavors just right in your Swirled Christmas Cookies Recipe.
Can I make the dough ahead of time?
Absolutely! The dough logs can be wrapped and refrigerated for up to 24 hours before slicing and baking, which makes holiday prep much easier and stress-free.
What is the best way to get perfect swirls in the cookies?
Rolling the dough rectangles evenly and tightly together helps ensure a stunning swirl effect. Chilling the dough well before slicing also helps maintain the swirl shape during baking.
Can I substitute cocoa powder with melted chocolate?
The texture of the dough changes significantly with melted chocolate, so it’s best to stick to cocoa powder in this recipe to keep the dough firm and easy to work with for rolling and slicing.
Are these cookies gluten-free?
This recipe uses all-purpose flour, so it’s not gluten-free as written. However, you can try gluten-free all-purpose flour blends, but results may vary and might require adjustments in texture and baking time.
Final Thoughts
There is something simply magical about the Swirled Christmas Cookies Recipe that brings hands together in holiday cheer. Whether you are an experienced baker or just getting started, these cookies deliver festive flavor, beautiful presentation, and lots of joy. So go ahead, gather your ingredients, and start a new tradition that will have everyone eagerly asking for seconds.
Print
Swirled Christmas Cookies Recipe
- Prep Time: 0h 30m
- Cook Time: 0h 12m
- Total Time: 1h 42m
- Yield: Approximately 36 cookies
- Category: Dessert
- Method: Baking
- Cuisine: American
Description
These Swirled Christmas Cookies combine classic buttery sugar cookie dough with a rich cocoa swirl to create a festive and visually stunning holiday treat. The cookies are soft, slightly chewy, and adorned with powdered sugar and colorful red and green sprinkles, making them perfect for holiday gatherings and gift-giving.
Ingredients
Dry Ingredients
- 2 3/4 cups all-purpose flour
- 1 teaspoon baking soda
- 1/2 teaspoon salt
- 1/4 cup unsweetened cocoa powder (for swirl)
Wet Ingredients
- 1 cup unsalted butter, softened
- 1 cup granulated sugar
- 1 cup packed brown sugar
- 1 teaspoon vanilla extract
- 1 large egg
- 1 large egg yolk
Decorations
- 2 cups powdered sugar (for dusting)
- Red and green sprinkles (for decoration)
Instructions
- Preheat Oven: Preheat your oven to 350°F (175°C) and line two baking sheets with parchment paper to prevent sticking and ensure even baking.
- Mix Dry Ingredients: In a medium bowl, whisk together the flour, baking soda, and salt to evenly distribute the leavening agents and salt.
- Cream Butter and Sugars: In a large mixing bowl, cream together the softened butter, granulated sugar, and brown sugar until light and fluffy, about 3-4 minutes, to incorporate air for a tender cookie.
- Add Eggs and Vanilla: Beat in the egg, egg yolk, and vanilla extract until well combined, ensuring a smooth batter.
- Combine Dry and Wet Ingredients: Gradually add the flour mixture to the wet ingredients, mixing just until combined to avoid overworking the dough, which can make cookies tough.
- Divide and Flavor Dough: Split the dough evenly into two portions. Mix cocoa powder thoroughly into one half for the chocolate swirl, leaving the other half plain.
- Shape and Chill Dough Logs: On a floured surface, form each half of dough into a log, wrap in plastic, and refrigerate for at least 1 hour until firm to facilitate rolling and slicing.
- Roll Out Dough: After chilling, roll each dough log out into a roughly 1/4-inch thick rectangle.
- Layer and Roll Dough: Place the cocoa dough rectangle over the plain dough rectangle. Starting from one edge, tightly roll the layered dough into a log to create the swirled effect.
- Chill the Swirled Log: Wrap the combined dough log in plastic wrap and refrigerate again for 1 hour to firm up before slicing.
- Slice Cookies: Remove the log from the fridge and cut into 1/4-inch thick slices, spacing them on prepared baking sheets to allow for spreading.
- Bake Cookies: Bake in the preheated oven for 10-12 minutes or until edges are lightly golden, indicating doneness while keeping the centers soft.
- Cool Cookies: Let the cookies cool on the baking sheets for 5 minutes before transferring to wire racks to cool completely, preventing breakage.
- Decorate: Once cooled, dust the cookies generously with powdered sugar and sprinkle with red and green sprinkles to add a festive holiday touch.
Notes
- Ensure dough logs are well chilled to make rolling and slicing easier and cleaner.
- Do not overmix the dough when combining flour to keep cookies tender and light.
- Use parchment paper or silicone baking mats for easy cookie removal and cleanup.
- Cookies can be stored in an airtight container at room temperature for up to one week.
- For a gluten-free version, substitute all-purpose flour with a gluten-free flour blend that includes xanthan gum.
