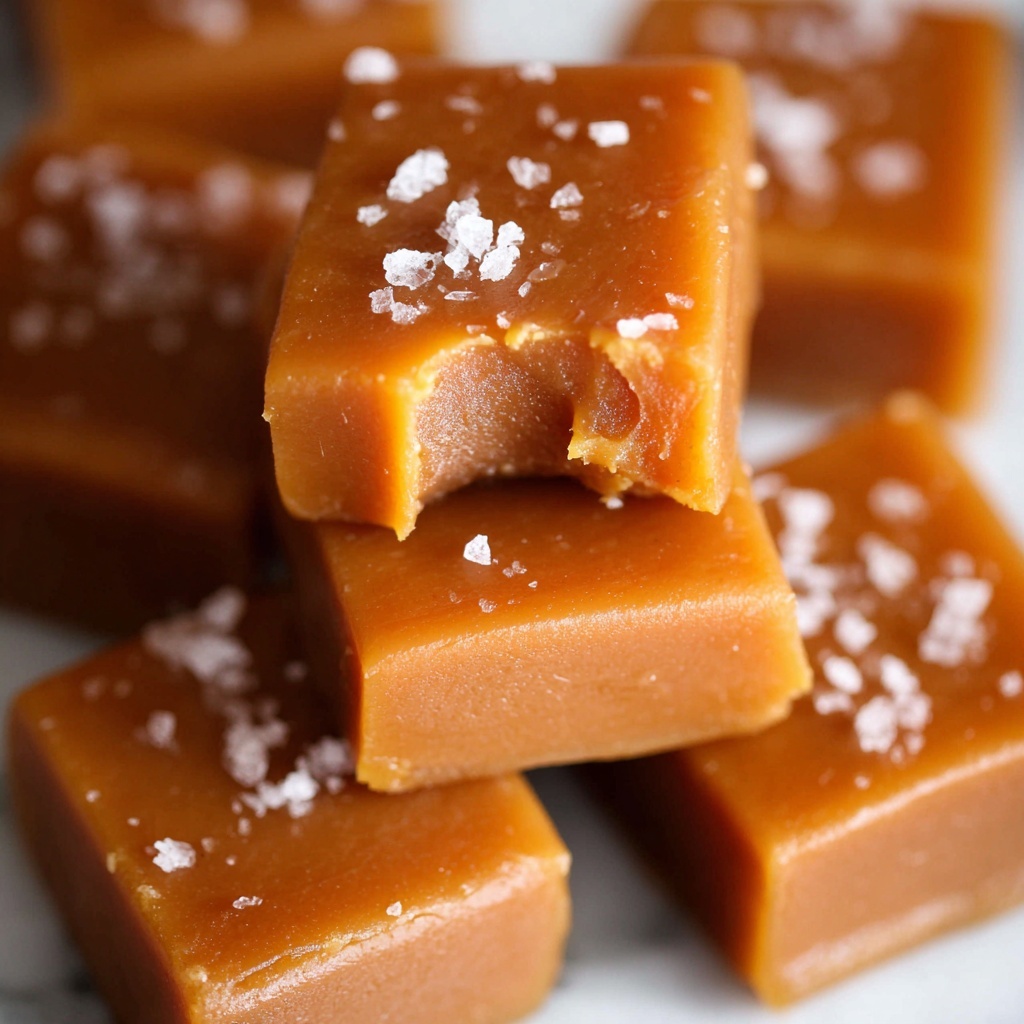
If you’ve ever dreamed of nailing that perfect melt-in-your-mouth sweet treat, then you’ve got to try this Soft Homemade Caramels Recipe. It’s everything you love about caramel, but crafted right in your own kitchen with lovingly simple ingredients that transform into rich, buttery, chewy bites of pure joy. Whether you’re an experienced candy maker or just dipping your toes into homemade sweets, this recipe brings together the magic of deep brown sugar, velvety cream, and just the right touch of salt and vanilla to create caramels that are soft, luscious, and unbelievably satisfying. Trust me, once you make these, store-bought just won’t cut it anymore!
Ingredients You’ll Need
This Soft Homemade Caramels Recipe is a beautiful reminder that sometimes the simplest ingredients make the best treats. Each one plays a crucial role: from sweetness and creaminess to that perfect rich texture and subtle salty twist. Let’s get to know them!
- Water (1/4 cup): The humble base that helps dissolve and cook the sugar evenly.
- Dark brown sugar (2 cups, packed): Adds deep molasses flavor plus gorgeous color and moisture.
- Light corn syrup (1 cup): Keeps the caramel smooth and prevents crystallization.
- Butter (1/2 cup or 1 stick): Brings richness and creamy softness to the caramel.
- Heavy cream (1 cup): Or evaporated milk for a slight twist—creates that buttery, tender chewiness.
- Kosher salt (1 ½ teaspoons): Balances the sweetness and enhances all those layers of flavor.
- Vanilla extract or vanilla bean paste (1 tablespoon): Adds warmth and aromatic depth.
- Large flake sea salt (optional): For sprinkling on top to polish off that sweet-salty taste experience.
How to Make Soft Homemade Caramels Recipe
Step 1: Prepare Your Pan
First things first, line an 8×8 or 9×9 inch square pan with parchment paper. Make sure to crease and fold the corners snugly so the paper fits perfectly—this will make lifting out your caramels later super easy. Set it aside and get ready to dive into caramel-making magic!
Step 2: Get Ingredients Ready
Have all your ingredients measured and ready. Caramel-making is a whirlwind—you’ll notice it moves slow at the start but you’ll want to be on the ball when it speeds up. Pour the corn syrup into a cup, measure out your cream, unwrap your butter, and keep your salt and vanilla close by.
Step 3: Start the Sugar Mixture
Pour the water into a heavy 3-quart saucepan—preferably stainless steel—and swirl it around. Add the packed dark brown sugar in the center. Careful not to let sugar touch the edges for an even melt. Use a flat whisk to gently moisten all the sugar until smooth. This is the foundation for that beautiful caramel color and bold flavor.
Step 4: Caramelize the Sugar
Turn the heat to medium and whisk almost constantly. At first, the mixture will bubble—soon it will foam and release that irresistible caramel aroma. When you see the first wisps of smoke and consistent little puffs of steam, use a candy thermometer to make sure it’s between 260 and 265 degrees Fahrenheit. Remove from heat immediately here or risk burning this masterpiece.
Step 5: Halt the Cooking with Corn Syrup
Right off the heat, whisk in the light corn syrup while stirring vigorously. This prevents the caramel from overcooking and ensures a silky texture. It’s a sneaky step that keeps your caramels perfectly soft.
Step 6: Add Butter and Reheat
Next, stir in the butter. When it’s mostly melted, return your pot to medium heat. Let the mixture bubble until the butter fully melts and blends in, bringing that rich velvet-smoothness we crave.
Step 7: Slowly Incorporate Cream
This part is all about patience. Pour the cream in gradually over about five minutes while stirring continuously. Adding it slowly keeps the caramel from separating and turning grainy. This gentle introduction of cream is what sets your Soft Homemade Caramels Recipe apart with its lush, tender bite.
Step 8: Cook to the Perfect Temperature
Keep stirring and cooking at medium heat until your thermometer hits 240 degrees F. This stage determines the chewiness—go slightly lower if you’re cautious, but don’t rush it! The anticipation here is all part of the caramel love story.
Step 9: Season and Flavor
Off the heat, sprinkle in the salt—kosher salt is ideal for its crunch and clean taste, but adjust if you’re using table salt. Then, add your vanilla and stir well to combine. This final flavor punch seals in your caramel’s signature complexity.
Step 10: Pour and Cool
Pour your luscious caramel into the lined pan. If you adore the salted caramel vibe, sprinkle large flake sea salt on top now. Let the pan cool completely—this usually takes 2-4 hours, but chill in the fridge to speed up the process if you can’t wait. Once chilled, it’s easier to slice with a sharp knife.
Step 11: Cut and Wrap
Lift the caramel block from the pan using the parchment paper. Slice into rectangles or squares—anywhere between 48 and 56 is perfect. Remember to separate them right away to avoid melting together. Wrap each piece tightly in parchment paper to keep their shape and softness intact.
How to Serve Soft Homemade Caramels Recipe
Garnishes
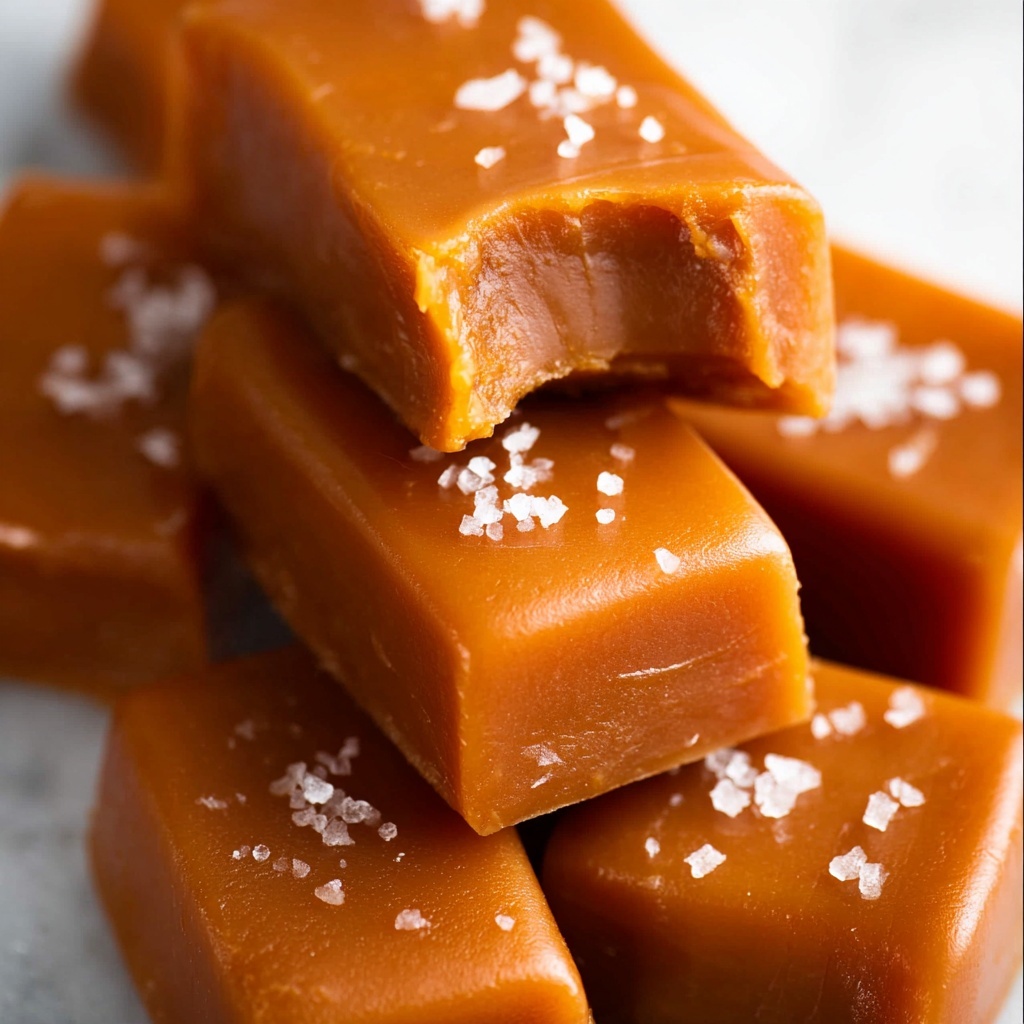
Sprinkling a little flaky sea salt on each caramel right before serving adds a delightful crunch and balances sweetness beautifully. You can also dust them lightly with cocoa powder or drizzle with melted dark chocolate for an extra special touch.
Side Dishes
These caramels shine as a stand-alone treat but also pair wonderfully with a warm cup of coffee or tea, a glass of milk, or even alongside vanilla ice cream or fresh fruit for a decadent dessert plate. Their buttery richness complements many flavors.
Creative Ways to Present
For gifting or parties, arrange your wrapped caramels in a rustic wooden box or a glass jar tied with a pretty ribbon. You can also stack them on a dessert tray interspersed with fresh mint leaves or edible flowers for a charming display that invites everyone to dig in.
Make Ahead and Storage
Storing Leftovers
Keep your wrapped caramels in an airtight container at room temperature if you plan to enjoy them within a week. They stay perfectly soft and chewy this way, ready for that unexpected sweet craving hit.
Freezing
If you want to keep your Soft Homemade Caramels Recipe around longer, freezing is your best friend. Place the wrapped caramels in a ziplock bag and freeze for up to six months. When it’s caramel time, just let them come to room temperature for a couple of hours and they’re soft and delicious as ever.
Reheating
Caramels don’t require reheating, but if you find they’ve gotten too firm, simply leave them at room temperature or warm gently in your hand to soften before enjoying. Avoid microwaving as it can change their texture.
FAQs
Can I use evaporated milk instead of heavy cream?
Absolutely! Using evaporated milk adds a slightly different texture but still creates wonderfully soft caramels. Just make sure to add it slowly, just like with cream, to prevent separation.
Why is my caramel grainy?
Graininess usually happens when sugar crystals form or when the cream is added too quickly. Whisk the sugar and water well at the start, avoid sugar on the pot edges, and add cream slowly to keep your caramel smooth and silky.
Do I need a candy thermometer?
A candy thermometer makes this Soft Homemade Caramels Recipe much easier and more accurate. It ensures you hit the perfect temperature for chewiness without burning the caramel. If you don’t have one, careful visual clues and timing can help but it’s a bit trickier.
Can I make these caramels vegan?
This recipe relies heavily on butter and cream for texture and flavor, so substitutions would change the outcome. However, experimenting with coconut cream and plant-based butter alternatives might get you close, but expect a different texture and taste.
How long do homemade caramels last?
Stored properly at room temperature, these caramels last about a week. In the fridge, they can keep for up to two weeks. Freeze for longer storage up to six months without losing their soft, chewy deliciousness.
Final Thoughts
There’s something truly special about making candy yourself, and this Soft Homemade Caramels Recipe is a wonderful way to bring that hands-on joy into your kitchen. With its rich flavor, tender texture, and the satisfaction of wrapping each little caramel, it’s perfect for sharing, gifting, or simply treating yourself. Go ahead and try it—it will become your new favorite go-to for sweet moments!
Print
Soft Homemade Caramels Recipe
- Prep Time: 10 minutes
- Cook Time: 20 minutes
- Total Time: 30 minutes plus 2-4 hours cooling
- Yield: 48 caramels
- Category: Candy
- Method: Stovetop
- Cuisine: American
Description
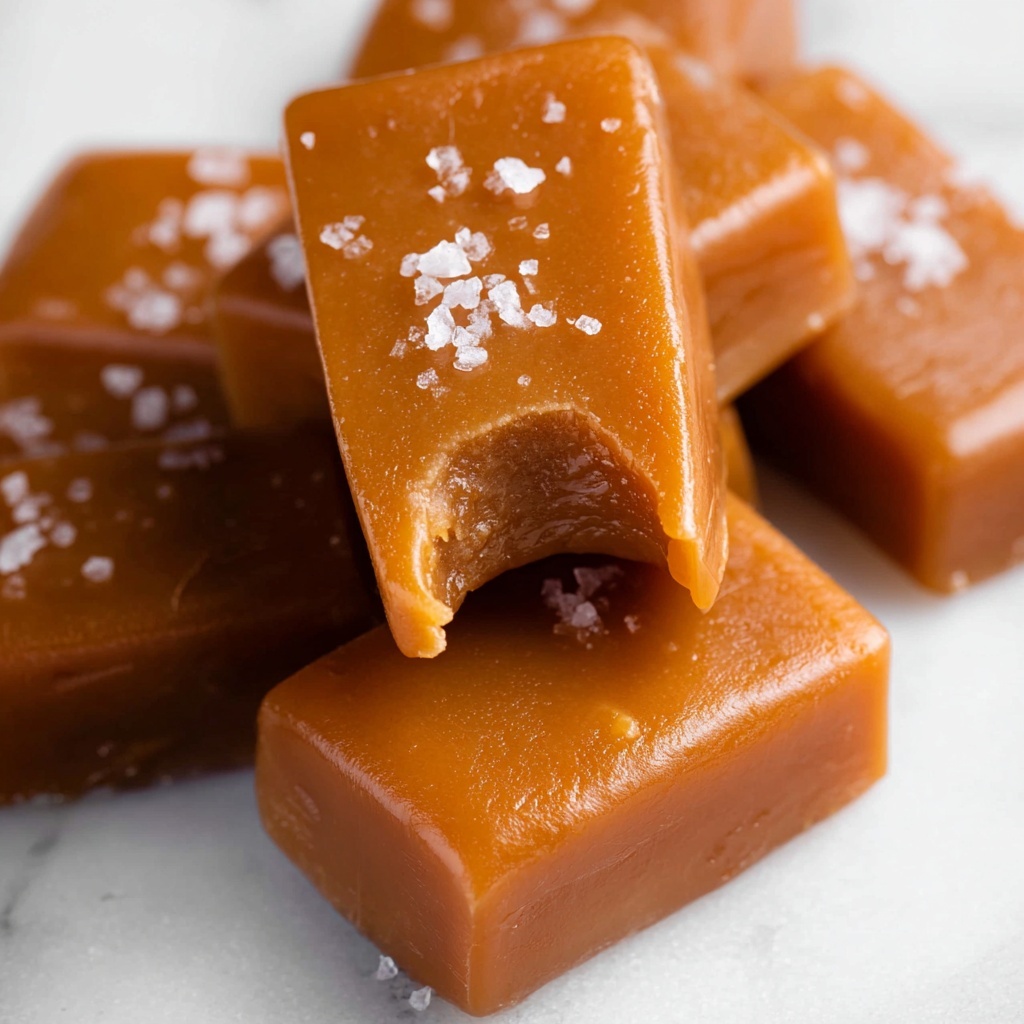
This recipe for Soft Homemade Caramels yields perfectly chewy, buttery, and sweet caramels with a rich depth of flavor from dark brown sugar and a hint of salt. The caramels are cooked carefully using a candy thermometer to achieve the ideal firm yet soft texture. They can be enjoyed plain or topped with flaky sea salt for a delicious salted caramel treat.
Ingredients
Caramel Base
- 1/4 cup water
- 2 cups dark brown sugar (packed)
- 1 cup light corn syrup
- 1/2 cup butter (1 stick)
- 1 cup heavy cream (or 1 cup evaporated milk as an alternative)
- 1 and 1/2 teaspoons kosher salt (or sea salt; use half the amount if using table salt or fine salt)
- 1 tablespoon vanilla extract (or vanilla bean paste; or scrape out seeds of 1 vanilla bean)
Topping (Optional)
- Large flake sea salt (to top caramels)
Instructions
- Prepare the Pan: Line an 8×8 or 9×9 inch square pan with parchment paper, folding and creasing the corners to fit snugly. Set aside.
- Get Ingredients Ready: Measure out 1 cup light corn syrup and 1 cup heavy cream into small measuring cups. Unwrap the stick of butter and have the salt and vanilla extract nearby for quick access.
- Start the Sugar Base: In a heavy 3-quart stainless steel saucepan, pour 1/4 cup water and swirl to wet the sides of the pan thoroughly.
- Add Brown Sugar: Gently add 2 cups packed dark brown sugar into the center of the pan, avoiding the sides as much as possible.
- Moisten Sugar: Over medium heat, use a flat whisk to draw the water toward the center, gently whisking until the sugar dissolves and the mixture is smooth.
- Begin Boiling: Let the sugar and water mixture bubble and boil, attaching a candy thermometer to the pan if available.
- Caramelize Sugar: Whisk almost constantly for 6-8 minutes, watching for foaming and bubbling to intensify. Look for the first signs of smoke and continue whisking until consistent smoke puffs appear. Confirm temperature reaches between 260-265°F, then immediately remove from heat to avoid burning.
- Add Corn Syrup: Off the heat, quickly whisk in 1 cup light corn syrup to stop the cooking process. Timing here is crucial to prevent overcooking.
- Incorporate Butter: Add 1/2 cup butter to the pot and continue whisking until mostly melted.
- Return to Heat: Place the pot back on medium heat to fully melt the butter, stirring continuously as the mixture bubbles again.
- Slowly Add Cream: Over approximately 5 minutes, gradually pour in 1 cup heavy cream a little at a time to avoid curdling or graininess, stirring continuously.
- Cook to Final Temperature: Stir over medium heat until the caramel reaches 240°F, which takes 5-10 minutes. Use an instant-read thermometer for accuracy, and stop at 239°F if wary.
- Season and Flavor: Remove from heat and stir in 1 and 1/2 teaspoons kosher salt; adjust salt if using a different salt type or omit as desired. Add 1 tablespoon vanilla extract or vanilla bean paste and stir well.
- Pour Caramel into Pan: Transfer the hot caramel mixture immediately into the prepared parchment-lined pan.
- Add Optional Salt Topping: Sprinkle large flake sea salt evenly on top for a salted caramel finish if desired.
- Cool Completely: Allow caramels to cool at room temperature for 2-4 hours until firm. To speed up, refrigerate but then let rest at room temperature 10-30 minutes before cutting.
- Chill Before Cutting: If left out, place pan in freezer for 10 minutes or fridge for 20 minutes to reduce stickiness when slicing.
- Cut Caramels: Using a large sharp chef’s knife, lift caramel out of pan with parchment paper and cut into 6-8 rows lengthwise. Re-chill if knife sticks. Then cut crosswise into 6-8 rows to yield approximately 48-56 caramels.
- Separate Pieces: Immediately separate cut caramels to prevent sticking and shape loss. Re-chill as needed during cutting.
- Wrap Caramels: Wrap each caramel individually in 4×5 inch parchment paper rectangles, rolling and twisting ends to seal. Avoid wax paper to prevent sticking.
- Storage: Store wrapped caramels in an airtight container at room temperature for up to one week. Refrigerate to enjoy chilled caramels.
- Freezing: For longer storage, freeze wrapped caramels in a ziplock bag for up to six months. Thaw at room temperature for 2-4 hours before eating.
Notes
- Use a heavy stainless steel pan rather than enameled or cheap pans to prevent burning and for even heating.
- Corn syrup is critical to prevent crystallization and keep caramels smooth.
- Slowly adding cream helps avoid a grainy texture by preventing curdling.
- Keep candy thermometer calibrated or use an instant-read thermometer for best results.
- Adjust salt type carefully; table salt is stronger than kosher salt so reduce quantity by half.
- If caramel sticks to your knife during cutting, chill again and wipe knife often for clean cuts.
- Wrapping caramels helps maintain shape and prevents sticking during storage.
- Heavy cream can be substituted with evaporated milk for a slightly lighter flavor and texture.

