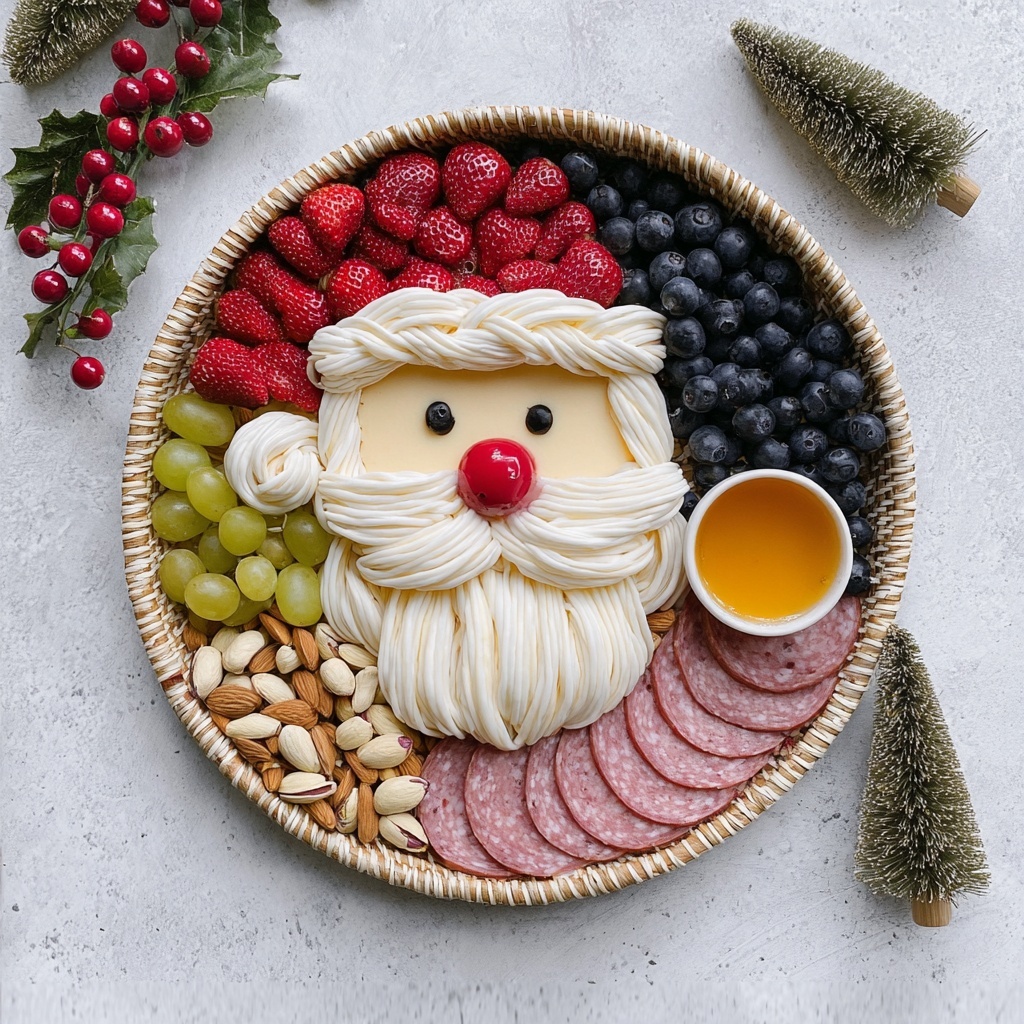
If you are looking for a festive and fun way to impress your guests this holiday season, the Santa Charcuterie Board Recipe is an absolute delight. This charming board brings together vibrant colors, fresh textures, and a burst of flavors that captures the spirit of Christmas in every bite. From creamy cheeses to juicy berries and savory meats, this recipe transforms everyday ingredients into a joyful masterpiece that looks as good as it tastes. It’s the perfect centerpiece for a holiday gathering, guaranteed to spark smiles and conversations around the table.
Ingredients You’ll Need
Putting together the perfect Santa Charcuterie Board Recipe is simple because each ingredient plays a crucial role in flavor, texture, or visual appeal. From creamy cheeses providing softness, to fresh fruits adding sweetness and crunch, every element harmonizes beautifully.
- Round slice from a whole wheel of cheese: This forms the base of Santa’s face—choose a mild, firm cheese that’s easy to shape.
- Braided string cheese (7 pieces): Perfect for creating Santa’s playful hair texture.
- Mozzarella balls (1 cup): Soft and creamy, these create the fluffy beard that’s essential for that Santa look.
- Cherry tomato (1 piece): Adds a bright red touch as Santa’s cute nose.
- Strawberries (1 cup): Their vibrant red slices form Santa’s hat, adding a fresh, tart bite.
- Blueberries (1 cup): Small bursts of color and sweetness to fill the board.
- Grapes (1 cup): Juicy, refreshing, and perfect for nibbling.
- Olives (1 cup): Adds a briny depth and fun black color for the eyes.
- Honey (¼ cup): Provides a natural sweetness that pairs wonderfully with cheeses and nuts.
- Ham slices (10 pieces): Rolled into roses and spread out to add savory richness.
- Pistachios (¼ cup): Crunchy and lightly sweet, they complement the softer textures.
- Almonds (¼ cup): Adds another delightful crunch and nutty flavor to the board.
How to Make Santa Charcuterie Board Recipe
Step 1: Gather Your Ingredients
Start by gathering all the ingredients so you can visualize your board as you build it. Having everything ready keeps the process smooth and enjoyable.
Step 2: Shape Santa’s Face
Take the round slice of cheese and carefully cut a small portion off the bottom to create a semi-circle. This forms the base of Santa’s jolly face and makes it easier to arrange the other components around it.
Step 3: Add Santa’s Hair and Beard
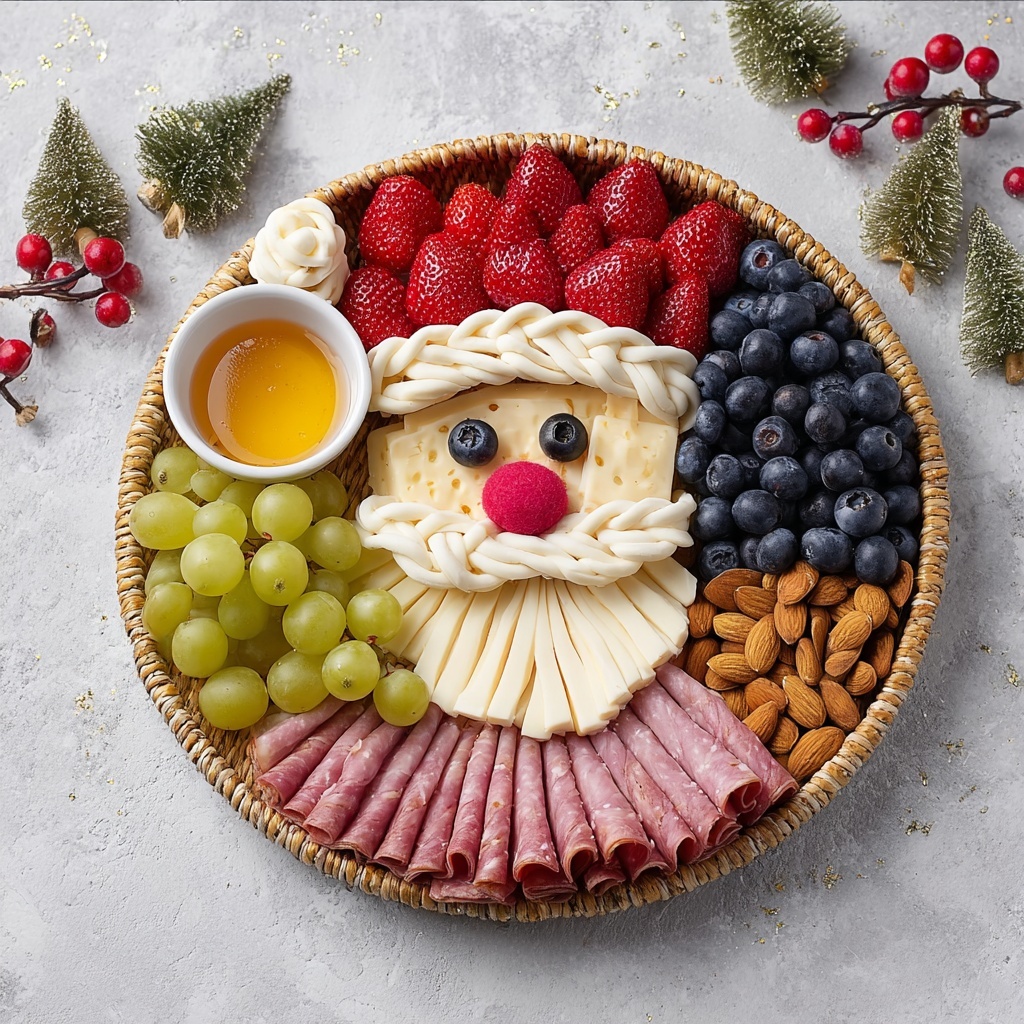
Place the semi-circle cheese in the center of your serving board. Arrange the braided string cheese pieces around the top edge as Santa’s thick, curly hair. Use the mozzarella balls below the face to simulate a fluffy and snowy beard that looks irresistibly soft.
Step 4: Create Facial Features
Slice an olive in half to make Santa’s sparkling eyes and carefully place them on the cheese face. For the nose, slice the cherry tomato and position it centrally, adding a festive pop of red right where Santa’s nose would be.
Step 5: Make the Hat
Slice strawberries and create a layered hat on top of Santa’s head with the juicy red fruit. Finish the tip of the hat with a small round piece of cheese to resemble the classic pom-pom detail. Place the honey nearby for sweet dipping options.
Step 6: Fill the Board with Berries and Olives
Arrange blueberries, grapes, and olives artistically over the upper half of the board. These add beautiful color contrasts and a fresh variety of flavors that balance out the cheeses and meats.
Step 7: Add Ham Rolls and Nuts
Roll the ham slices into rose shapes and place one prominently near Santa’s face for an elegant touch. Scatter the remaining ham slices, pistachios, and almonds throughout the board to add savory notes and delightful crunch.
How to Serve Santa Charcuterie Board Recipe
Garnishes
Fresh herbs like rosemary sprigs or mint leaves make lovely garnishes, adding an herbal aroma that complements the cheeses and fruits while enhancing the festive presentation.
Side Dishes
Serve your Santa Charcuterie Board with slices of crusty baguette, crackers, or even warm pita chips. These provide a satisfying crunchy base to scoop and enjoy all the delicious components together.
Creative Ways to Present
Use a wooden board or a festive platter to hold your Santa Charcuterie Board Recipe. Add fairy lights around the board or sprinkle edible glitter on some fruits for a magical holiday sparkle that will charm every guest.
Make Ahead and Storage
Storing Leftovers
Wrap leftover components separately in airtight containers to maintain freshness. Cheese and meats can be stored in the refrigerator for up to 3 days, while fruits are best consumed within 24 hours.
Freezing
This charcuterie board is best enjoyed fresh, so freezing is not recommended as it may affect the texture and flavor of cheeses and fruits.
Reheating
No reheating is needed for this Santa Charcuterie Board Recipe since it is designed to be served cold and fresh. Just bring ingredients to room temperature before serving for optimal taste.
FAQs
Can I substitute the cheeses in this recipe?
Absolutely! Feel free to try different types of cheeses such as cheddar, gouda, or even blue cheese to customize your Santa Charcuterie Board Recipe to your taste preferences.
What other fruits can I use instead of the berries?
You can swap in fruits like pomegranate seeds, orange slices, or apple wedges. Just consider color and freshness to maintain the festive look and balanced flavors.
How far in advance can I prepare the board?
It’s best to assemble the board no more than a few hours before serving to keep everything looking fresh and appetizing.
Can I make this board gluten-free?
Yes! Just ensure the crackers or bread you serve alongside are gluten-free, and all other ingredients used are naturally gluten-free, which most of them are.
What drink pairs well with the Santa Charcuterie Board Recipe?
A crisp white wine, such as Sauvignon Blanc, or a light sparkling cider works wonderfully to complement the variety of flavors on the board.
Final Thoughts
The Santa Charcuterie Board Recipe is such a joyful way to bring holiday flavors and festive vibes together in one stunning presentation. Whether you’re hosting a big party or enjoying a cozy night in, this board is sure to become a beloved tradition on your holiday table. Trust me, once you try it, you’ll want to share it with everyone you know!
Print
Santa Charcuterie Board Recipe
- Prep Time: 30 minutes
- Cook Time: 0 minutes
- Total Time: 30 minutes
- Yield: 1 charcuterie board
- Category: Appetizer
- Method: No-Cook
- Cuisine: American
Description
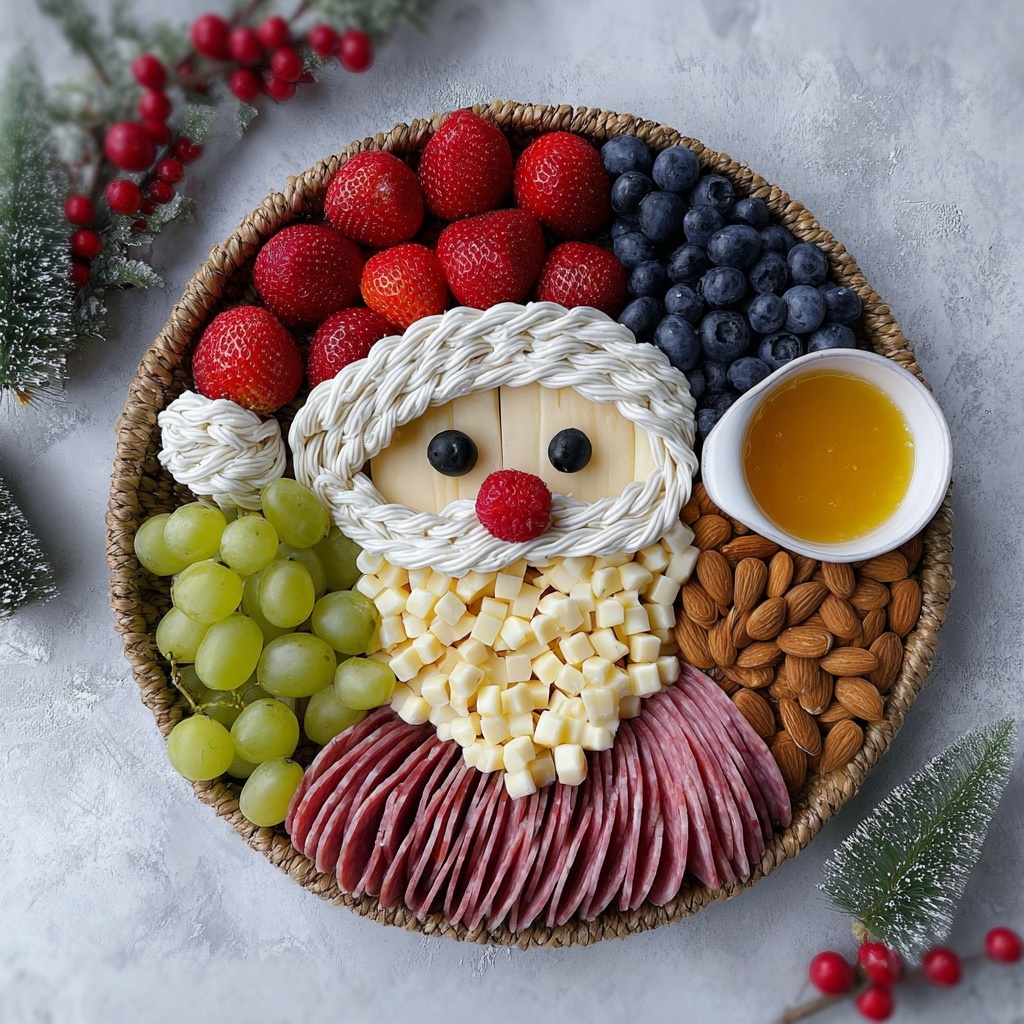
Create a festive Santa Charcuterie Board perfect for holiday gatherings, featuring a creative arrangement of cheeses, fruits, nuts, and deli meats styled to resemble Santa Claus with vibrant, fresh ingredients.
Ingredients
Cheeses
- 1 round slice from a whole wheel of cheese
- 7 braided string cheese
- 1 cup mozzarella balls
Produce
- 1 pc cherry tomato
- 1 cup strawberries
- 1 cup blueberries
- 1 cup grapes
- 1 cup olives
Meats & Nuts
- 10 slices ham
- 1/4 cup pistachios
- 1/4 cup almonds
Condiments
- 1/4 cup honey
Instructions
- Gather Ingredients: Collect all the necessary ingredients required to assemble the Santa charcuterie board, ensuring freshness and readiness for plating.
- Prepare Santa’s Face: Cut off a small portion from the bottom of the cheese circle creating a semi-circle to serve as Santa’s face on the board.
- Arrange Hair and Beard: Place the cheese semi-circle in the center of the board, then arrange the braided string cheese around it to represent Santa’s hair and use mozzarella balls to form his beard.
- Create Facial Features: Slice an olive in half to form Santa’s eyes and position them appropriately on the cheese. Slice the cherry tomato and place it at the center as Santa’s nose.
- Craft Santa’s Hat: Slice strawberries and arrange them over the top half of the cheese semi-circle to form Santa’s hat. Add a small cheese circle as the pom-pom on the tip of the hat. Set the honey close to the face to serve as an optional dipping condiment.
- Fill Board with Berries and Olives: Fill the upper half of the snack board with blueberries, grapes, and olives to add color and variety around Santa’s face and hat.
- Add Ham Roses and Nuts: Roll some ham slices into rose shapes and place them beside Santa’s face. Evenly distribute remaining ham slices, pistachios, and almonds to fill the rest of the board balancing appearance and texture.
Notes
- Use a firm cheese wheel for best structure when cutting the face shape.
- Fresh and ripe fruits will enhance the visual appeal and flavor contrast.
- Customize nuts and meats based on preferences or dietary restrictions.
- Keep the board chilled before serving to maintain freshness of cheeses and fruits.
- Honey can be served on the side for dipping or drizzling to complement the savory and sweet elements.


