If life’s about sharing joy through food, then the Red Velvet Santa Hat Brownies Recipe is your golden ticket to spreading holiday cheer bite by bite. Combining the deep, velvety richness of classic red velvet cake with the fudgy delight of brownies, this recipe transforms a beloved dessert into festive, adorable Santa hats. Perfect for seasonal gatherings or cozy nights by the fire, these brownies are as delightful to make as they are to devour, offering a stunning pop of color and a luscious balance of flavors that will have everyone reaching for seconds.
Ingredients You’ll Need
Gathering ingredients for the Red Velvet Santa Hat Brownies Recipe is wonderfully straightforward, with each component playing a key role in building the perfect balance of richness, sweetness, and festive flair. From the moist, vibrant red velvet base to the smooth, creamy frosting, these essentials are the foundation of this show-stopping treat.
- Red Velvet Cake mix (1 box, 15 ounces): The base that lends deep red color and that classic tangy cocoa flavor everyone loves.
- Large egg (1): Adds structure and moisture, making brownies tender and rich.
- Salted butter (¾ cup, melted): Infuses the batter with creamy richness and enhances flavor depth.
- Milk (½ cup): Keeps the batter smooth and prevents it from being too dense.
- Mini chocolate chips (1 cup): These little pockets of melty chocolate give a delightful texture contrast.
- Salted butter (4 tablespoons, softened): Key for making the luscious, creamy frosting that holds the Santa hat shape.
- Powdered sugar (1 ½ cups): Sweetens and thickens the frosting for that perfect spreadable consistency.
- Vanilla extract (½ teaspoon): Enhances the flavor profile, adding warmth and balance to the frosting.
- Good-quality white chocolate (2 ounces, melted): Used to create delicate drizzle details, bringing elegance and sweetness.
- Heavy whipping cream or milk (1 tablespoon): Adjusts the frosting’s texture, ensuring it’s creamy without being runny.
How to Make Red Velvet Santa Hat Brownies Recipe
Step 1: Prepare the Batter
Start by preheating your oven to 350°F (175°C) and greasing a 9×13-inch baking pan. In a large mixing bowl, combine your red velvet cake mix, the large egg, melted salted butter, and milk. Stir these together gently but thoroughly until a smooth, vibrant red batter forms. The batter will be thick with a hint of cocoa aroma — a great sign that richness is on its way.
Step 2: Fold in the Mini Chocolate Chips
Gently fold 1 cup of mini chocolate chips into the batter. These will melt slightly during baking, creating irresistible chocolate pockets that complement the tangy red velvet flavor perfectly. Be careful not to overmix to keep the chips evenly distributed.
Step 3: Bake the Brownies
Pour the batter into your prepared pan, distributing it evenly. Bake in the oven for 25-30 minutes, or until a toothpick inserted in the center comes out with just a few moist crumbs. Resist the urge to overbake — your brownies should be moist and tender, not dry.
Step 4: Make the Frosting
While the brownies cool completely, whip up the frosting. In a bowl, beat the softened salted butter until creamy. Gradually add powdered sugar, mixing well after each addition, then stir in the vanilla extract. Slowly add your tablespoon of heavy whipping cream or milk to reach that perfect spreadable frosting consistency — creamy and smooth but firm enough to pipe or spread.
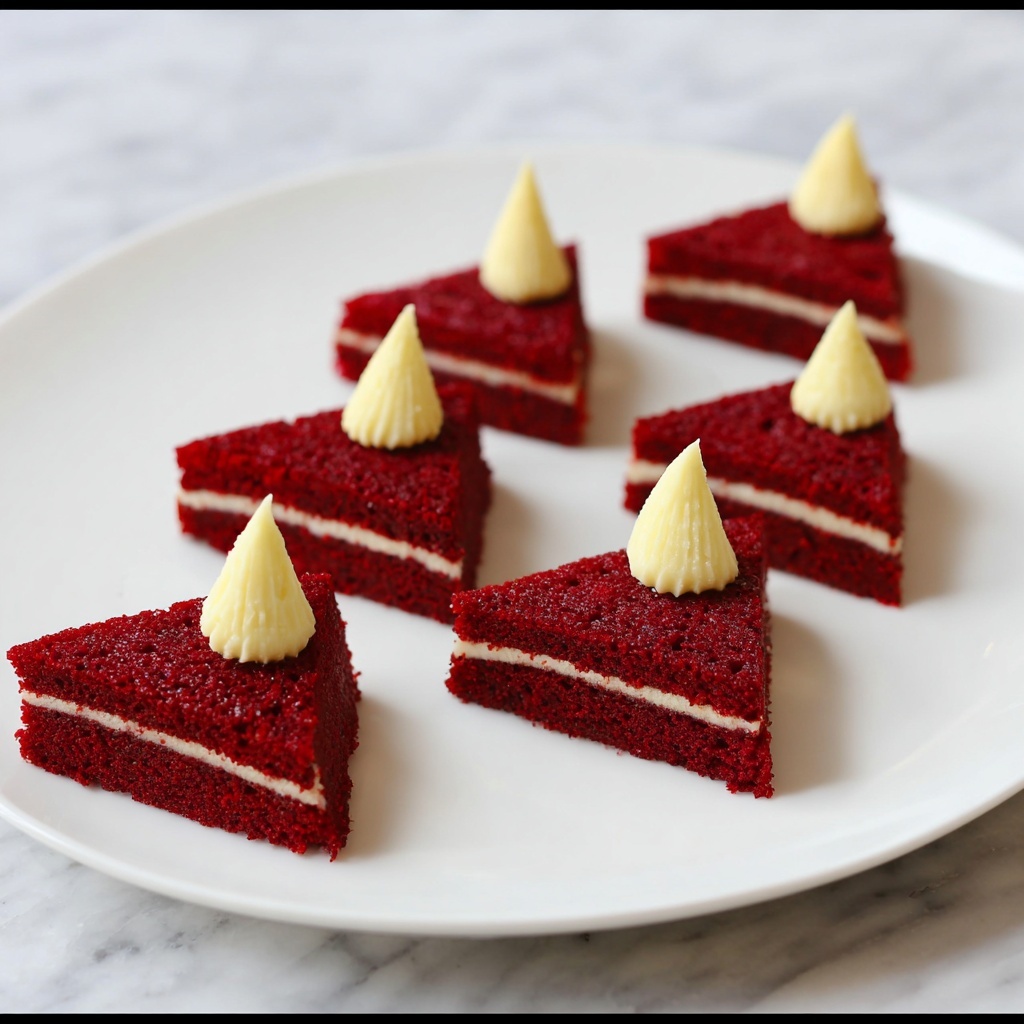
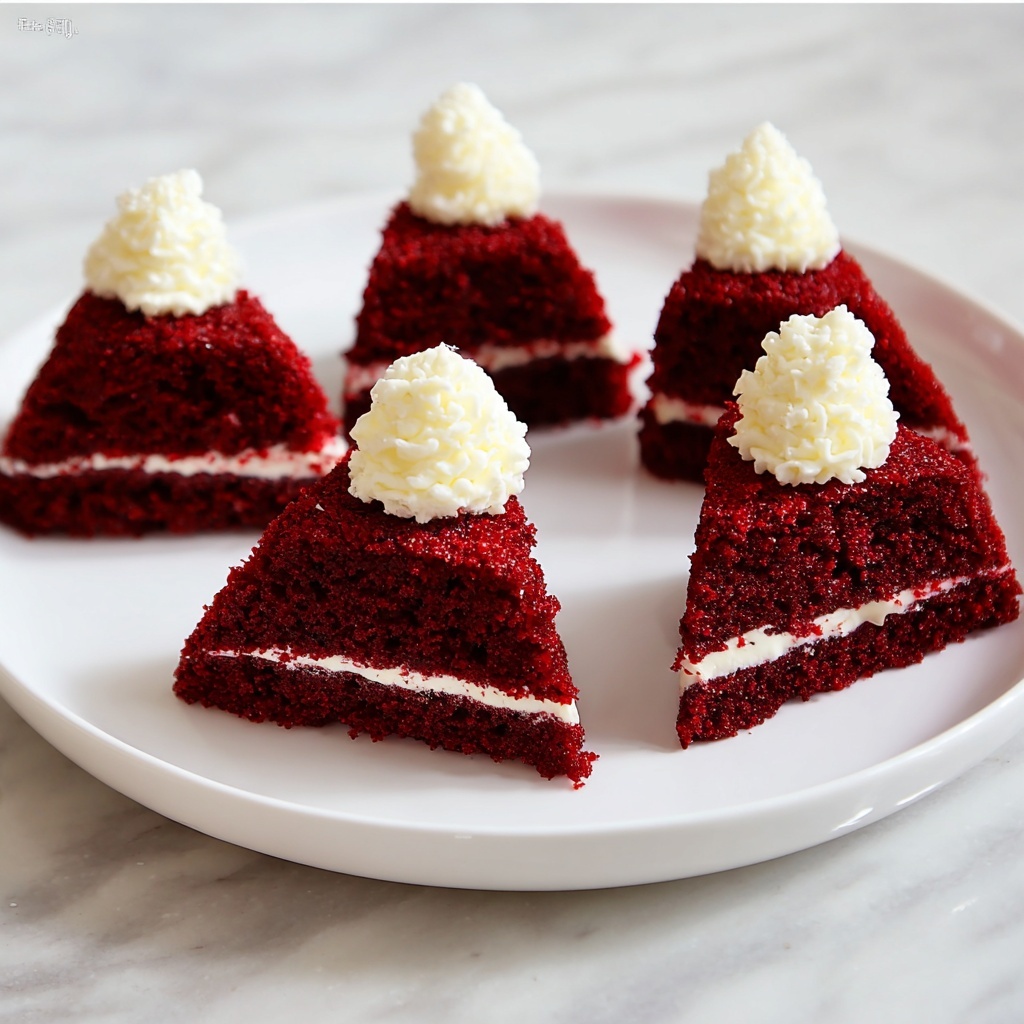
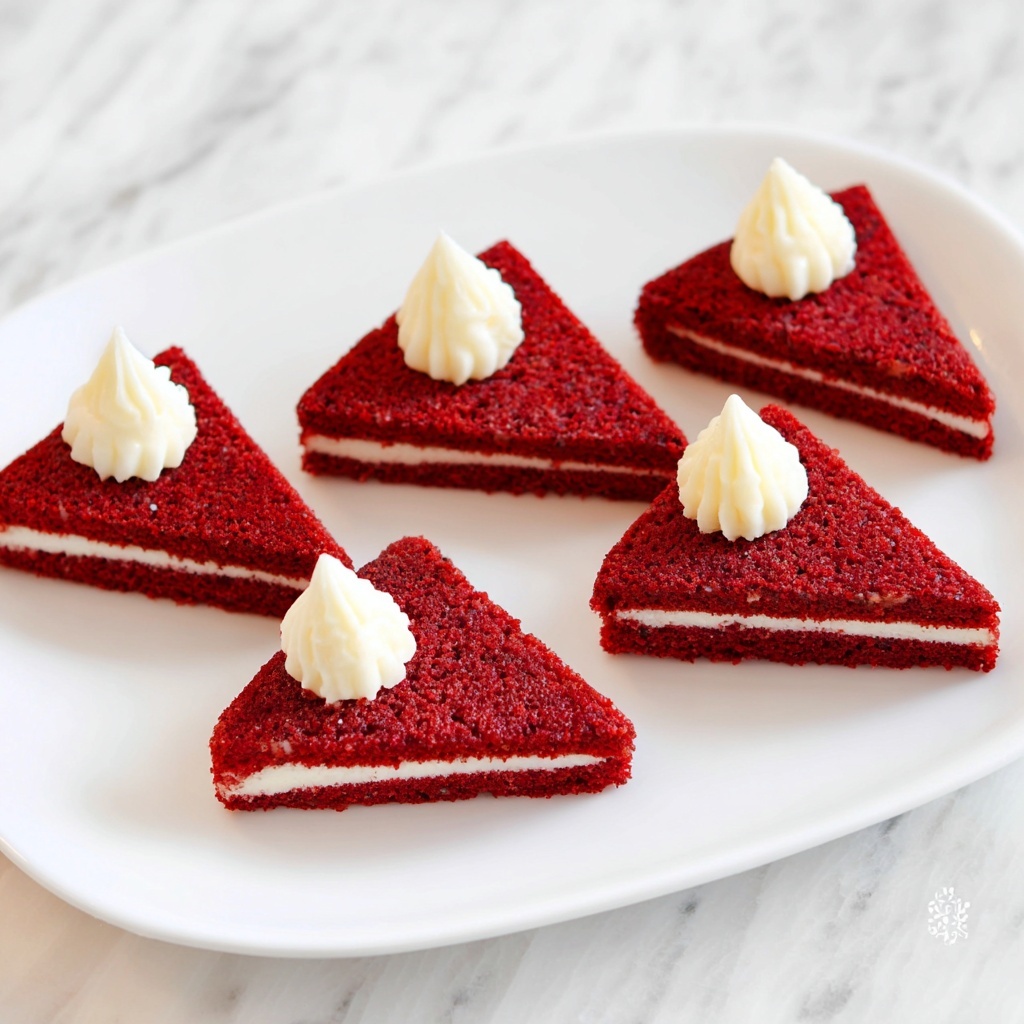
Step 5: Frost and Shape the Santa Hats
Once the brownies have cooled, cut them into 20 equal squares. Using a piping bag or a simple knife, spread a generous mound of frosting on each brownie piece, shaping it into a cone or hat shape reminiscent of Santa’s classic hat. This is where the magic happens — your festive touch brings the brownies to life.
Step 6: Add the Finishing Touches
Drizzle the melted white chocolate over the frosting for elegant detailing. You can create “fur” trim by applying small dots or swirls with leftover frosting or use the white chocolate drizzle to outline and accentuate the hat shape. Let everything set before serving to keep those Santa hats intact.
How to Serve Red Velvet Santa Hat Brownies Recipe
Garnishes
For an extra dash of holiday spirit, sprinkle a few edible silver or red sugar pearls atop each frosting hat or dust lightly with powdered sugar for a snowy effect. Fresh mint leaves or a single cranberry can add an unexpected pop of color and freshness, elevating your presentation.
Side Dishes
These festive brownies pair wonderfully with a warm cup of spiced hot chocolate or a rich peppermint mocha. For a lighter alternative, a dollop of vanilla bean ice cream or a simple whipped cream topping can contrast the dense brownie nicely without overwhelming its decadent flavor.
Creative Ways to Present
Transform your holiday platter into a winter wonderland by arranging the Red Velvet Santa Hat Brownies Recipe on a bed of shredded coconut “snow.” Place them on festive tiered cake stands or wrap each brownie in a clear cellophane bag tied with a bright red ribbon for adorable edible gifts. Presentation turns a simple dessert into an unforgettable centerpiece.
Make Ahead and Storage
Storing Leftovers
After serving, keep any leftover Red Velvet Santa Hat Brownies Recipe in an airtight container at room temperature for up to 3 days. This will maintain the frosting’s integrity and keep the brownies moist and flavorful — perfect to indulge in again.
Freezing
If you want to make these ahead for a party, freeze unfrosted brownies wrapped tightly in plastic wrap and then foil for up to 3 months. Frost them fresh after thawing for best texture and flavor. Alternatively, freeze fully decorated brownies on a baking sheet before transferring to a container to avoid frosting damage.
Reheating
For a warm treat, gently reheat individual brownies in the microwave for about 10 seconds before serving. Avoid microwaving too long or the frosting may melt excessively. A brief warm-up enhances that gooey, melt-in-your-mouth texture that makes this recipe unforgettable.
FAQs
Can I use homemade red velvet batter instead of the cake mix?
Absolutely! Using homemade red velvet batter can add a personal touch, though cake mix offers convenience and consistent results. Just ensure your batter is thick enough to hold mini chocolate chips without sinking.
What if I don’t have mini chocolate chips?
You can substitute with regular-sized chips, chopped chocolate chunks, or even white chocolate chips. Just be mindful that larger pieces might cause uneven distribution in the brownie bites.
How do I make the frosting less sweet?
Try reducing the powdered sugar slightly or adding a small pinch of salt to balance the sweetness. Alternatively, mix in a bit of cream cheese for tanginess and a classic red velvet twist.
Can these brownies be made gluten-free?
Yes, by using a gluten-free red velvet cake mix and ensuring all other ingredients are gluten-free, you can easily adapt this recipe for gluten sensitivities while maintaining delicious flavor.
Is there a way to make the white chocolate drizzle more decorative?
Definitely! Use a small piping bag with a fine tip or a plastic sandwich bag with a tiny corner cut off to create delicate lines and patterns. Chilling the drizzle slightly before piping can help with control.
Final Thoughts
There’s something truly special about the Red Velvet Santa Hat Brownies Recipe — it’s playful, indulgent, and bursting with festive flavors that bring smiles with every bite. Whether you’re baking for friends, family, or just treating yourself, this recipe is a joyous way to celebrate the season with sweetness and style. Give it a try, and watch how these charming brownies become a centerpiece of your holiday traditions.
Print
Red Velvet Santa Hat Brownies Recipe
- Prep Time: 15 minutes
- Cook Time: 30 minutes
- Total Time: 45 minutes
- Yield: 20 brownies
- Category: Dessert
- Method: Baking
- Cuisine: American
Description
These festive Red Velvet Santa Hat Brownies combine rich red velvet cake mix with melty chocolate chips and a creamy white chocolate frosting, molded into adorable Santa hat shapes. Perfect for holiday gatherings, these easy-to-make brownies feature a soft, moist texture with a luxurious whipped topping decorated to resemble Santa hats, making them a crowd-pleasing dessert for Christmas celebrations.
Ingredients
Brownie Base
- 1 box (15 ounces) Red Velvet Cake mix (preferably Duncan Hines brand)
- 1 large egg
- ¾ cup salted butter, melted
- ½ cup milk
- 1 cup mini chocolate chips
White Chocolate Frosting
- 4 tablespoons salted butter, softened
- 1 ½ cups powdered sugar
- ½ teaspoon vanilla extract
- 2 ounces good-quality white chocolate, melted (not chocolate chips)
- 1 tablespoon heavy whipping cream or milk
Instructions
- Prepare the Brownie Batter: In a mixing bowl, combine the red velvet cake mix, egg, melted salted butter, and milk. Stir well until the batter is smooth and fully incorporated. Fold in the mini chocolate chips evenly throughout the batter.
- Bake the Brownies: Preheat your oven to 350°F (175°C). Pour the batter into a greased or parchment-lined 9×13 inch baking pan, spreading it evenly. Bake for 25-30 minutes or until a toothpick inserted in the center comes out with moist crumbs but no raw batter. Allow the brownies to cool completely in the pan on a wire rack.
- Make the White Chocolate Frosting: In a large bowl, beat the softened butter until creamy. Gradually add the powdered sugar while mixing on low speed. Add the vanilla extract, melted white chocolate, and heavy whipping cream or milk, then beat on medium-high speed until the frosting is smooth, fluffy, and spreadable.
- Assemble the Santa Hat Brownies: Once the brownies have cooled, cut them into 20 equal squares. Using a spatula or piping bag, frost the tops of each brownie with the white chocolate frosting, shaping it to resemble the fluffy white trim of Santa hats. Optionally, you can add a small dollop of frosting on the tip to complete the look.
- Serve and Enjoy: Arrange the decorated brownies on a serving tray and enjoy these festive, moist, and flavorful Santa Hat Brownies at your holiday party or family gathering.
Notes
- Make sure the brownies are completely cooled before frosting to prevent melting.
- Use high-quality white chocolate for a richer frosting flavor and smoother texture.
- For variation, add a pinch of cinnamon or nutmeg to the brownie batter for a subtle holiday spice.
- Store brownies in an airtight container in the refrigerator for up to 5 days.
- Bring refrigerated brownies to room temperature before serving for best texture.


