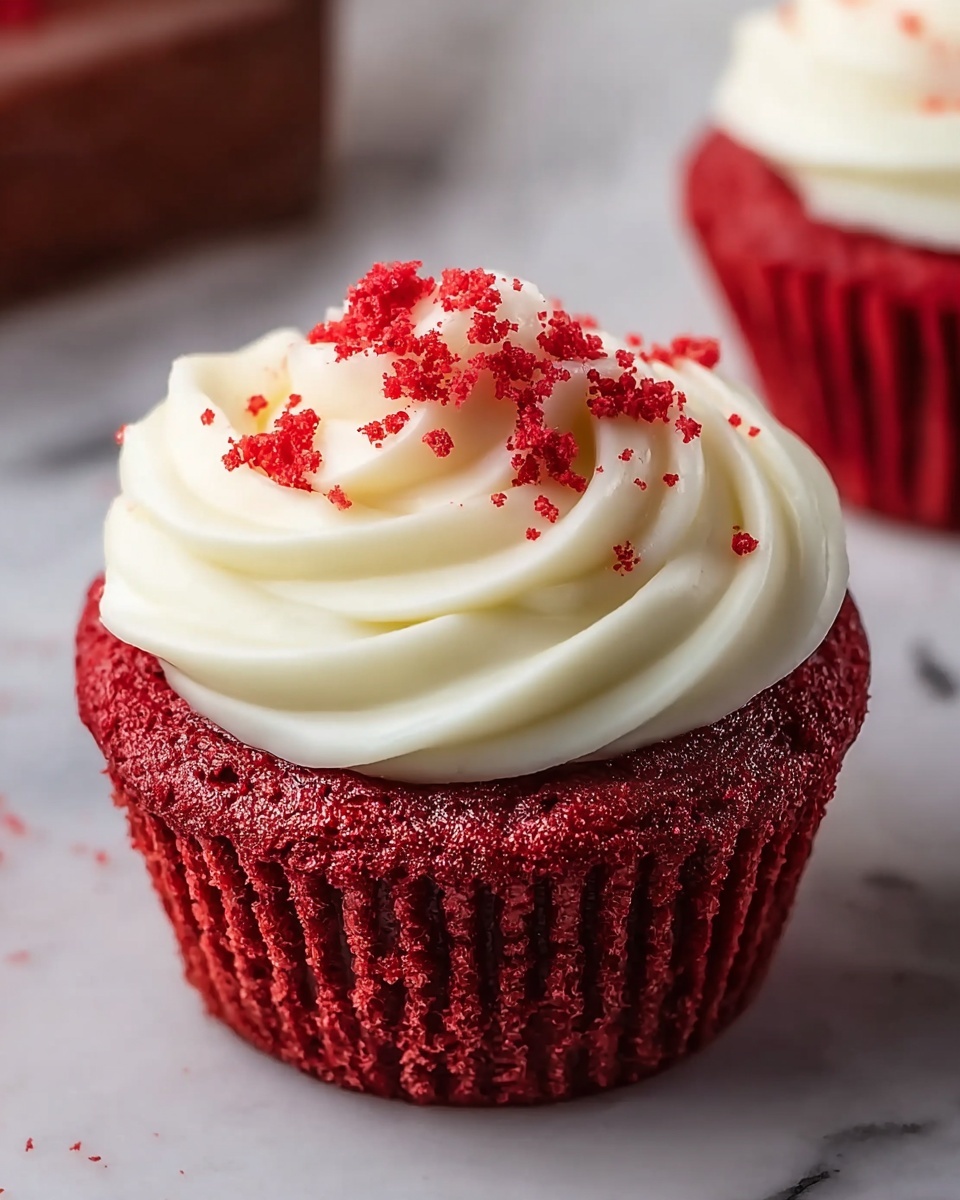
If you have a soft spot for desserts that blend classic flavors with a fun twist, then you’re going to adore this Red Velvet Cookie Cups with Cream Cheese Frosting Recipe. Imagine the rich, buttery texture of a cookie shaped perfectly into little cups, baked to tender perfection, and nestled beneath a cloud of luscious, tangy cream cheese frosting. It’s like your favorite red velvet cake and cookie had a delicious baby that’s ideal for snack time, parties, or anytime you want a special homemade treat that feels both playful and indulgent.

Ingredients You’ll Need
Gathering the right ingredients is key to creating the perfect Red Velvet Cookie Cups with Cream Cheese Frosting Recipe. Each component plays a crucial role: from the cocoa powder adding depth, to the buttermilk ensuring moistness, and the cream cheese bringing that signature tangy frosting we all love.
- 1 1/2 cups all-purpose flour: The sturdy base for a tender yet structured cookie.
- 1 tbsp cocoa powder: Adds that subtle chocolate undertone essential to red velvet flavor.
- 1/2 tsp baking soda: Helps the cookies rise and become wonderfully soft.
- 1/4 tsp salt: Balances sweetness and enhances flavor.
- 1/2 cup unsalted butter, softened: Brings richness and tenderness to the dough.
- 1 cup granulated sugar: Sweetness that also helps create a light texture when creamed with butter.
- 1 large egg: Binds ingredients together and adds moisture.
- 1 tsp vanilla extract: Infuses warmth and depth into the dough.
- 2 tbsp buttermilk: Adds a subtle tang and moisture while activating the baking soda.
- 2 tbsp red food coloring: The star that makes these cookie cups unmistakably red velvet.
- 1/2 tsp white vinegar: Enhances the red color and adds to the tender crumb.
- 8 oz cream cheese, softened: The creamy base for that irresistibly smooth frosting.
- 1/4 cup unsalted butter, softened: Makes the frosting rich and spreadable.
- 2 cups powdered sugar: Sweetens and thickens the frosting to perfection.
- 1 tsp vanilla extract: Complements the cream cheese with subtle flavor.
- Pinch of salt: Balances the sweetness in the frosting.
How to Make Red Velvet Cookie Cups with Cream Cheese Frosting Recipe
Step 1: Prepare Your Baking Tools
Start by preheating your oven to 350°F (175°C) and greasing a mini muffin tin or lining it with cupcake liners. This preparation step ensures your cookie cups will come out easily and hold their shape perfectly as they bake.
Step 2: Mix the Dry and Wet Ingredients
In one bowl, whisk together the flour, cocoa powder, baking soda, and salt. Separately, cream the softened butter and granulated sugar until light and fluffy—this creates the ideal base for your cookies. Then, add the egg, vanilla extract, and the vibrant red food coloring into the butter mixture, mixing well to combine. Incorporate the buttermilk and vinegar, which help create that classic tender crumb and boost the red color. Gradually fold in your dry ingredients, being careful not to overmix to keep the cookies soft and tender.
Step 3: Shape and Bake Your Cookie Cups
Using about one tablespoon of cookie dough per muffin cup, gently press the dough down into the cups to create the signature shape. Bake for 8 to 10 minutes until the edges are set and a toothpick inserted comes out clean. Cooling them in the pan for five minutes before transferring will help maintain their shape and makes them easier to handle.
Step 4: Whip Up the Cream Cheese Frosting
With the cookie cups cooling, beat together the softened cream cheese and butter until perfectly smooth. Then add the powdered sugar, vanilla extract, and a pinch of salt, beating until the frosting turns fluffy and creamy. This luscious topping brings the entire Red Velvet Cookie Cups with Cream Cheese Frosting Recipe to life with its rich, tangy balance.
Step 5: Frost and Finish
Once the cookie cups are completely cool, pipe or spread the cream cheese frosting generously onto each cup. Feel free to get creative here by adding sprinkles, red velvet crumbs, or even a drizzle of chocolate to make them look as delightful as they taste.
Step 6: Serve or Store
These cookie cups are ready to enjoy immediately, but if you have leftovers, simply store them in an airtight container in the refrigerator for up to three days.
How to Serve Red Velvet Cookie Cups with Cream Cheese Frosting Recipe

Garnishes
Sprinkles, chopped nuts, or even a few fresh raspberries add an extra pop of color and texture that pairs beautifully with the smooth cream cheese frosting. A light dusting of cocoa powder or red velvet crumbs can also elevate the presentation for special occasions.
Side Dishes
Serve these delightful cups alongside a warm cup of coffee, a glass of cold milk, or a cozy hot chocolate for an unforgettable treat. They also play nicely with fresh fruit platters or light desserts like fruit sorbet.
Creative Ways to Present
For parties, try arranging these cookie cups on a tiered cake stand or nestled inside decorative cupcake wrappers. You can even gift them in pretty boxes tied with ribbons to surprise friends and family with a homemade, heartfelt dessert.
Make Ahead and Storage
Storing Leftovers
Keep any leftover Red Velvet Cookie Cups with Cream Cheese Frosting Recipe in an airtight container in the fridge. This keeps the cookie moist and the frosting fresh for up to three days, making them a convenient treat to enjoy later.
Freezing
If you want to save some for later, these cookie cups freeze beautifully. Place them on a baking sheet to freeze individually before transferring them to a freezer-safe container. They’ll keep well for up to a month and thaw gently in the fridge overnight.
Reheating
For best results, let frozen cookie cups thaw fully in the refrigerator. You can warm them slightly in the microwave (about 10 seconds) if you prefer a soft, freshly baked feel, but be careful not to melt the cream cheese frosting.
FAQs
Can I use food coloring alternatives for the red color?
Absolutely! Natural options like beet juice or powdered freeze-dried berries can add a hint of red, though the color may be more muted compared to traditional food coloring. Experiment and see what you like best.
What if I don’t have buttermilk?
No worries! You can make a quick buttermilk substitute by mixing 1 tablespoon of white vinegar or lemon juice with 1 cup of milk and letting it sit for 5 minutes before using.
Can I make these cookies gluten-free?
Yes! Swap the all-purpose flour for a gluten-free flour blend that measures cup-for-cup. Just be sure it contains xanthan gum or another binder to keep the texture right.
Is it necessary to chill the dough before baking?
In this recipe, chilling the dough isn’t required due to the small, individual baking method. However, if your kitchen is warm or the dough feels too soft, a brief 15-20 minute chill can help with shaping.
How long do these cookie cups keep at room temperature?
Because of the cream cheese frosting, it’s best to store these cookie cups in the refrigerator. At room temperature, they should only be left out for a couple of hours to avoid spoilage.
Final Thoughts
If you’re looking for a dessert that’s as fun to make as it is to eat, you can’t go wrong with this Red Velvet Cookie Cups with Cream Cheese Frosting Recipe. It’s a joyful combination of textures and flavors that feels special without being complicated. I truly hope you enjoy making these as much as I do sharing them with my favorite people.
Print
Red Velvet Cookie Cups with Cream Cheese Frosting Recipe
- Prep Time: 15 minutes
- Cook Time: 10 minutes
- Total Time: 25 minutes
- Yield: 12 cookie cups (12 servings)
- Category: Dessert
- Method: Baking
- Cuisine: American
- Diet: Vegetarian
Description
Delicious Red Velvet Cookie Cups topped with creamy homemade cream cheese frosting. These bite-sized treats combine the classic red velvet flavor with the convenience of a cookie cup, perfect for parties or everyday indulgence.
Ingredients
Dry Ingredients
- 1 1/2 cups all-purpose flour
- 1 tbsp cocoa powder
- 1/2 tsp baking soda
- 1/4 tsp salt
Wet Ingredients
- 1/2 cup unsalted butter, softened
- 1 cup granulated sugar
- 1 large egg
- 1 tsp vanilla extract
- 2 tbsp buttermilk
- 2 tbsp red food coloring
- 1/2 tsp white vinegar
Cream Cheese Frosting
- 8 oz cream cheese, softened
- 1/4 cup unsalted butter, softened
- 2 cups powdered sugar
- 1 tsp vanilla extract
- Pinch of salt
Instructions
- Preheat Oven and Prepare Pan: Preheat your oven to 350°F (175°C). Grease a mini muffin tin or line it with cupcake liners to prevent sticking.
- Mix Dry Ingredients: In a medium bowl, whisk together the flour, cocoa powder, baking soda, and salt until well combined. Set aside for later use.
- Cream Butter and Sugar: In a large mixing bowl, beat the softened butter and granulated sugar together until the mixture is light and fluffy, about 2-3 minutes using a mixer or by hand.
- Add Wet Ingredients: Beat in the egg, vanilla extract, and red food coloring until fully incorporated. Then add the buttermilk and vinegar and mix well.
- Combine Dry and Wet Mixtures: Gradually add the dry ingredients to the wet ingredients, mixing gently until just combined to avoid overmixing.
- Form Cookie Cups: Scoop about 1 tablespoon of cookie dough into each muffin cup. Press the dough down gently to form an even base.
- Bake: Bake in the preheated oven for 8-10 minutes, or until a toothpick inserted into the centers comes out clean. Remove from oven and cool in the pan for 5 minutes.
- Cool Completely: Transfer cookie cups to a wire rack to cool completely before frosting.
- Prepare Cream Cheese Frosting: In a large bowl, beat the softened cream cheese and butter until smooth. Add powdered sugar, vanilla extract, and a pinch of salt. Beat the mixture until fluffy and creamy, about 3-4 minutes.
- Frost Cookie Cups: Using a piping bag or spoon, spread or pipe the cream cheese frosting onto each cooled cookie cup. Optionally, decorate with sprinkles or red velvet crumbs.
- Serve or Store: Serve the cookie cups immediately, or store them in an airtight container in the refrigerator for up to 3 days to maintain freshness and texture.
Notes
- Make sure butter and cream cheese are softened to room temperature for smooth mixing.
- Press dough gently into muffin cups to form an even layer without overpacking.
- Cool cookie cups completely before frosting to prevent melting or sliding of frosting.
- Use mini muffin tins for perfectly sized cookie cups.
- Store leftovers in an airtight container refrigerated for up to 3 days.


