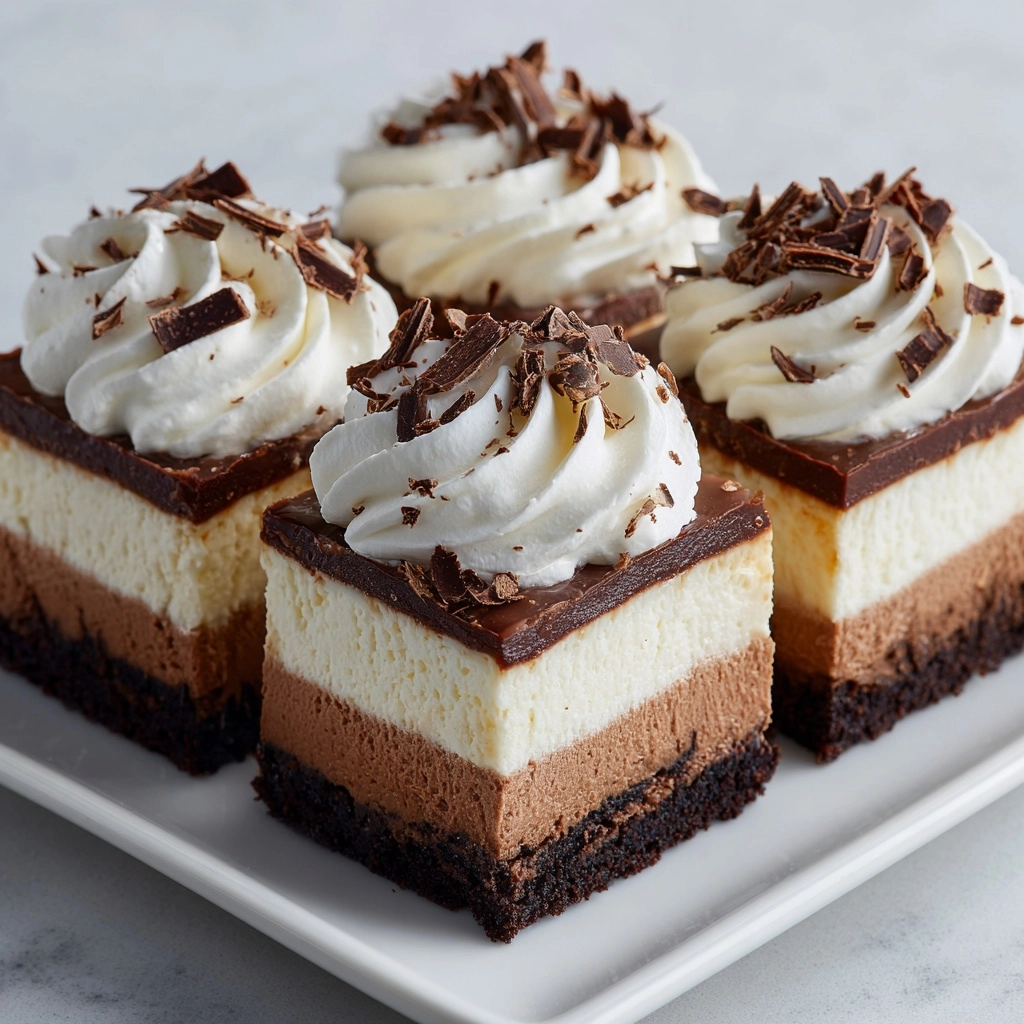
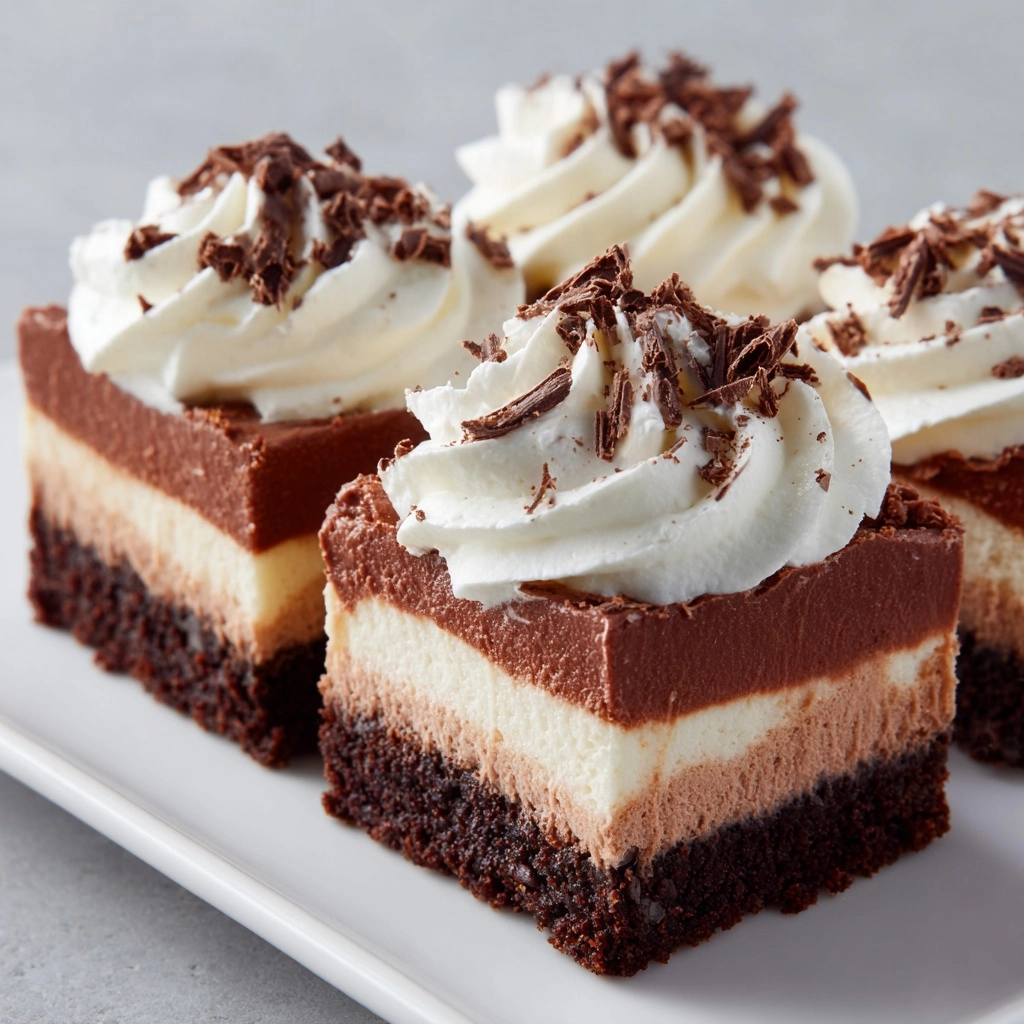
If you dream about a dessert that’s ultra-creamy, chocolatey, totally indulgent, but never requires you to turn on your oven, these No-Bake Chocolate Mousse Bars are about to become your newest obsession. Imagine a rich, soft chocolate mousse piled on top of a buttery cookie crust, all ready in advance and perfect chilled—no heat, just pure bliss. Whether you’re treating yourself after a long day or bringing a homemade delight to a gathering, these bars offer everything you love about chocolate mousse, in a playful bar you can slice and share. Plus, they’re super straightforward to make, yet fancy enough to wow every chocolate lover you know.
Ingredients You’ll Need
Ingredients You’ll Need
When it comes to the perfect No-Bake Chocolate Mousse Bars, every ingredient counts. These simple picks each work behind the scenes to create the dreamy taste, velvety texture, and picture-perfect layers that make this dessert truly unforgettable.
- Crushed chocolate graham crackers or Oreo cookies (1 1/2 cups, without filling): The base of your bars, offering deep chocolate flavor and a satisfying crunch that sets the scene for the creamy mousse.
- Unsalted butter (1/4 cup, melted): This binds the cookie crumbs, giving you a crust that’s sturdy yet tender and never greasy.
- Semisweet chocolate chips (1 1/2 cups): Essential for the rich, indulgent chocolate flavor that’s at the heart of these bars.
- Heavy cream (1/2 cup for melting chocolate): Melts effortlessly with chocolate chips for a silky-smooth, glossy chocolate base.
- Heavy whipping cream (1 cup for mousse): Whipped into blissful, pillowy peaks, this is the secret to a mousse layer that’s airy yet decadently luscious.
- Powdered sugar (1/4 cup): Sweetens the whipped cream just right—no graininess, just smooth and light.
- Vanilla extract (1 teaspoon): A splash of vanilla rounds out the chocolate, giving a mellow warmth that brings all the flavors together.
- Chocolate shavings or cocoa powder (for topping, optional): These aren’t just for looks—the added chocolate or cocoa dusting gives a hint of extra richness and a beautiful finish.
How to Make No-Bake Chocolate Mousse Bars
Step 1: Prepare the Crust
Start by mixing the crushed chocolate graham crackers or Oreo cookies with the melted butter in a medium bowl. Stir until the crumbs are evenly coated and the texture resembles wet sand. Press this mixture firmly into the bottom of an 8×8-inch pan lined with parchment paper. This gives you a sturdy, chocolatey base. If you want an ultra-firm crust, pop it in the freezer for 15 minutes; otherwise, the fridge for 10 to 15 minutes will do while you prep the mousse.
Step 2: Make the Chocolate Base
In a heatproof bowl, combine your semisweet chocolate chips and 1/2 cup heavy cream. Microwave this in 30-second bursts, stirring in between, until it’s gorgeously smooth and completely melted. Give it a few minutes to cool down—just enough so it’s not hot but still perfectly fluid. This keeps your mousse light and airy later.
Step 3: Whip the Cream
In another bowl, whip together 1 cup heavy whipping cream, 1/4 cup powdered sugar, and the vanilla extract until soft peaks form. You’re looking for a gentle, cloud-like texture that will fold seamlessly into the chocolate, making the mousse irresistibly fluffy.
Step 4: Fold and Layer
It’s magic time! Gently fold the whipped cream into the cooled chocolate mixture in batches—this step is key to keeping the mousse light and ethereal. Once the mixture is fully combined and smooth, spread it evenly over your chilled crust, smoothing the top for that elegant finish.
Step 5: Chill and Set
Pop your pan into the refrigerator for at least 3 hours, or until the mousse is set and sliceable. This not only lets the layers meld together beautifully but ensures each bar can be sliced neatly for those perfect serving squares.
Step 6: Garnish and Serve
Right before serving, add a flourish of chocolate shavings or a dusting of cocoa powder for a little extra love. Cut into squares, and get ready for the oohs and ahhs when you present these No-Bake Chocolate Mousse Bars to your lucky tasters!
How to Serve No-Bake Chocolate Mousse Bars
Garnishes
Go classic with a flurry of chocolate shavings, cocoa powder, or even a few curls of white chocolate to catch the eye. Fresh raspberries or sliced strawberries also look stunning and add a bright pop of flavor against the rich chocolate. For a festive touch, consider a sprinkle of edible gold dust or a dollop of whipped cream on top.
Side Dishes
With No-Bake Chocolate Mousse Bars as the star, try pairing them with something light and fruity—a bowl of fresh berries or a citrus sorbet keeps things refreshing. Coffee and espresso are also perfect companions, helping the chocolate flavors shine even more.
Creative Ways to Present
Be playful! Serve each bar on an individual dessert plate, drizzled with a zigzag of raspberry sauce or caramel. You can also layer cubes of the bars in parfait glasses with whipped cream for a deconstructed look, or cut them into mini bites for a chic dessert platter at a party.
Make Ahead and Storage
Storing Leftovers
These bars keep beautifully in the refrigerator for up to four days. Simply cover the pan tightly with plastic wrap or transfer your slices into an airtight container—just make sure they’re chilled at all times to keep the mousse perfectly set and dreamy.
Freezing
For even longer storage, No-Bake Chocolate Mousse Bars freeze like a charm! Place them in a single layer in a freezer-safe box, or layer with parchment between bars if stacking. When you’re ready to enjoy, let them thaw in the fridge for a couple of hours, and you’ll have a rich, cold treat ready for any occasion.
Reheating
No reheating needed here—these treats are best served cold straight from the fridge! If you’ve frozen them, just let them thaw until they’re cool and sliceable again. Avoid microwaving or heating, as it can melt the mousse and change the texture.
FAQs
Can I use milk chocolate or dark chocolate instead of semisweet?
Absolutely! Both milk chocolate and dark chocolate work beautifully for No-Bake Chocolate Mousse Bars. Just keep in mind that milk chocolate makes the bars sweeter and creamier, while dark chocolate delivers a deeper, more intense chocolate flavor. Adjust the powdered sugar if you change up the chocolate.
What’s the best way to crush the cookies for the crust?
A food processor makes quick work of crushing cookies, but you can also place them in a sealed plastic bag and use a rolling pin to crush them into fine crumbs. It’s a great step to get kids involved or let out a little stress!
Do I need to remove the filling from Oreo cookies?
Yes, for this recipe you’ll want to use Oreo cookies without the filling to avoid making the crust too soft or greasy. Save the fillings for another treat—or a secret snack!
Can I make No-Bake Chocolate Mousse Bars a day ahead?
These bars are ideal for making ahead! In fact, letting them chill overnight deepens the flavors and gives you the cleanest slices the next day. Just garnish fresh before serving for the best presentation.
How can I make the mousse extra fluffy?
The key to extra fluffy mousse is not overworking the whipped cream when folding it into the chocolate, and making sure both the whipped cream and melted chocolate are at similar, cool room temperatures before combining. This helps maintain all the lovely air you just whipped in.
Final Thoughts
There’s something magical about a dessert that takes only a handful of ingredients, a little patience, and delivers pure chocolate joy in every bite. Whether you’re prepping for a celebration or simply treating yourself, these No-Bake Chocolate Mousse Bars are the kind of recipe you’ll want to make again and again. Gather your ingredients, follow the easy steps, and get ready to impress yourself and your friends—it’s time to share a slice of happiness!