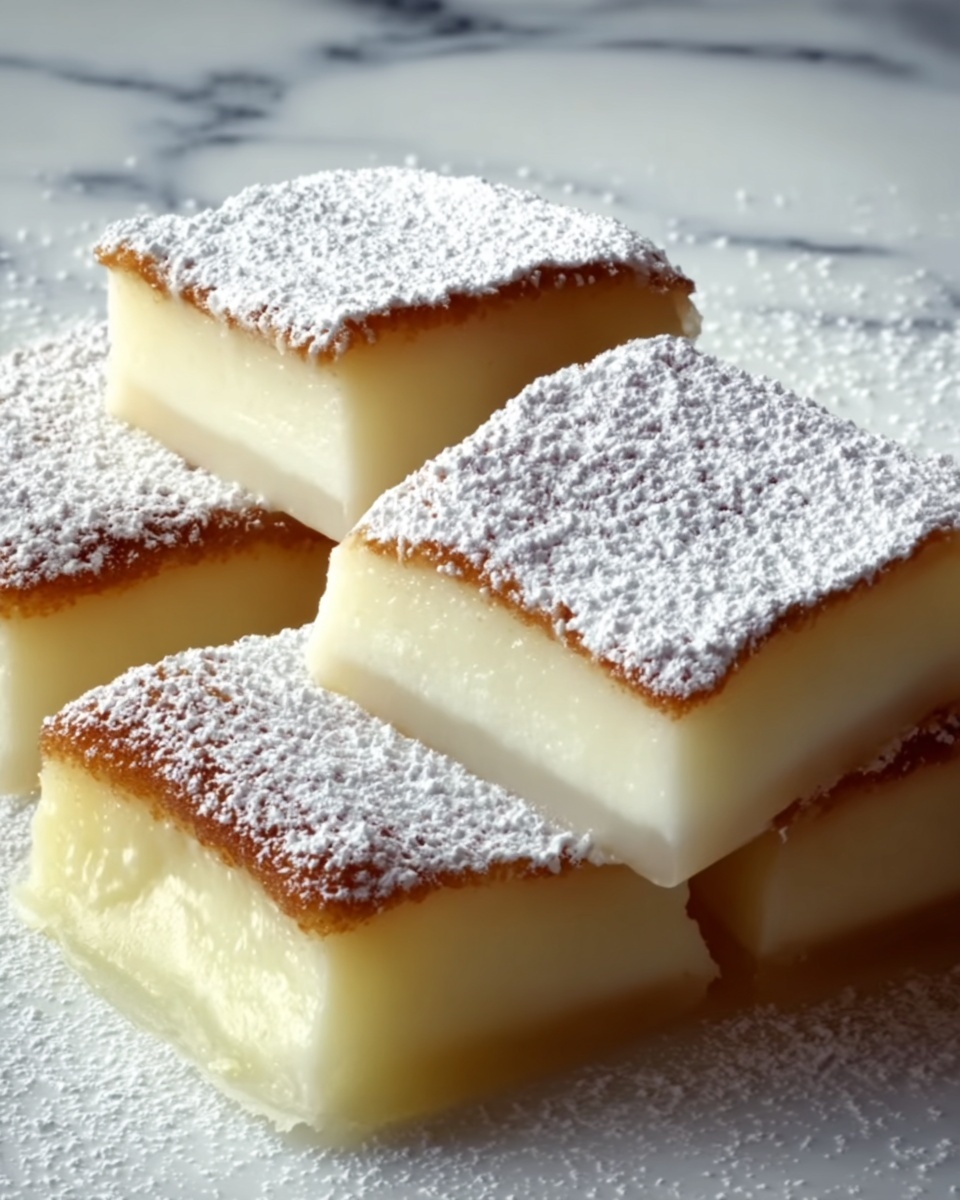
If you have a sweet tooth and love bite-sized treats that simply melt in your mouth, the Melting Moment Logs Recipe is your new best friend. This classic Australian biscuit brings together buttery richness, delicate sweetness, and a tender crumb that just dissolves with every bite. Perfect for afternoon tea, sharing with loved ones, or sneaking a few whenever cravings hit, these melt-in-your-mouth logs are deceptively simple but absolutely addictive. Once you try this Melting Moment Logs Recipe, you’ll wonder how you ever lived without them in your baking repertoire.
Ingredients You’ll Need
The magic of the Melting Moment Logs Recipe starts with a handful of humble ingredients that each play a vital role. From the creamy butter that gives a rich base, to the soft sweetness of confectioner’s sugar, and the cornstarch that lends a melt-away texture—all these components come together perfectly to create a biscuit that’s more than the sum of its parts.
- Butter (1 cup, softened): The heart and soul of the biscuit, softened butter ensures a tender and rich crumb.
- Confectioner’s sugar (¾ cup plus extra for dusting): This finely ground sugar adds gentle sweetness and a smooth finish, plus the dusting adds a lovely snowy look.
- Vanilla extract (1 tsp): A splash of vanilla infuses warmth and depth to balance the buttery notes.
- All-purpose flour (1½ cups): The sturdy base that gives structure while remaining soft in the finished biscuit.
- Cornstarch (½ cup): The secret behind that signature melt-in-the-mouth texture—it softens the flour’s bite.
- Salt (¼ tsp): Just a pinch to enhance all the sweet flavors and bring balance to the dough.
How to Make Melting Moment Logs Recipe
Step 1: Cream the Butter and Sugar
Start by beating the softened butter and ¾ cup of confectioner’s sugar together. This combo needs to get really light and fluffy—which takes about four minutes with a mixer—to build the perfect base for your logs. This step is crucial because it aerates the mixture and ensures your biscuits bake up tender and light.
Step 2: Add Vanilla Extract
Once the butter and sugar have reached that creamy, cloud-like texture, stir in the vanilla extract. The vanilla adds a delicate fragrance that makes the dough irresistible and brings a lovely warmth to the final biscuit.
Step 3: Mix Dry Ingredients
In a separate bowl, sift together the all-purpose flour, cornstarch, and salt. Sifting helps keep the dry ingredients light and free of lumps, which will ensure the smooth, even texture of the dough. Slowly add these dry ingredients to the butter mixture, mixing just until fully combined and smooth—avoid over-mixing to keep the biscuits tender.
Step 4: Shape the Dough into Logs
Divide the dough into three equal portions and roll each portion into logs about 1 inch in diameter. This shaping gives your biscuits their classic log form. Wrap each log tightly in plastic wrap and pop them into the fridge to chill for at least an hour. Chilling firms up the dough, which makes slicing easier and helps maintain those neat shapes during baking.
Step 5: Preheat Oven and Prepare Baking Sheet
About 20 minutes before baking, preheat your oven to 350°F (175°C). Line a baking sheet with parchment paper to prevent sticking and to promote even cooking. A good-prepared tray is key to getting those golden bottoms without any burnt surprises.
Step 6: Slice the Logs and Chill Again
Remove the logs from the fridge and slice them into 1-inch thick rounds. Place these slices on the prepared baking sheet, spaced apart to allow for slight spreading. For the best texture and shape, chill the slices on the sheet for another 30 minutes before baking. This step ensures the logs hold their form and bake into beautifully tender biscuits.
Step 7: Bake Until Lightly Golden
Bake the slices for around 8 minutes, just until the bottoms start to turn a gentle golden color. Keep a close eye—underbaking can leave doughy centers, while overbaking can dry them out. After baking, let the biscuits cool on the sheet for about three minutes before transferring them to a wire rack. This helps them set perfectly without breaking.
Step 8: Dust with Confectioner’s Sugar
Once the cookies are entirely cool, generously dust them with extra confectioner’s sugar. This final touch adds a snow-like finish and an extra hint of sweetness that completes the classic Melting Moment Logs Recipe experience.
How to Serve Melting Moment Logs Recipe

Garnishes
While just a dusting of confectioner’s sugar is perfect in itself, you can also try a light drizzle of melted chocolate or a sprinkle of finely chopped nuts for extra texture and flavor contrasts. These enhancements make your Melting Moment Logs stand out even more when you’re sharing with friends or serving at special occasions.
Side Dishes
Pair these melt-in-your-mouth logs with a hot cup of tea, coffee, or even a chilled glass of milk for an unbeatable combination. Their subtle sweetness balances wonderfully with slightly bitter or creamy beverages, turning snack time into a soothing ritual.
Creative Ways to Present
For parties or gifts, arrange the logs on a beautiful platter lined with parchment or tie several logs together with a festive ribbon for a charming edible gift. You could also sandwich softened cream or jam between two halves to make bite-sized cookies with a filling twist.
Make Ahead and Storage
Storing Leftovers
If you find yourself with leftovers from your batch of Melting Moment Logs Recipe, keep them fresh by storing in an airtight container at room temperature. They usually stay perfect for up to a week, preserving that classic melt-in-your-mouth texture.
Freezing
These logs freeze beautifully—either as whole logs before slicing or as sliced cookies after baking. Wrap them tightly in plastic wrap and place them in a freezer-safe container or bag. When ready to enjoy, thaw completely at room temperature to bring back that irresistible softness.
Reheating
Since these biscuits are best enjoyed soft, avoid microwaving that can make them chewy. Instead, let frozen biscuits thaw naturally or warm briefly in a low oven (about 300°F) for a few minutes to revive that fresh-baked feel.
FAQs
Can I substitute butter in the Melting Moment Logs Recipe?
Butter is essential for the authentic flavor and texture of melting moment logs, so while you could try margarine or plant-based butter alternatives, the results may not be as tender or flavorful.
Why is cornstarch used in this recipe?
Cornstarch softens the gluten in the flour, helping to create that signature tender, crumbly texture that literally melts in your mouth in this recipe.
How do I prevent the logs from spreading too much during baking?
Chilling the dough logs before slicing and again after slicing is key. This firms up the fat so the biscuits hold their shape and bake evenly without spreading excessively.
Can I add flavors or mix-ins to the dough?
Absolutely! Adding finely chopped nuts, cocoa powder, or lemon zest can add exciting twists, but keep in mind that altering the texture too much might affect how well the biscuits melt.
What’s the best way to enjoy Melting Moment Logs?
They’re perfect with a warm cup of tea or coffee, or simply enjoyed on their own whenever you need a sweet little pick-me-up. Their simplicity is their charm!
Final Thoughts
There’s something incredibly comforting about the Melting Moment Logs Recipe that makes it a timeless classic in any kitchen. With simple ingredients and straightforward steps, you end up with heavenly treats that are perfect for any occasion—or just quiet moments at home. I can’t encourage you enough to give this recipe a try and make these melt-away cookies a beloved staple in your baking lineup.
Print
Melting Moment Logs Recipe
- Prep Time: 15 minutes
- Cook Time: 8 minutes per batch
- Total Time: 1 hour 46 minutes
- Yield: 24 servings
- Category: Dessert
- Method: Baking
- Cuisine: Western
- Diet: Vegetarian
Description
Melting Moment Logs are delicate, buttery cookies with a melt-in-your-mouth texture, lightly dusted with confectioner’s sugar. These sweet delights are perfect for teatime or as a simple, elegant treat for any occasion.
Ingredients
For the Dough
- 1 cup butter (softened)
- ¾ cup confectioner’s sugar (plus more for dusting)
- 1 tsp vanilla extract
- 1½ cups all-purpose flour
- ½ cup cornstarch
- ¼ tsp salt
Instructions
- Cream Butter and Sugar: Beat the softened butter and ¾ cup confectioner’s sugar together until light and fluffy, which should take about 4 minutes. This step is essential to incorporate air into the mixture for a tender cookie.
- Add Vanilla: Mix in the vanilla extract thoroughly to evenly distribute the flavor throughout the butter and sugar mixture.
- Mix Dry Ingredients: In a separate bowl, sift together all-purpose flour, cornstarch, and salt. Gradually add this dry mixture to the butter mixture, beating until smooth and fully combined to form a soft dough.
- Shape Logs: Divide the dough into three equal portions and roll each into a 1-inch diameter log. Wrap each log tightly in plastic wrap and chill in the refrigerator for at least one hour. This chilling step helps the dough to firm up for easier slicing and better texture.
- Preheat Oven: Preheat your oven to 350°F (175°C) and line a baking sheet with parchment paper to prevent sticking.
- Slice and Chill Again: Remove chilled logs from the fridge and slice each into 1-inch thick pieces. Arrange these slices evenly spaced on the prepared baking sheet and chill them again for 30 minutes. This extra chilling helps the cookies retain their shape during baking.
- Bake: Bake the cookies in the preheated oven for about 8 minutes, or until the bottoms are just lightly golden. Avoid over-baking to maintain the tender texture. After baking, cool the cookies on the sheet for 3 minutes before transferring them to a wire rack to cool completely.
- Dust with Sugar: Once the cookies are completely cooled, dust them generously with additional confectioner’s sugar for a sweet finishing touch and an elegant appearance.
Notes
- Ensure butter is softened but not melted for best creaming results.
- Chilling the dough logs before slicing and after slicing is crucial for maintaining cookie shape and texture.
- Do not overbake; cookies should remain pale with just golden bottoms to keep their melt-in-the-mouth quality.
- Store cookies in an airtight container to preserve freshness.
- These cookies pair wonderfully with tea or coffee.


