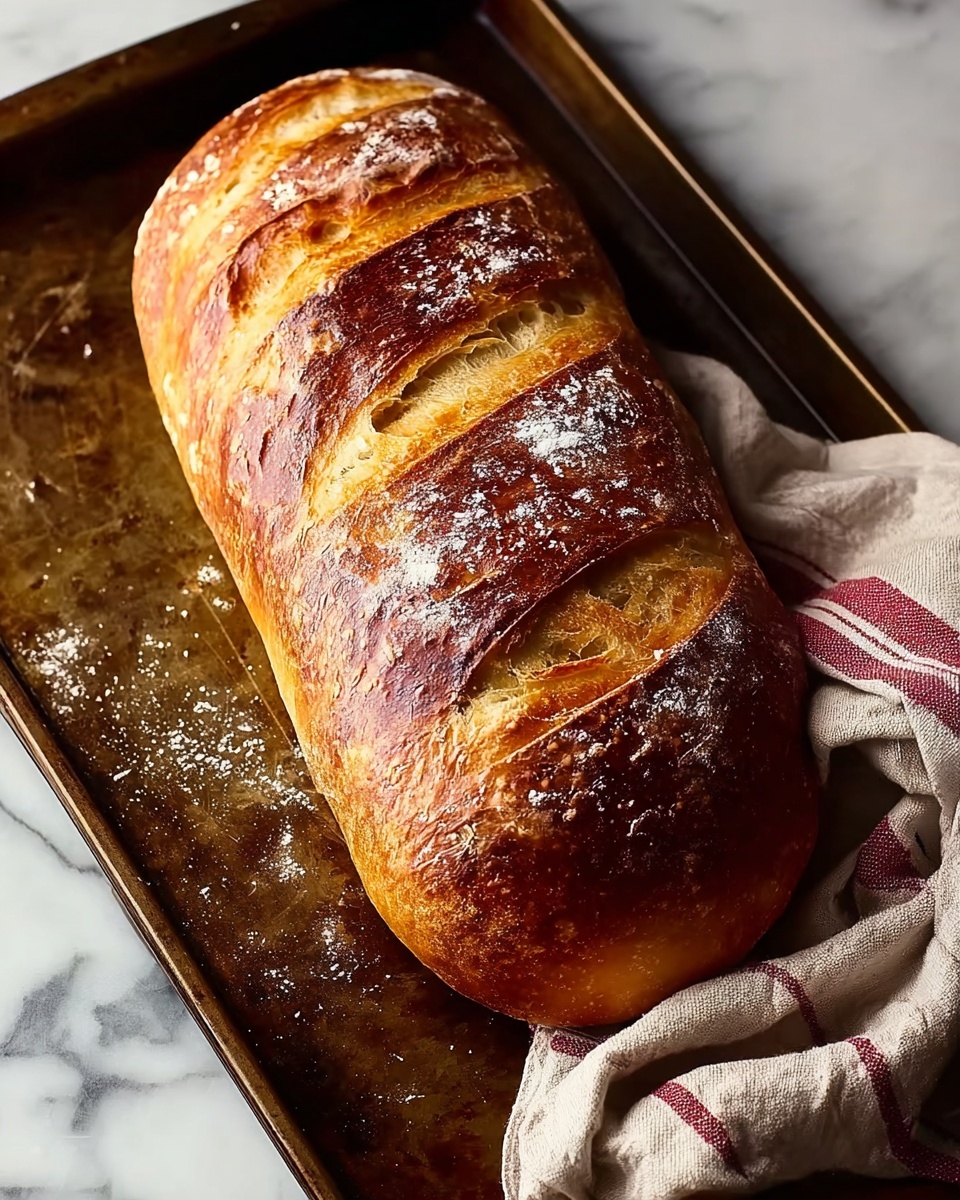
There is something truly magical about homemade bread, especially when it’s the kind of classic loaf that fills your kitchen with the warm aroma of Italy. This Italian Bread Recipe is a delightful, straightforward way to bring that comforting, crusty, and chewy bread right into your home. With simple pantry staples and a bit of patience, you’ll create a loaf that’s perfect for sandwiches, dipping in olive oil, or simply enjoying with butter. Trust me, once you make this bread, it will become one of your all-time favorites to bake and share.
Ingredients You’ll Need
To craft the perfect Italian Bread Recipe, you only need a handful of essential ingredients that each play a crucial role. From the flour that forms the structure to the olive oil that adds moisture and flavor, every component is simple yet indispensable in creating that classic texture and taste.
- 3 1/2 cups all-purpose flour: This provides the bread’s structure and chewiness essential in an Italian loaf.
- 1 tablespoon sugar: Feeds the yeast to help the dough rise beautifully.
- 2 teaspoons salt: Enhances flavor and balances sweetness.
- 1 tablespoon active dry yeast: The magic agent that makes the bread rise and develop its airy texture.
- 1 1/2 cups warm water (110°F/45°C): Activates the yeast and hydrates the flour for the perfect dough consistency.
- 1 tablespoon olive oil: Adds tenderness and a subtle fruity flavor typical of Italian bread.
- 1 tablespoon cornmeal (for dusting): Provides a lovely rustic finish and prevents sticking on the baking sheet.
How to Make Italian Bread Recipe
Step 1: Activate the Yeast
Start by dissolving the sugar and yeast in warm water, then let it sit until it becomes foamy, about 5 to 10 minutes. This step is crucial because it shows your yeast is alive and ready to work its magic, ensuring a light and airy loaf.
Step 2: Mix the Dough
In a large bowl, whisk together the flour and salt. Then add your yeast mixture and olive oil. Stir everything until a dough begins to form. This is where your simple ingredients start transforming into that perfect Italian bread dough.
Step 3: Knead Until Smooth
Onto a floured surface, turn out the dough and knead it for 8 to 10 minutes. This part is key—it develops the gluten that gives the bread its chewy texture, so don’t rush it. You’ll know you’re done when the dough is smooth and elastic.
Step 4: Let the Dough Rise
Place your dough in a greased bowl, cover it with a damp cloth, and let it rise in a warm spot for 1 to 2 hours. This rise time allows the dough to nearly double, creating those beautiful air pockets inside the bread.
Step 5: Preheat Oven
While the dough is rising, preheat your oven to 375°F (190°C). It’s important the oven is ready at just the right temperature to bake your bread to golden perfection.
Step 6: Shape the Loaf
Punch down your risen dough and shape it into a loaf. Place it on a baking sheet dusted with cornmeal. The cornmeal not only stops sticking but adds to that slightly crunchy, rustic crust Italian bread is known for.
Step 7: Proof Again and Score
Let the shaped dough rise for another 30 minutes, then make a few slashes across the top with a sharp knife. Scoring helps the bread expand evenly as it bakes and gives it that classic artisanal look.
Step 8: Bake to Golden Perfection
Bake your loaf for 25 to 30 minutes until it turns a gorgeous golden brown. A good test is to tap the bottom—if it sounds hollow, your bread is perfectly baked inside.
Step 9: Cool and Slice
Don’t rush to slice it hot from the oven. Let the bread cool on a wire rack so the steam escapes, giving you clean slices and that wonderful crusty exterior everyone loves.
How to Serve Italian Bread Recipe
Garnishes
If you want to dress up your Italian bread, consider brushing it with a garlic-infused olive oil or sprinkling a dash of sea salt and rosemary on top after baking. It’s simple touches like these that elevate your homemade loaf to irresistible.
Side Dishes
This bread shines alongside soups, stews, or hearty pasta dishes. It’s also fabulous when served with olive oil and balsamic vinegar for dipping or topped with slices of fresh mozzarella and ripe tomatoes for a quick bruschetta.
Creative Ways to Present
For a special occasion, hollow out the center and fill it with a savory spinach and cheese dip. Or slice and toast the bread for a crunchy crostini platter, perfect for impressing guests.
Make Ahead and Storage
Storing Leftovers
Your Italian Bread Recipe loaf is best enjoyed fresh, but if you have leftovers, store them in an airtight container or wrapped tightly in plastic wrap at room temperature to keep the crust crisp and the inside soft for up to two days.
Freezing
To keep your bread longer, wrap it well in plastic wrap and then in foil before freezing. When you’re ready, thaw it at room temperature, and your bread will nearly taste as fresh as the day you baked it.
Reheating
Reheat slices in a toaster or warm the whole loaf in the oven at 350°F (175°C) for about 10 minutes. This refreshes the crust and makes the bread beautifully soft inside again.
FAQs
Can I use whole wheat flour in this Italian Bread Recipe?
Yes, you can substitute some or all of the all-purpose flour with whole wheat flour. Keep in mind the texture will be denser and the flavor nuttier, but it’s still delicious and nutritious.
How important is the water temperature when activating yeast?
Water temperature is very important. Too hot and it can kill the yeast; too cold and it won’t activate properly. Aim for warm water around 110°F (45°C) to get the best rise.
Why do I need to let the dough rise twice?
The first rise develops flavor and texture, while the second rise after shaping ensures a tender crumb and optimal loaf shape. Both are essential steps for classic Italian bread.
Can I make this bread without olive oil?
You could omit the olive oil, but it does add moisture and flavor that make the crust softer and the bread more tender. If omitted, your bread may be a bit drier and crisper.
What should I do if my bread is too dense?
Dense bread usually results from under-kneading, insufficient rising time, or old yeast. Make sure to knead until elastic, give the dough plenty of time to rise in a warm spot, and always check your yeast’s expiration date.
Final Thoughts
I hope you’re as excited as I am for you to try this classic Italian Bread Recipe. It’s wonderfully straightforward but yields a loaf bursting with authentic flavor and texture that’s perfect for any meal. Baking this bread becomes more than just making food—it becomes a cozy experience that fills your home with love and the unmistakable scent of fresh-baked goodness. Give it a go and watch your kitchen transform into your favorite little Italian bakery!
Print
Italian Bread Recipe
- Prep Time: 15 minutes
- Cook Time: 30 minutes
- Total Time: 2 hours 45 minutes
- Yield: 12 servings
- Category: Bread
- Method: Baking
- Cuisine: Italian
Description
This classic Italian bread recipe yields a crusty, golden loaf with a soft, airy interior. Made using simple ingredients like all-purpose flour, yeast, and olive oil, the bread requires a few hours of rising and baking to achieve the perfect texture and flavor. Ideal for sandwiches, dipping in olive oil, or serving alongside meals.
Ingredients
Dough Ingredients
- 3 1/2 cups all-purpose flour
- 1 tablespoon sugar
- 2 teaspoons salt
- 1 tablespoon active dry yeast
- 1 1/2 cups warm water (110°F/45°C)
- 1 tablespoon olive oil
For Baking
- 1 tablespoon cornmeal (for dusting)
Instructions
- Activate Yeast: In a small bowl, dissolve the sugar and active dry yeast in the warm water. Let the mixture sit for 5 to 10 minutes until it becomes foamy, indicating the yeast is active.
- Mix Dry Ingredients: In a large mixing bowl, combine the all-purpose flour and salt thoroughly.
- Combine and Form Dough: Add the yeast mixture and olive oil to the flour mixture. Stir everything together until a rough dough forms.
- Knead Dough: Turn the dough onto a lightly floured surface and knead it for 8 to 10 minutes until it becomes smooth, elastic, and slightly tacky but not sticky.
- First Rise: Place the kneaded dough into a greased bowl, cover it with a damp cloth, and let it rise in a warm spot for 1 to 2 hours, or until it doubles in size.
- Preheat Oven: Set your oven to 375°F (190°C) to preheat while the dough rises for the second time.
- Shape Dough: Punch down the risen dough to release excess air, shape it into a loaf, and place it on a baking sheet sprinkled with cornmeal to prevent sticking.
- Second Rise: Let the loaf rise for another 30 minutes on the baking sheet. Just before baking, slash the top of the loaf with a sharp knife to allow steam to escape and encourage expansion.
- Bake Bread: Bake in the preheated oven for 25 to 30 minutes until the crust is golden brown and the loaf sounds hollow when tapped on the bottom.
- Cool: Remove the bread from the oven and transfer it to a wire rack to cool completely before slicing to preserve its texture.
Notes
- Use warm water at about 110°F (45°C) to properly activate the yeast without killing it.
- Allowing the dough to double in size during the first rise is crucial for good texture.
- Dusting the baking sheet with cornmeal helps prevent sticking and adds a slight crunch to the crust.
- Slashing the loaf before baking allows steam to escape and helps the bread expand evenly.
- Cool the bread fully before slicing to avoid a gummy interior.
- You can substitute all-purpose flour with bread flour for a chewier texture.
- This bread freezes well; slice and freeze if desired for future use.


