
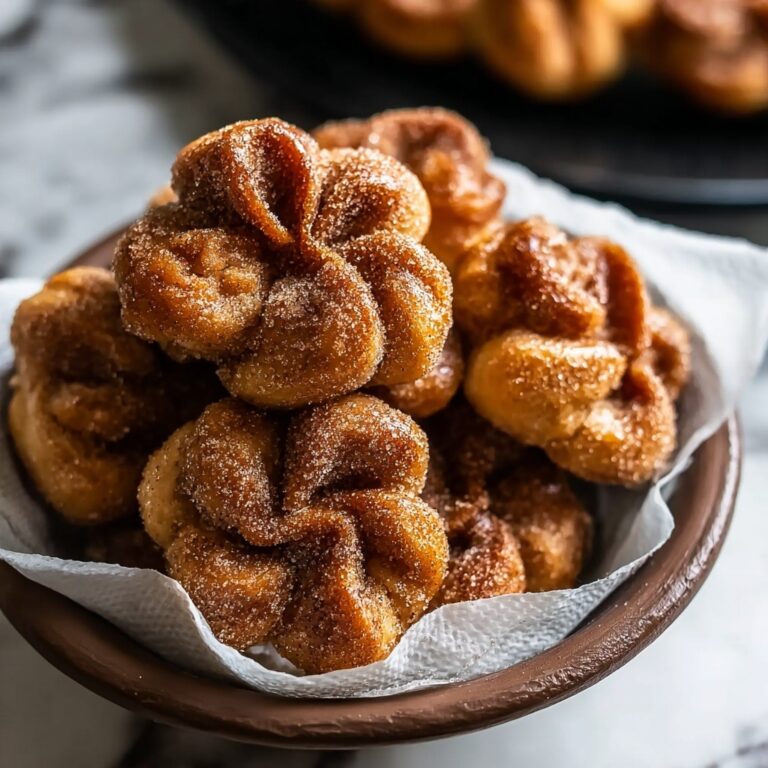
If you have a craving for something wonderfully crispy on the outside and soft on the inside, this Hungarian Fried Dough Recipe is your next must-try treat. This cherished classic offers the perfect balance of subtly sweet and comforting fried goodness, making it an irresistible snack or dessert. Whether enjoyed fresh from the pan or dusted with powdered sugar, every bite delivers a nostalgic taste of Hungary that will have you coming back for more.

Ingredients You’ll Need
The beauty of this Hungarian Fried Dough Recipe lies in its simplicity—just a handful of pantry staples come together to create magic. Each ingredient plays an essential role in crafting the texture and flavor that define this delightful dish.
- 2 cups all-purpose flour: The base that gives structure and a tender crumb to the dough.
- 1 teaspoon salt: Enhances the flavors and balances the sweetness perfectly.
- 1 tablespoon sugar: Adds a gentle hint of sweetness that caramelizes during frying.
- 1 packet active dry yeast: The secret to that airy, light texture after rising.
- 3/4 cup warm water: Activates the yeast and brings the dough together smoothly.
- 1 tablespoon vegetable oil: Keeps the dough pliable and adds richness.
- Powdered sugar for dusting: The final touch of sweetness that melts delightfully on top.
How to Make Hungarian Fried Dough Recipe
Step 1: Activate the Yeast
Start by mixing the warm water with the active dry yeast in a bowl. Let it sit for a few minutes until it bubbles and froths—this means the yeast is alive and ready to work its magic. This step is crucial for achieving the perfect rise, which gives the dough its light and fluffy texture.
Step 2: Combine Dry Ingredients
In another bowl, whisk together the all-purpose flour, salt, and sugar. This ensures that the seasoning and sweetness are evenly distributed throughout the dough, setting the stage for a consistent flavor in every bite.
Step 3: Mix Dough
Pour the activated yeast mixture and vegetable oil into the bowl with the dry ingredients. Stir everything together until it starts to come together, then prepare for the kneading process. At this point, the dough will feel a bit sticky but that’s perfectly normal.
Step 4: Knead and Let Rise
Turn the dough onto a lightly floured surface and knead it for about 8 to 10 minutes until it becomes smooth and elastic. Place it in a greased bowl, cover with a kitchen towel, and let it rise in a warm spot for about 1 hour or until it doubles in size. This patience pays off with a wonderfully airy dough that fries up beautifully.
Step 5: Shape the Dough
Once risen, punch down the dough gently and roll it out to about half an inch thickness. Cut into your preferred shapes—traditionally, squares or circles work well. Shaping is part of the fun and allows you to customize your Hungarian Fried Dough to suit the occasion.
Step 6: Fry the Dough
Heat vegetable oil in a deep skillet or pan over medium heat until shimmering. Fry the dough pieces in batches, turning once, until they puff up and turn a gorgeous golden brown on both sides. This takes just a couple of minutes per side, so keep an eye to avoid burning.
Step 7: Dust and Serve
Remove the fried dough from the oil and drain on paper towels briefly to shed excess oil. While still warm, dust generously with powdered sugar for that classic sweet finish that melts into every crevice.
How to Serve Hungarian Fried Dough Recipe

Garnishes
Powdered sugar is the timeless choice, but you can get creative with toppings like cinnamon sugar, a drizzle of honey, or even a dollop of fruit jam for extra flavor pops. Garnishes transform this simple treat into a personalized delight.
Side Dishes
Serve alongside fresh fruit, whipped cream, or a cup of rich coffee or tea. This combination turns the Hungarian Fried Dough Recipe into a comforting snack perfect for relaxed afternoons or festive gatherings.
Creative Ways to Present
Try stacking several pieces with cream cheese and fruit preserves between them to make a decadent layered dessert. Alternatively, twist the shapes or dust with colorful edible flowers to impress guests visually and gastronomically.
Make Ahead and Storage
Storing Leftovers
If you’re lucky enough to have leftovers, store them in an airtight container at room temperature for up to 2 days. While the dough tastes best fresh, this keeps them pleasant enough for enjoying later without losing too much crispness.
Freezing
To extend their life, flash-freeze the fried dough pieces on a baking sheet, then transfer to a freezer bag. They can be frozen for up to 1 month. When ready to eat, thaw briefly before reheating to maintain texture.
Reheating
Reheat in a hot oven or toaster oven at 350°F for 5–7 minutes to refresh the crispy exterior and warm the dough inside. Avoid microwaving if you want to keep that perfect crunch.
FAQs
Can I use a different type of flour for this Hungarian Fried Dough Recipe?
While all-purpose flour works best for the right texture, you can experiment with bread flour for a chewier bite or a mix with whole wheat for a nuttier flavor. Just keep in mind it might slightly alter the final texture.
How important is the yeast activation step?
Activating the yeast ensures it’s active and will cause the dough to rise properly. Skipping this or using water that’s too hot or cold can result in dense fried dough, so it’s definitely worth the few extra minutes.
What oil is best for frying Hungarian Fried Dough?
Use neutral oils with a high smoke point like vegetable, canola, or sunflower oil. These oils allow the dough to fry evenly without imparting strong flavors.
Can I make the dough in advance?
Yes! You can prepare the dough the night before, keep it covered in the fridge, and let it come to room temperature and rise before frying. This can sometimes enhance the dough’s flavor too.
Is Hungarian Fried Dough gluten-free friendly?
Traditional Hungarian Fried Dough Recipe uses wheat flour, so it is not gluten-free. For gluten-free options, you would need a suitable flour blend, but results and texture might differ significantly.
Final Thoughts
This Hungarian Fried Dough Recipe is truly a joyful kitchen adventure that brings warmth and tradition to your table. It’s simple to make, incredibly satisfying, and guaranteed to impress anyone who tries it. Give it a go—you might just find your new favorite comfort snack!
Print
Hungarian Fried Dough Recipe
- Prep Time: 20 minutes
- Cook Time: 25 minutes
- Total Time: 1 hour 45 minutes
- Yield: 12 servings
- Category: Snack
- Method: Frying
- Cuisine: Hungarian
Description
Hungarian Fried Dough, known as ‘Lángos’, is a traditional Hungarian street food featuring soft, fluffy dough fried to golden perfection and dusted with powdered sugar. Crispy on the outside and tender inside, this delicious treat is perfect for a snack or dessert and captures the rustic flavors of Hungarian cuisine.
Ingredients
Dough
- 2 cups all-purpose flour
- 1 teaspoon salt
- 1 tablespoon sugar
- 1 packet active dry yeast (about 2 1/4 teaspoons)
- 3/4 cup warm water (about 110°F/43°C)
- 1 tablespoon vegetable oil
Topping
- Powdered sugar for dusting
- Vegetable oil for frying (enough to fill pan about 1–2 inches deep)
Instructions
- Activate the yeast: In a small bowl, combine the warm water and active dry yeast. Stir gently and let it sit for about 5–10 minutes until the mixture is frothy and bubbles form, indicating the yeast is activated.
- Mix the dry ingredients: In a large mixing bowl, combine the all-purpose flour, salt, and sugar. Whisk together to ensure even distribution.
- Combine wet and dry ingredients: Pour the activated yeast mixture and vegetable oil into the bowl with the flour mixture. Stir with a spoon or your hands to begin forming a dough.
- Knead the dough: Transfer the dough onto a lightly floured surface and knead for about 8–10 minutes until it becomes smooth, elastic, and no longer sticky. If necessary, sprinkle a little more flour to prevent sticking.
- Let the dough rise: Place the dough in a lightly oiled bowl, cover it with a clean kitchen towel or plastic wrap, and let it rise in a warm, draft-free place for approximately 1 hour, or until it has doubled in size.
- Shape the dough: After rising, punch the dough down gently to release air. Roll it out on a floured surface to about 1/4-inch thickness. Cut into your desired shapes—traditional circles or rustic free-form shapes work well.
- Heat oil for frying: In a deep skillet or frying pan, pour vegetable oil to about 1–2 inches deep and heat over medium heat until it reaches approximately 350°F (175°C). To test, drop a small piece of dough into the oil; it should sizzle and float to the top promptly.
- Fry the dough: Carefully place pieces of dough into the hot oil, frying in batches to avoid overcrowding. Fry each piece for about 2–3 minutes per side or until golden brown and puffed. Use a slotted spoon or tongs to flip and remove them.
- Drain and dust: Transfer fried dough to a plate lined with paper towels to drain excess oil. While still warm, sprinkle generously with powdered sugar before serving.
Notes
- Ensure the water used for activating yeast is warm, not hot, to avoid killing the yeast.
- You can customize this fried dough by adding toppings like garlic butter, sour cream, or cheese for savory versions.
- Maintain the oil temperature between 325°F and 350°F to ensure proper frying without absorbing excess oil.
- Use fresh yeast and flour for the best texture and rise.
- Wear an apron and be cautious with hot oil to avoid burns.
- Leftover fried dough can be reheated in a warm oven to regain crispiness but is best enjoyed fresh.


