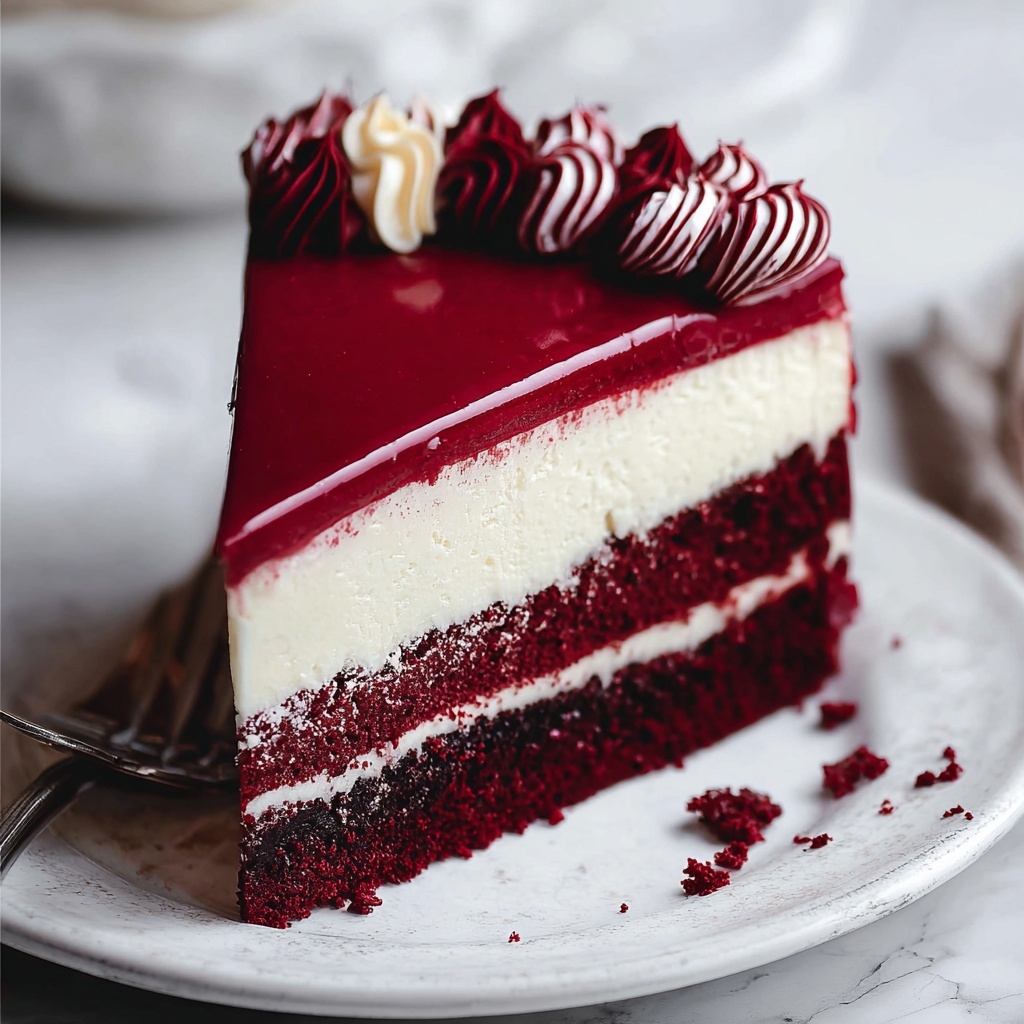
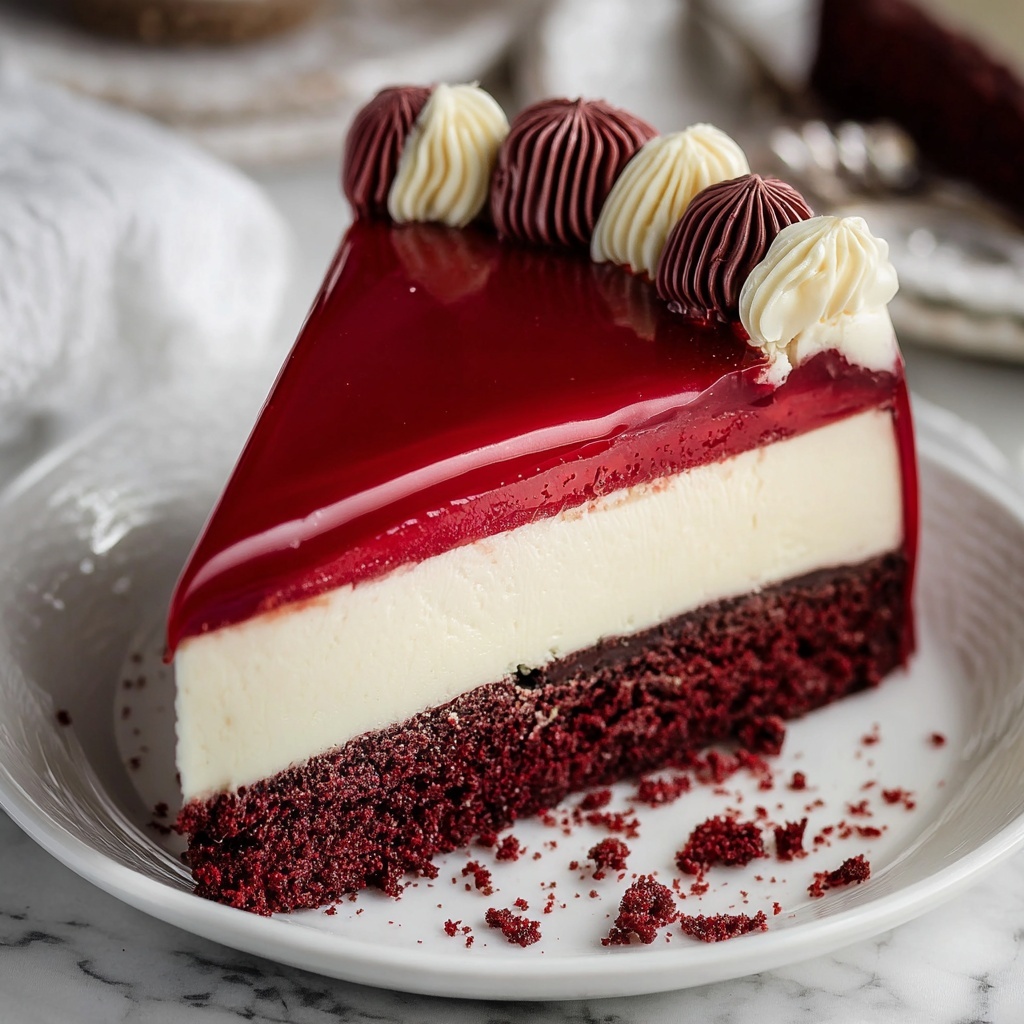
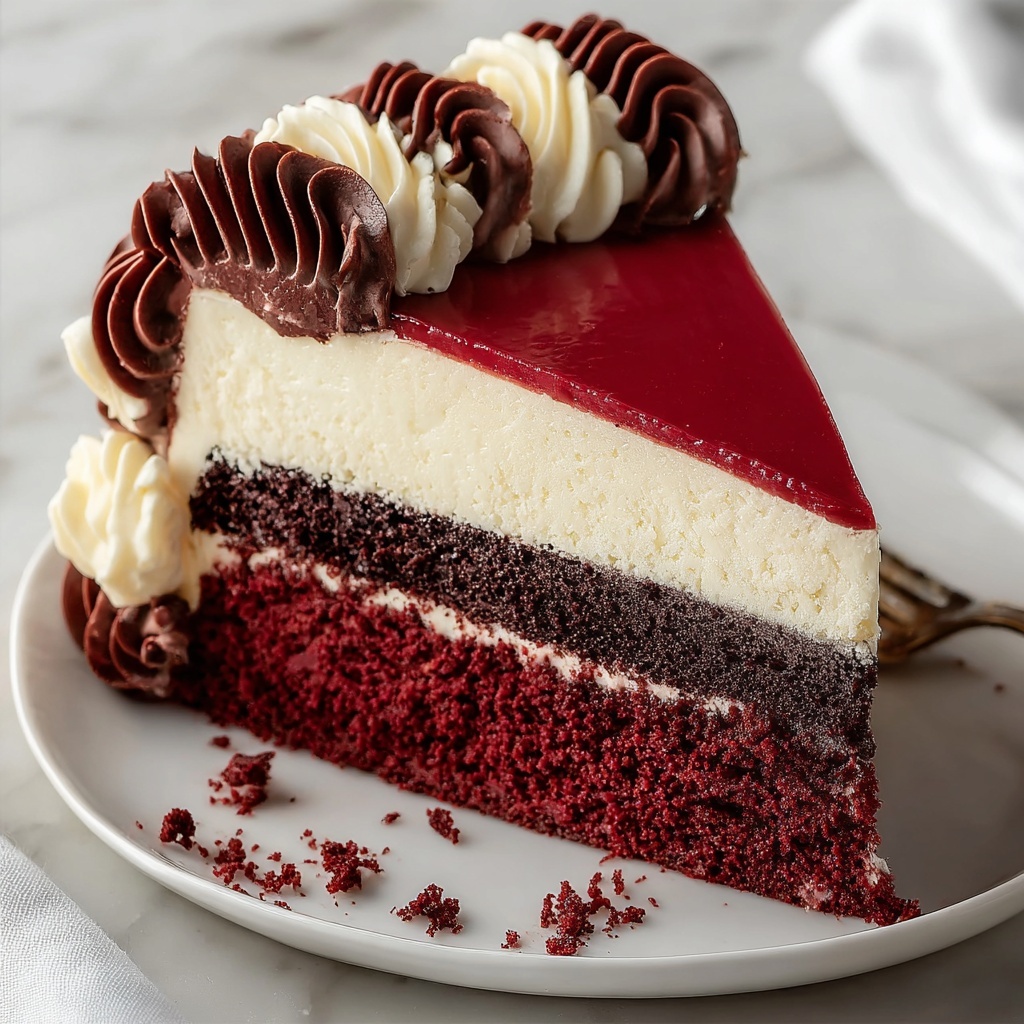
If you’re a dessert lover looking to wow your friends and family, the Homemade Red Velvet Cheesecake Recipe is an absolute showstopper that combines the luxurious creaminess of classic cheesecake with the rich, vibrant charm of red velvet cake. This recipe delivers a lush, velvety texture with a hint of cocoa, layered atop a buttery Oreo crust and finished off with a smooth cream cheese frosting. Whether it’s a special occasion or you just want to treat yourself, this cheesecake will have everyone asking for seconds, and it’s surprisingly simple to make at home.
Ingredients You’ll Need
The magic of this cheesecake lies in its straightforward yet carefully chosen ingredients. Each one plays a vital role in balancing flavor, texture, and that signature red velvet color that makes this dessert so irresistible.
- Crushed Oreo cookies (2 ½ cups): Provides a chocolatey, crunchy base that complements the creamy layers above.
- Unsalted butter (5 tablespoons + ¼ cup): Adds richness and helps bind the crust and frosting to perfect consistency.
- Cream cheese (32 ounces + 4 ounces): The star ingredient for creating the smooth cheesecake filling and frosting.
- Granulated sugar (1 ⅓ cups): Sweetens the cheesecake while balancing the cocoa’s slight bitterness.
- Cocoa powder (½ cup): Offers a subtle chocolate undertone essential to true red velvet flavor.
- Sour cream (1 cup): Adds tanginess and creaminess for a tender bite.
- White vinegar (1 tablespoon): Enhances the red color and tenderizes the cake texture.
- Vanilla extract (2 tablespoons total): Deepens flavor in both the filling and frosting.
- Red food coloring (1-2 ounces): Gives the cheesecake its vibrant red hue that everyone loves.
- Large eggs (4, lightly beaten): Bind the ingredients together and contribute to the rich, dense texture.
- Confectioners’ sugar (¼ cup): Sweetens and smooths the cream cheese frosting.
How to Make Homemade Red Velvet Cheesecake Recipe
Step 1: Prepare the Crust
Start by preheating your oven to 350°F (175°C) and wrapping the bottom of a 9-inch springform pan with two layers of heavy-duty aluminum foil to prevent leaks. Next, mix your crushed Oreo cookies with melted butter. Press this mixture firmly into the bottom and sides of your prepared pan to create an even crust. Bake it for 10 minutes, then let it cool completely, setting the foundation for the cheesecake filling.
Step 2: Make the Cheesecake Batter
Lower the oven temperature to 300°F (150°C). Beat 32 ounces of softened cream cheese until super smooth. Gradually add granulated sugar and cocoa powder to the mix for that classic red velvet flavor. Then stir in sour cream, white vinegar, vanilla extract, and your choice of red food coloring to get that perfect rich red hue. Gently fold in the lightly beaten eggs, making sure everything is well combined but without overmixing to keep the batter light and airy.
Step 3: Bake with a Water Bath
Pour your luscious red velvet batter over the cooled Oreo crust. For optimal baking, place the springform pan inside a larger roasting pan and carefully pour boiling water halfway up the sides. This water bath method ensures even cooking and prevents cracks in your cheesecake. Bake for exactly 1 hour. Once done, turn off the oven but keep the cheesecake inside the water bath for another hour to cool gently and set perfectly.
Step 4: Chill Overnight
Remove your cheesecake from the water bath and place it on a wire rack to cool to room temperature. Then refrigerate it for at least 4 hours, though overnight chilling is best for flavors to meld and the texture to firm up beautifully.
Step 5: Whip Up the Cream Cheese Frosting
Beat together softened cream cheese and butter until smooth and fluffy. Slowly add confectioners’ sugar and vanilla extract, continuing to mix until the frosting is creamy and spreadable. This frosting is the perfect balance of sweetness and tang that contrasts wonderfully with the rich cheesecake beneath.
Step 6: Frost and Serve
Once your Homemade Red Velvet Cheesecake Recipe is fully chilled, spread the cream cheese frosting evenly over the top. Your creation is now ready to dazzle family and friends!
How to Serve Homemade Red Velvet Cheesecake Recipe
Garnishes
A beautiful cheesecake deserves equally stunning garnishes. Try sprinkling a few extra crushed Oreos around the edges or adding white chocolate shavings on top for an elegant touch. Fresh berries like raspberries can provide a lovely tart contrast and pop of color, complementing the red velvet hues perfectly.
Side Dishes
A scoop of vanilla bean ice cream or a dollop of freshly whipped cream pairs wonderfully alongside a slice to balance richness. You could also serve it with a warm berry compote to add a fresh, fruity burst that livens up each bite.
Creative Ways to Present
For an eye-catching presentation, slice the cheesecake into neat wedges and place each on a dessert plate drizzled with raspberry sauce. Alternatively, serve mini versions of this Homemade Red Velvet Cheesecake Recipe in small jars or ramekins for a charming individual dessert at your next gathering.
Make Ahead and Storage
Storing Leftovers
Once sliced, store your leftover cheesecake in an airtight container in the refrigerator. It stays fresh for up to 4 days without losing any of its luscious flavor or creamy texture, making it a great dessert to enjoy over a few days.
Freezing
If you want to save slices for later, wrap them tightly in plastic wrap and then foil before placing them in the freezer. Frozen properly, your cheesecake can last up to 1 month. Thaw overnight in the refrigerator for the best results.
Reheating
Cheesecake is best enjoyed chilled, but if you prefer a slightly warmer dessert, remove it from the refrigerator about 30 minutes before serving. Avoid microwaving, as it can alter the texture and cause separation.
FAQs
Can I use a different crust instead of Oreos?
Absolutely! While Oreos add a delightful chocolate crunch, you can substitute graham crackers, digestive biscuits, or even pretzels for a salty-sweet twist. Just make sure to adjust the butter quantity to create a firm crust.
How important is the water bath?
The water bath helps the cheesecake bake evenly and prevents cracks from forming on the surface. It’s a small step that elevates the final texture and appearance of your Homemade Red Velvet Cheesecake Recipe.
Can I adjust the amount of red food coloring?
Yes! The red food coloring gives that signature cake color, but if you prefer a lighter shade, simply use less. Using gel food coloring is recommended for vibrant results without adding extra liquid to the batter.
What’s the best way to soften cream cheese?
For smooth cheesecake batter and frosting, leave the cream cheese out at room temperature for about 30-60 minutes before starting. This prevents lumps and helps ingredients blend more easily.
Can I make this cheesecake gluten-free?
Definitely! Simply substitute the Oreo crust for gluten-free cookies or gluten-free graham crackers. Make sure all other ingredients you use are certified gluten-free to keep the whole dessert safe for sensitive eaters.
Final Thoughts
There is something truly special about creating your own Homemade Red Velvet Cheesecake Recipe from scratch. From the velvety filling and the crunchy Oreo crust to the rich cream cheese frosting, every bite feels like a celebration. Whether you’re aiming to impress at a party or indulge in a luxurious treat, this recipe is a must-try. So gather your ingredients, roll up your sleeves, and dive into the warm, welcoming world of homemade cheesecake bliss!
Print
Homemade Red Velvet Cheesecake Recipe
- Prep Time: 30 minutes
- Cook Time: 1 hour 10 minutes
- Total Time: 6 hours 42 minutes
- Yield: 12 servings
- Category: Dessert
- Method: Baking
- Cuisine: American
Description
This Homemade Red Velvet Cheesecake combines the rich, creamy texture of classic cheesecake with the bold flavors of red velvet cake. Featuring a crunchy Oreo cookie crust and smooth cocoa-infused filling dyed a vibrant red, this dessert is elegantly finished with a luscious cream cheese frosting. Perfect for special occasions or indulgent treats, it requires careful baking in a water bath to achieve the ideal creamy consistency.
Ingredients
Crust
- 2 ½ cups (250 g) crushed Oreo cookies (about 30 cookies)
- 5 tablespoons unsalted butter, melted
Cheesecake Filling
- 32 ounces (908 g) cream cheese, softened
- 1 ⅓ cups (267 g) granulated sugar
- ½ cup (42 g) cocoa powder
- 1 cup (227 g) sour cream, room temperature
- 1 tablespoon white vinegar
- 1 tablespoon vanilla extract
- 1–2 ounces red food coloring
- 4 large eggs, room temperature, lightly beaten
Frosting
- 4 ounces (113 g) cream cheese, softened
- ¼ cup (56 g) unsalted butter, softened
- 2 cups (260 g) confectioners’ sugar
- 1 teaspoon vanilla extract
Instructions
- Prepare the Oven and Pan: Preheat your oven to 350°F (175°C). Wrap the bottom of a 9-inch springform pan with two layers of heavy-duty aluminum foil to prevent water from leaking into the pan during baking.
- Make the Crust: Mix the crushed Oreo cookies with the melted unsalted butter until evenly combined. Press this mixture firmly into the bottom and up the sides of the prepared springform pan to form an even crust layer. Bake it for 10 minutes to set, then allow it to cool completely.
- Prepare the Cheesecake Batter: Reduce oven temperature to 300°F (150°C). In a large mixing bowl, beat the softened cream cheese until smooth and creamy. Gradually add granulated sugar and cocoa powder, mixing well to combine. Stir in the sour cream, white vinegar, vanilla extract, and red food coloring until the mixture is vibrant and evenly colored. Finally, gently fold in the lightly beaten eggs, being careful not to overmix to preserve a smooth texture.
- Bake the Cheesecake: Pour the cheesecake batter over the cooled Oreo crust in the springform pan. Place the pan into a larger roasting pan and carefully pour boiling water halfway up the sides of the springform pan to create a water bath, which helps to prevent cracking and ensures even baking. Bake the cheesecake at 300°F (150°C) for 1 hour. After the baking time, turn off the oven and leave the cheesecake in the water bath with the door closed for an additional hour to gently finish cooking.
- Cool and Chill: Remove the cheesecake from the oven and water bath, then let it cool to room temperature on a wire rack. Once cooled, refrigerate the cheesecake for at least 4 hours or preferably overnight to allow it to fully set and develop flavors.
- Prepare and Apply Frosting: In a mixing bowl, beat the softened cream cheese and unsalted butter together until creamy. Gradually add the confectioners’ sugar and vanilla extract, beating until smooth and fluffy. Spread this frosting evenly over the chilled cheesecake before serving.
Notes
- Ensure the cream cheese and eggs are at room temperature to avoid lumps and to achieve a smooth batter.
- Be careful not to overmix the batter after adding eggs to maintain a light texture.
- Wrapping the springform pan in foil is essential to prevent water from leaking into the crust during the water bath.
- The water bath helps prevent cracking and keeps the cheesecake moist.
- The cheesecake benefits from chilling overnight; this improves texture and flavor.
- Use gel-based red food coloring for a vivid color without thinning the batter.


