
If you’ve ever dreamed of crafting the perfect pizza at home, let me guide you through my Homemade Pizza Dough from Scratch Recipe that guarantees a tender, chewy, and irresistibly flavorful crust. This recipe is a total game-changer, using simple pantry ingredients to build a dough that rises beautifully and bakes into that classic pizza base we all love. Whether a newbie or a seasoned kitchen adventurer, making your own dough is surprisingly easy, satisfying, and downright fun.
Ingredients You’ll Need
Great pizza starts with great ingredients, and this list keeps it straightforward yet superb. Every item plays a unique role—hydrating, leavening, seasoning, or adding that silky elasticity—coming together to form the ideal dough foundation.
- 1 & 1/2 cups warm water: The perfect temperature helps activate the yeast without killing it, setting the stage for a lively rise.
- 2 & 1/4 teaspoons active dry yeast: The magic ingredient that makes your dough fluffy and light.
- 1 tablespoon granulated sugar: Feeds the yeast and slightly browns the crust for extra flavor.
- 2 teaspoons kosher salt: Enhances taste and strengthens the dough’s gluten structure.
- 3 tablespoons olive oil: Adds richness and helps keep the dough tender and easy to work with.
- 3 & 3/4 cups flour (Bread flour or All-Purpose, or a mix with “00” flour): The flour choice determines texture and chewiness; bread flour offers extra protein for a more robust crust.
How to Make Homemade Pizza Dough from Scratch Recipe
Step 1: Activate Your Yeast
Start by pouring 1 and 1/2 cups of warm water into a large bowl or mixer bowl. The temperature is key—it should feel like a cozy bath, not scorching. Gently test with your wrist to avoid killing the yeast. Sprinkle in your yeast and sugar, then wait patiently for about 3 minutes until you see foamy bubbles—proof that your yeast is alive and kicking. If nothing bubbles, no worries—you’ll need to start fresh with new yeast.
Step 2: Optional Sponge for Deeper Flavor
If you have time, the sponge step is a wonderful trick. Simply mix in 1 cup of flour to your bubbly yeast mixture and let it sit uncovered for 30 minutes to 3 hours. This lets the yeast ferment and develop a deeper, more complex flavor profile. After this bubbling rest, add the remaining ingredients as you would in the straight method. Don’t stress if your dough feels a bit sticky; that’s the secret to tenderness!
Step 3: Combine the Rest of Your Ingredients
If you’re skipping the sponge, go ahead by adding 2 teaspoons of kosher salt, 3 tablespoons of olive oil, and your full 3 and 3/4 cups of flour—adding flour one cup at a time to keep control of the dough’s texture. This method ensures your dough won’t be too stiff or too soggy.
Step 4: Knead Until Perfect
Once everything’s mixed, it’s time to knead. Five minutes in a stand mixer with a dough hook or 7 minutes by hand on a floured surface will make your dough smooth, elastic, and slightly sticky. If after a few minutes it still sticks to bowl sides and doesn’t form a ball, sprinkle in a little more flour. The key is to keep it soft, not tough.
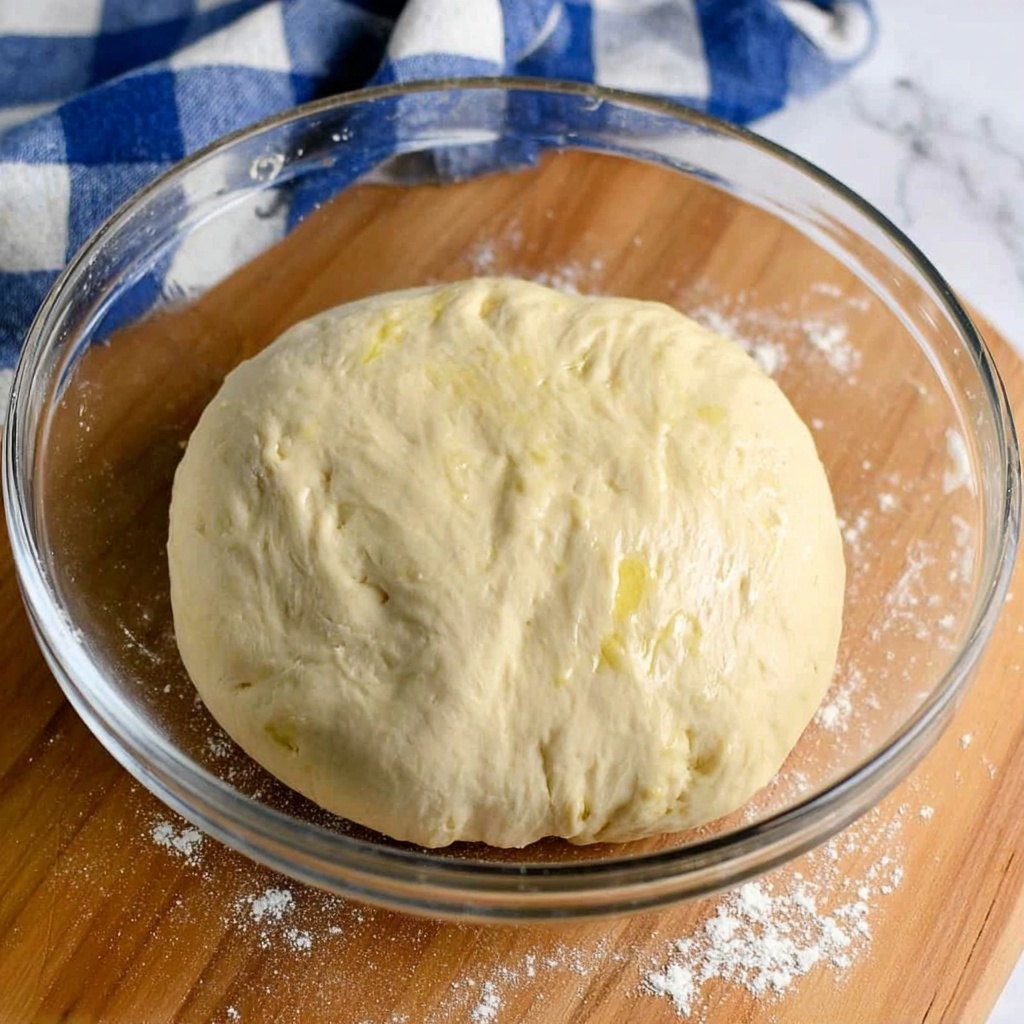
Step 5: First Rise
Shape your dough into a ball and place it in a generously greased bowl. Turn the dough once so the top is lightly oiled, too—this helps keep moisture in. Cover with a tea towel or plastic wrap and nestle into a warm spot, like inside your oven briefly warmed and then turned off. The rising time is flexible: 20 minutes if you’re in a rush, several hours if you want maximum flavor and chewy texture.
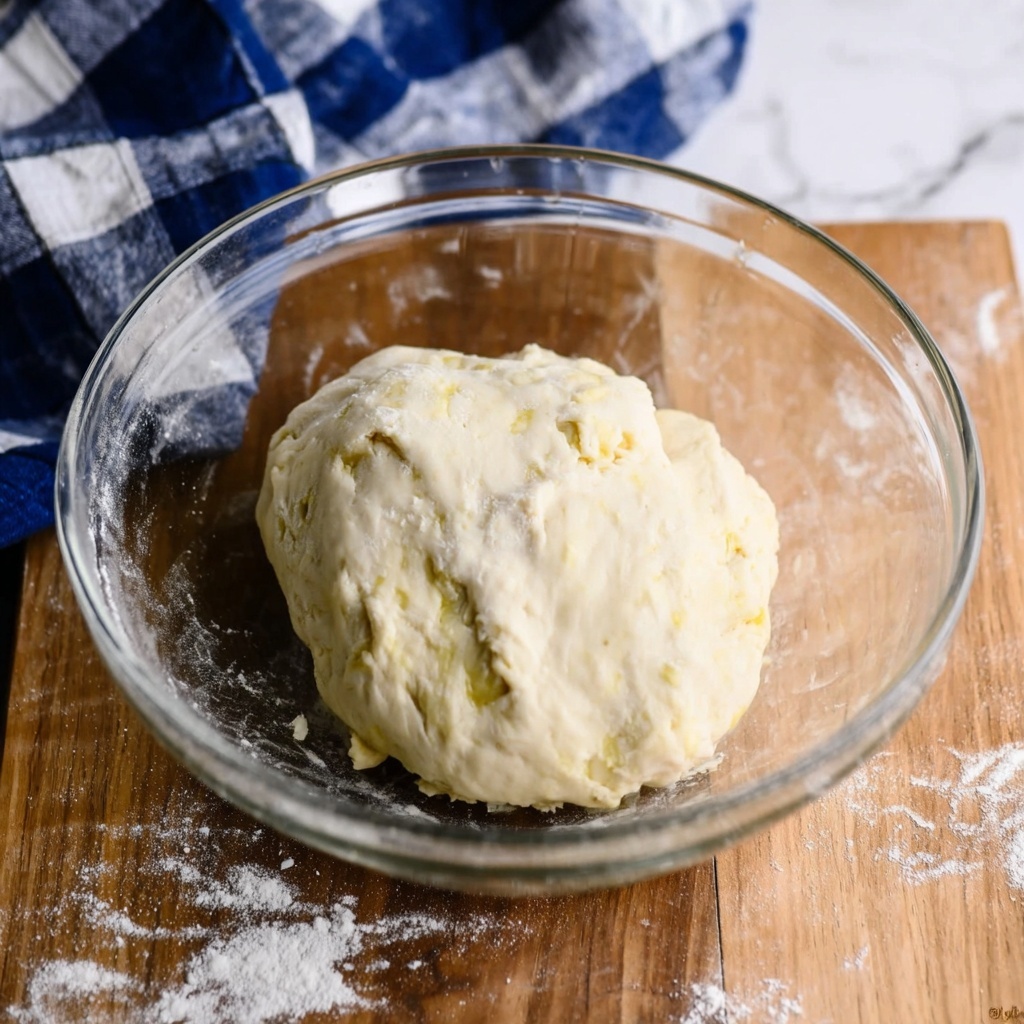
Step 6: Punch and Divide
When your dough has doubled in size and looks puffy, punch it down with joy and split it into two balls for 12-inch pizzas—feel free to make three balls if you prefer thinner crusts. Let the dough rest again for 5 to 20 minutes, covered, so it relaxes and is easy to roll out.
Step 7: Ready for Pizza Time!
Deflate each ball gently, and your Homemade Pizza Dough from Scratch Recipe is officially ready for your favorite toppings. From here, roll it out, add your sauce, cheese, and all your delicious fixings. Don’t forget to check out my Easy Pizza Sauce Recipe and complete Homemade Pizza Recipe for expert baking tips!
Step 8: Overnight and Freezing Tips
If you want to plan ahead, you can place the kneaded dough directly in the fridge overnight to develop flavor slowly—just punch it down and bring it to room temperature before using. To freeze, portion into balls, seal tightly in ziplock bags, and freeze for up to three months. When ready, thaw completely and allow a restful rise so it bounces back just right.
How to Serve Homemade Pizza Dough from Scratch Recipe
Garnishes
Once your pizza crust is baked to golden perfection, the toppings go far beyond the usual. Fresh basil leaves, a drizzle of extra virgin olive oil, or a sprinkle of flaky sea salt can transform your pizza into an elevated experience. Don’t shy away from bold cheeses like fontina or dollops of ricotta for creamy contrast.
Side Dishes
A crisp arugula salad tossed in lemon vinaigrette or a tangy tomato bruschetta makes a perfect companion to your pizza. Roasted vegetables or a simple antipasto platter also add variety and balance the richness of the crust and cheese.
Creative Ways to Present
Try folding slices into loaded calzones or making bite-sized pizza pinwheels for parties and snacks. You can also bake smaller, individual pizzas on pita or flatbread bases using this dough recipe for a quick-fix crowd-pleaser. The versatility of this dough truly shines!
Make Ahead and Storage
Storing Leftovers
If you happen to have leftover dough after pizza night, wrap it tightly in plastic wrap and store it in the fridge for up to 3 days. Keep it sealed to prevent drying out and use it for quick breads, focaccia, or even everyday flatbreads.
Freezing
To freeze dough, portion it into individual balls, seal in airtight freezer bags to avoid freezer burn, and store for up to three months. When you’re ready, simply thaw in the fridge overnight and allow to rest at room temperature before shaping and baking.
Reheating
Leftover baked pizza is best reheated on a skillet or in the oven to maintain that delightful crust crispness. For dough, always allow it to come to room temperature and rise if needed before baking again for the best texture.
FAQs
Can I use all-purpose flour instead of bread flour?
Absolutely! All-purpose flour works well, though your crust might be slightly less chewy. Mixing in some “00” flour or bread flour can also boost texture if you want to experiment.
Do I need to use the sponge step?
The sponge step is optional but highly recommended if you have time. It develops flavor and gives the dough a lovely airy texture, but skipping it will still result in a tasty crust.
What if my dough is too sticky to handle?
Just dust your hands and work surface with a bit of flour as you knead or shape. Add flour gradually but avoid making the dough stiff, which leads to a tough crust.
How long can I let the dough rise?
The longer the rise, the more complex the flavor and better texture. Anywhere from 20 minutes to 8 hours works, but for the best results, aim for at least 1 to 2 hours in a warm spot.
Can I make dough ahead and freeze it?
Definitely! This recipe freezes beautifully. Portion it before freezing, then thaw and rest before baking. You’ll save time but still get fresh, flavorful dough when needed.
Final Thoughts
There is nothing quite as rewarding as pulling a hot, golden pizza fresh out of the oven made from your own Homemade Pizza Dough from Scratch Recipe. It invites creativity, saves you money, and tastes so much better than store-bought dough. Give it a try—you’ll be amazed at how easy and delicious homemade pizza can be. Your kitchen will smell incredible, and your friends and family will thank you again and again!
Print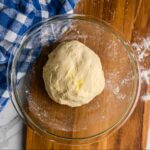
Homemade Pizza Dough from Scratch Recipe
- Prep Time: 15 minutes
- Cook Time: N/A
- Total Time: Variable (minimum 35 minutes including rise time, up to several hours depending on rising)
- Yield: 2 (12-inch) pizzas
- Category: Bread/Dough
- Method: No-Cook
- Cuisine: Italian
Description
This homemade pizza dough recipe yields two 12-inch pizzas with a soft, elastic, and slightly sticky dough perfect for a flavorful and textured crust. The dough can be prepared using an optional sponge method for enhanced flavor, or the straight method for convenience. It includes tips for kneading, rising, and storage options including overnight refrigeration and freezing.
Ingredients
Main Ingredients
- 1 & 1/2 cups warm water (between 105–110 degrees F)
- 2 & 1/4 teaspoons active dry yeast (one 1/4 ounce packet)
- 1 tablespoon granulated sugar
- 2 teaspoons kosher salt
- 3 tablespoons olive oil
- 3 & 3/4 cups bread flour, or all-purpose flour, or half bread flour and half “00” flour
Instructions
- Activate Yeast: Add the warm water to a large bowl or stand mixer. Ensure the water temperature is comfortably warm, like a nice bath, between 105-110°F. Add the active dry yeast and sugar, then wait about 3 minutes for the mixture to become foamy, indicating the yeast is active.
- Optional Sponge Step: To enhance flavor, add 1 cup of flour to the yeast mixture and stir. Let it rest uncovered at room temperature for 30 minutes to 3 hours until foamy and fermented. After this, add the remaining ingredients except the salt, olive oil, and remaining flour. You may need to add extra flour slightly for workable dough.
- Straight Method: If skipping the sponge step, add the kosher salt, olive oil, and all the flour (adding 1 cup at a time) directly to the bubbly yeast mixture.
- Knead the Dough: Knead the dough for 5 minutes using a stand mixer with a dough hook or approximately 7 minutes by hand on a floured surface until smooth, elastic, slightly sticky, and soft. Add more flour if dough is too sticky and doesn’t form a ball.
- First Rise: Shape the dough into a ball and place it in a large greased bowl, turning to coat the top. Cover with a tea towel or plastic wrap and let rise in a warm environment, like an oven warmed to 350°F briefly then turned off, for at least 20-30 minutes or up to 8 hours for best flavor development.
- Punch Down and Divide: Once risen, punch down the dough to release gas and divide into two balls for two 12-inch pizzas (or three balls for thinner crusts). Place on a greased or floured surface, cover, and let rest for 5-20 minutes.
- Prepare for Use: Deflate each ball gently with your hands. The dough is now ready to be rolled out and used according to your preferred pizza baking method.
- Overnight Refrigeration: After kneading, place dough in a covered bowl or sealed gallon ziplock bag and refrigerate overnight. Before use, punch down and let rest at room temperature for 1-2 hours.
- Freezing Dough: Divide dough into two balls and place each in labeled ziplock bags. Freeze up to 3 months. Thaw in the refrigerator or at room temperature for 1-2 hours before using. Warm water bath thawing is an optional quick method.
Notes
- Use warm water between 105-110°F to avoid killing the yeast.
- The optional sponge step improves flavor but can be skipped for quicker preparation.
- Adjust flour slightly as needed to achieve a soft, slightly sticky dough; avoid too much flour to keep crust tender.
- Longer rising times develop more complex flavors and better texture.
- Use olive oil to enhance dough elasticity and flavor.
- The dough can be refrigerated overnight for convenience and flavor or frozen for up to three months.
- Always allow refrigerated or frozen dough to rest at room temperature before rolling out.
- For thinner crusts, divide dough into three balls instead of two.


