
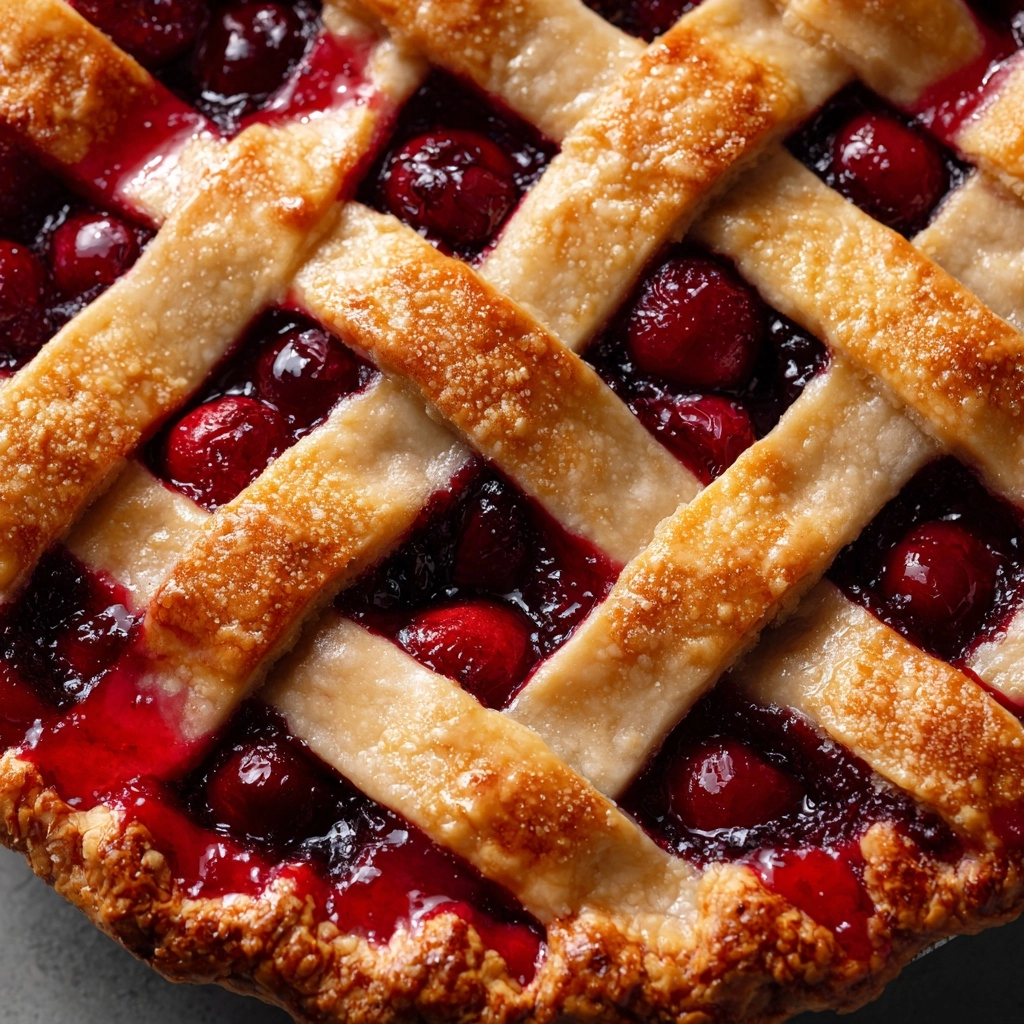
There is something truly magical about a classic cherry pie straight from the oven, bubbling with juicy cherries and wrapped in flaky, golden crust. This Homemade Cherry Pie Recipe captures that nostalgic feeling with a perfect balance of sweetness, subtle almond notes, and a luscious texture that melts in your mouth. Whether it’s a cozy family gathering or a special treat for yourself, this recipe will quickly become your go-to for a timeless and satisfying dessert that celebrates the vibrant flavor of cherries in every bite.
Ingredients You’ll Need
Every ingredient in this recipe plays a crucial role in elevating the final result, from the fresh cherries that offer natural brightness to the cornstarch that thickens the luscious filling. These simple pantry staples come together to create an irresistible pie that tastes like it took hours to perfect, but is wonderfully straightforward to make.
- Fresh or frozen pitted cherries (2 1/4 pounds): The star of the show, juicy cherries bring vibrant color and tart-sweet flavor.
- Granulated sugar (1 cup): Sweetness that balances the cherry tartness perfectly; increase if using tart cherries.
- Cornstarch (1/4 cup): Adds the essential thickening that creates that perfect pie filling texture.
- Lemon juice (1 tablespoon): Brightens the flavors and adds a subtle zing to the filling.
- Almond extract (1/4 teaspoon): A hint of nutty warmth that enhances the cherry flavor beautifully.
- Salt (1/4 teaspoon): Just a pinch to balance and deepen the sweetness.
- Butter (2 tablespoons, cut into small pieces): Dotting the filling with butter gives richness and creates a silky finish.
- Refrigerated double pie crusts (1 package) or homemade crust: The flakiest base and top that turn golden and crisp.
- Egg (1, beaten): Provides a shiny, golden egg wash glaze for an irresistible crust.
- Coarse sugar (1 tablespoon, optional): Adds a sparkly, crunchy touch on top for extra texture and sweetness.
How to Make Homemade Cherry Pie Recipe
Step 1: Prepare the Cherry Filling
Start by preheating your oven to 425°F (220°C). If you’re using frozen cherries, make sure to thaw and drain them well to prevent excess water from watering down the filling. In a large saucepan set over medium heat, toss together your cherries, granulated sugar, cornstarch, lemon juice, almond extract, and salt. Cooking this mixture for 10 to 15 minutes, stirring often, will allow the filling to thicken up and develop a glossy sheen that signals it’s just right. Let the filling cool slightly before the next step—this will help it set nicely in your pie.
Step 2: Prepare the Pie Crust
While the filling cools, roll out one of your pie crusts and carefully fit it into a 9-inch pie dish. This crust forms the sturdy, buttery base that holds all the luscious cherry filling. Make sure to press gently into the edges for a smooth, even base without stretching the dough.
Step 3: Fill and Dot with Butter
Pour your cooled cherry filling into the crust, spreading it evenly. Then, dot the filling with those small pieces of butter, which will melt into the hot cherries, enriching every spoonful with luxurious creaminess.
Step 4: Create the Top Crust
Now, roll out the second crust. You have two delightful options here—cover the pie fully with the entire crust and seal the edges by trimming and crimping, or get creative and cut the top crust into strips to build a classic lattice pattern. Whichever you choose, finishing touches on the edges make a difference for bake time and overall appearance.
Step 5: Egg Wash and Sugar Sprinkle
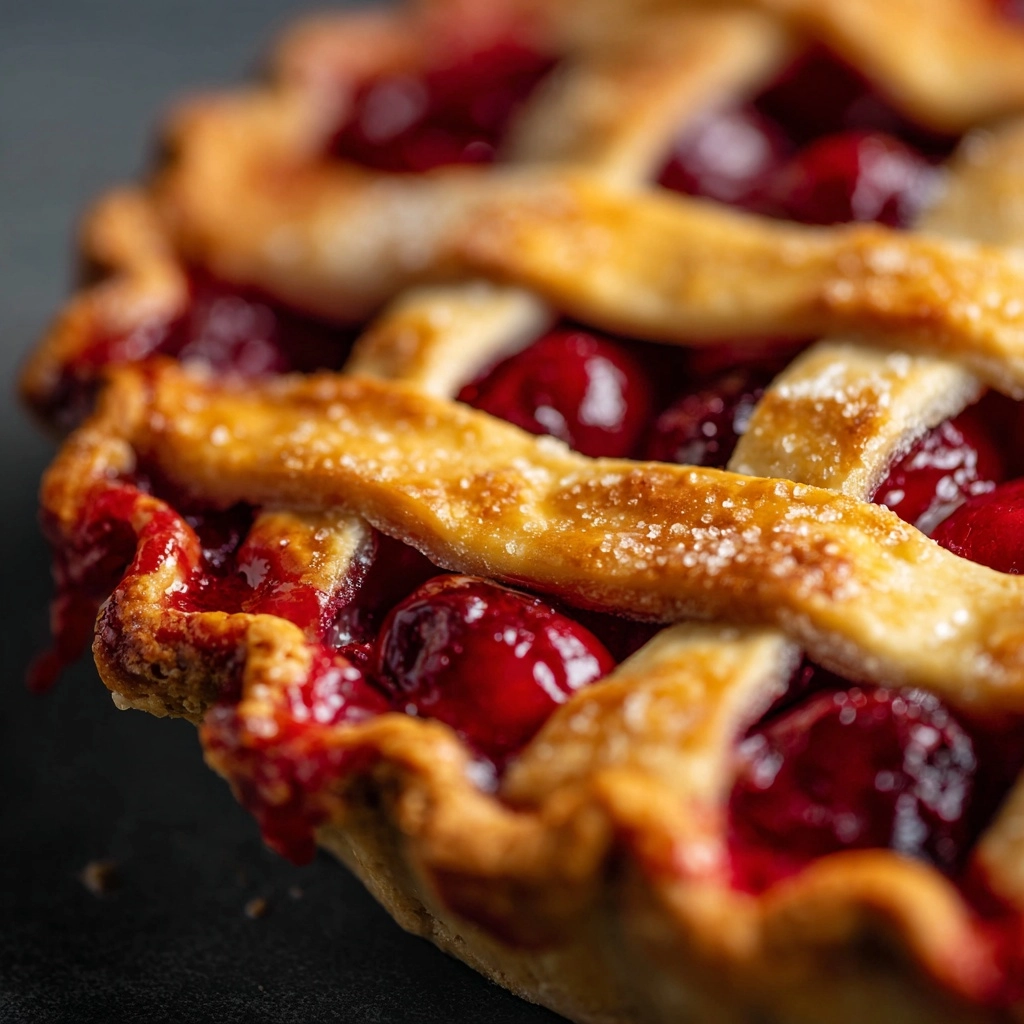
Brush the top crust with your beaten egg to develop a beautiful golden-brown color as the pie bakes. If you want to elevate that with a bit of sparkle and extra crunch, sprinkle lightly with coarse sugar. This makes the pie sparkle as if it’s straight from a bakery window.
Step 6: Bake the Pie
Place your pie on a baking sheet to catch any drips, then bake in the preheated oven at 425°F for 20 minutes. After this, reduce the oven temperature to 375°F (190°C) and bake for an additional 35 to 40 minutes. The crust should turn golden brown, and the filling should be bubbling—signaling that your Homemade Cherry Pie Recipe is nearly ready to enjoy. Allow it to cool completely before slicing to let the filling set beautifully.
How to Serve Homemade Cherry Pie Recipe
Garnishes
A dollop of freshly whipped cream or a scoop of vanilla ice cream is the perfect partner for warm cherry pie. The cool, creamy texture contrasts wonderfully with the tart cherries and flaky crust, creating a perfectly balanced bite. A light dusting of powdered sugar or a few toasted almonds on top can also add a lovely finishing touch.
Side Dishes
If you are serving this pie at a dinner party or family gathering, consider pairing it with fresh fruit salad or a simple mixed greens salad with a light vinaigrette to refresh the palate. A cup of strong coffee or a fruity herbal tea complements the flavors nicely without overpowering the dessert.
Creative Ways to Present
To really impress, serve individual mini cherry pies or tartlets for a charming single-serving treat. Alternatively, create cherry pie parfaits by layering pie filling and crushed crust with whipped cream in clear glasses for a beautiful and less traditional presentation that everyone will love.
Make Ahead and Storage
Storing Leftovers
Your Homemade Cherry Pie Recipe tastes fantastic even the next day. Store leftover pie at room temperature if you plan to eat it within two days, or cover and refrigerate it for up to four days. Keep it loosely covered to preserve crust crispness while allowing the filling to breathe.
Freezing
If you want to enjoy this pie much later, you can freeze the fully baked pie after it has cooled completely. Wrap it tightly in plastic wrap and foil to prevent freezer burn, then store it for up to two months. Thaw overnight in the fridge before reheating for best results.
Reheating
When you’re ready to enjoy your pie again, heat slices in a 350°F (175°C) oven for 10 to 15 minutes, or until warmed through and the crust re-crisps. Avoid the microwave if possible, as it can make the crust soggy and dull the beautiful texture.
FAQs
Can I use frozen cherries instead of fresh?
Absolutely! Frozen cherries work wonderfully and are often more convenient. Just be sure to thaw and drain them completely to avoid a watery filling.
What can I substitute for almond extract?
If you don’t have almond extract, vanilla extract is a great alternative that still complements the cherries nicely without overpowering their flavor.
How do I prevent a soggy bottom crust?
Baking your pie on the lower oven rack and using a glass or ceramic pie dish helps the crust cook evenly and stay crisp. Also, properly draining cherries and thickening with cornstarch will reduce excess moisture.
Can I make the pie crust from scratch?
Of course! Homemade pie crust adds an extra layer of love and flavor, and many find it worth the extra effort. Just be sure to chill your dough before rolling out for best results.
How long does this pie keep fresh?
When stored properly in the fridge, this cherry pie stays fresh and delicious up to four days. For longer storage, freezing is your best option.
Final Thoughts
This Homemade Cherry Pie Recipe is a delightful way to bring joy and nostalgia to your table, with every slice bursting with fresh cherry goodness and that coveted flaky crust. I encourage you to give it a try—you’ll find it’s easier than you think, and the warm smiles it brings around the table make all the effort worthwhile. Bake one today and experience the sweet magic yourself!
Print
Homemade Cherry Pie Recipe
- Prep Time: 30 minutes
- Cook Time: 1 hour
- Total Time: 1 hour 30 minutes
- Yield: 8 servings
- Category: Dessert
- Method: Baking
- Cuisine: American
- Diet: Vegetarian
Description
This classic homemade cherry pie features a luscious, glossy cherry filling made from fresh or frozen cherries, perfectly spiced with almond extract and lemon juice, all encased in a flaky, golden double crust. Ideal for summer dessert cravings or any festive occasion, this pie balances sweet and tart flavors with a rich, buttery crust.
Ingredients
Filling
- 2 1/4 pounds fresh or frozen pitted cherries (about 5 cups)
- 1 cup granulated sugar
- 1/4 cup cornstarch
- 1 tablespoon lemon juice
- 1/4 teaspoon almond extract
- 1/4 teaspoon salt
- 2 tablespoons butter (cut into small pieces)
Crust and Topping
- 1 package refrigerated double pie crusts (or homemade)
- 1 egg (beaten, for egg wash)
- 1 tablespoon coarse sugar (optional, for sprinkling)
Instructions
- Preheat Oven: Preheat your oven to 425°F (220°C) to prepare for baking the pie.
- Prepare Cherries: If using frozen cherries, thaw and drain them thoroughly to prevent excess moisture in the pie.
- Cook Filling: In a large saucepan over medium heat, combine the cherries, granulated sugar, cornstarch, lemon juice, almond extract, and salt. Cook, stirring frequently, for 10–15 minutes until the mixture thickens and becomes glossy. Remove from heat and let it cool slightly.
- Prepare Pie Crust: Roll out one pie crust and place it into a 9-inch pie dish, shaping it to fit snugly.
- Add Filling: Pour the cooled cherry filling into the prepared crust and dot the top with small pieces of butter for added richness.
- Top Crust: Roll out the second crust and either place it whole over the filling or cut it into strips to create a lattice pattern. Trim the excess crust and crimp the edges to seal the pie securely.
- Egg Wash and Sugar: Brush the top crust with the beaten egg to promote browning and shine, then sprinkle with coarse sugar if desired for extra crunch and sweetness.
- Bake Pie: Place the pie on a baking sheet to catch drips and bake at 425°F (220°C) for 20 minutes. Then reduce the temperature to 375°F (190°C) and continue baking for an additional 35–40 minutes until the crust is golden brown and the filling is bubbly.
- Cool and Serve: Allow the pie to cool completely before slicing to let the filling set properly for clean slices and optimal flavor.
Notes
- If using tart cherries, increase the sugar to 1 1/4 cups to balance the tartness.
- To prevent a soggy bottom crust, bake the pie on the lower oven rack and use a glass pie plate if available.
- This pie can be made a day in advance and stored at room temperature or refrigerated for convenience.


