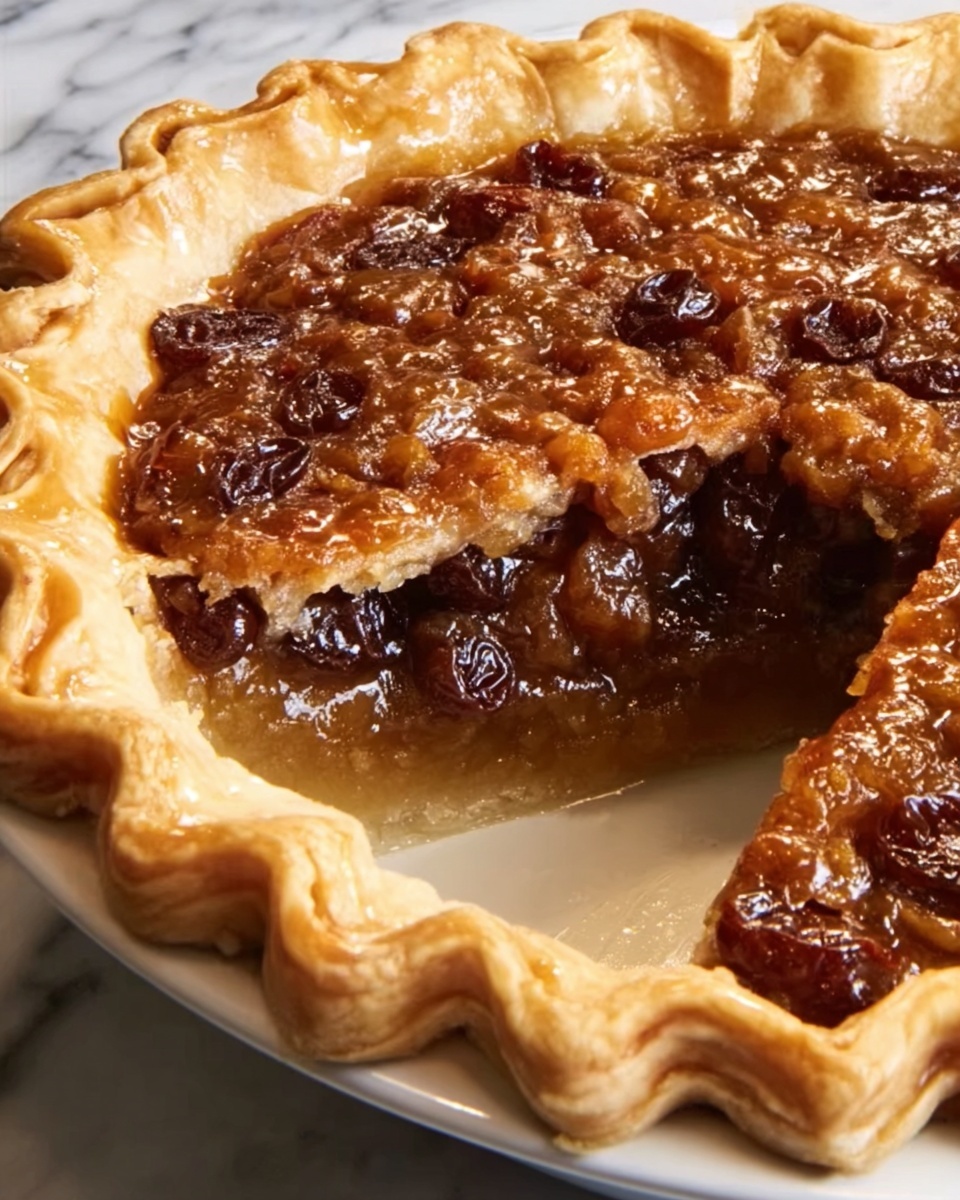
There is something truly heartwarming about a dessert that carries the flavors of tradition and nostalgia, and Grandma’s Old Fashioned Raisin Pie Recipe does exactly that. This pie is a perfect harmony of sweet, tender raisins soaked to perfection, a luscious, cinnamon-kissed filling, and a buttery, flaky crust that wraps it all up like a warm hug from the past. If you’re craving a slice of comfort and a taste of something timeless, this pie is an absolute must-try that celebrates classic homemade goodness in every bite.
Ingredients You’ll Need
Gathering the ingredients for this pie is wonderfully straightforward, but don’t let that fool you—the simplicity here is key to delivering flavor layers that sing together. Each element, from the juicy raisins to the pinch of cinnamon, plays a crucial role in creating the texture, sweetness, and warmth that make this recipe unforgettable.
- 4 cups water: Essential for plumping up those raisins to juicy perfection.
- 4 cups raisins: The star of the show, bringing natural sweetness and chewy texture.
- 1 cup light brown sugar: Adds deep, caramel notes that give the filling richness.
- 5 tablespoons cornstarch: This thickens the filling just right, making it glossy and sliceable.
- 1/2 teaspoon cinnamon: Offers a warm spice that complements the sweetness beautifully.
- 1/2 teaspoon salt: Balances the flavors and enhances the overall taste.
- 2 teaspoons lemon juice: Lifts the filling with a bright tang, cutting through sweetness.
- 3 tablespoons butter (not margarine): Adds richness and a silky finish to the filling.
- 1 teaspoon vanilla extract: Brings a fragrant warmth that ties all the flavors together.
- 2, 9-inch deep dish pie shells: The buttery casing that holds your beautiful raisin treasure.
How to Make Grandma’s Old Fashioned Raisin Pie Recipe
Step 1: Prepare the Raisins
Start by combining the raisins and water in a medium-sized pot. Bring this mixture to a boil, then let it simmer for about 5 minutes. This soaking step is wonderful because it plumps the raisins, making them tender and juicy, creating the perfect base for your pie’s luscious filling.
Step 2: Make the Filling Mixture
While the raisins are soaking, mix the light brown sugar, cornstarch, cinnamon, and salt in a separate bowl. This blend of dry ingredients not only sweetens but will also thicken your filling while adding a warm spice kick that’s utterly comforting.
Step 3: Combine and Cook the Filling
Gradually stir your brown sugar-cornstarch-spice blend into the hot pot of raisins, making sure to mix well. Cook this mixture, stirring often, until the syrup thickens into a glossy, bubbling consistency. Once it’s just right, remove the pot from heat and stir in the lemon juice, butter, and vanilla extract. These additions give the filling a bright, creamy, and aromatic finish. Let the mixture cool slightly to make handling easier when assembling the pie.
Step 4: Assemble the Pie
Pour your cooled raisin filling into one of the prepared pie shells, making sure it’s evenly distributed. This is where the magic of Grandma’s recipe really shows—an inviting filling waiting to be encased in a golden crust.
Step 5: Top and Seal the Pie
Carefully remove the crust from the second pie shell and gently lay it atop the filled pie. Seal the edges by pinching the crusts together to keep that delicious filling tucked inside. Don’t forget to cut a few small slits in the top crust to allow steam to escape while baking. This step ensures a perfectly baked pie with a beautiful, rustic look.
Step 6: Bake to Perfection
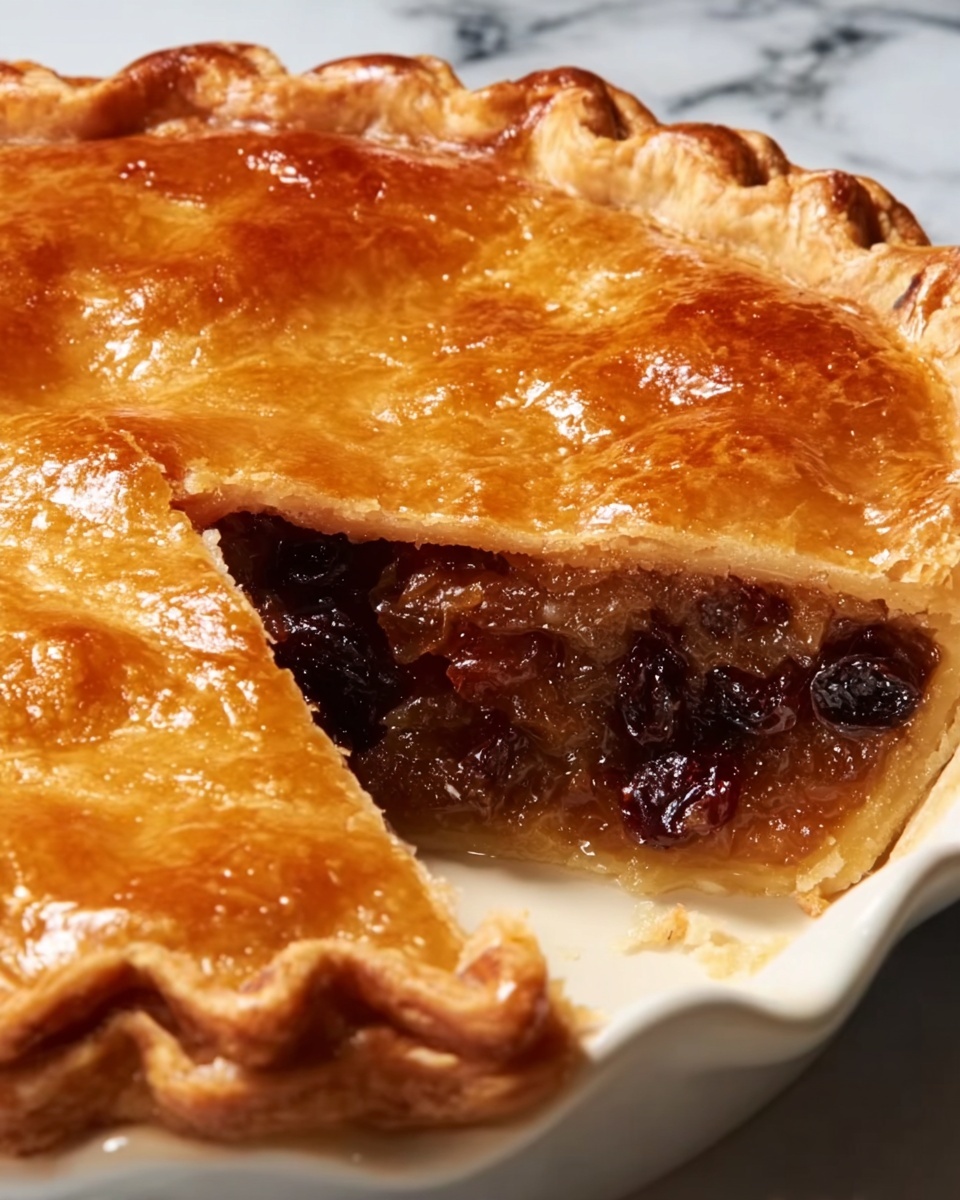
Place your pie in a preheated oven at 425°F (220°C) and bake for 30 to 35 minutes. Keep an eye on that crust—when it’s golden brown and flaky, and the filling is bubbling through the slits, your pie is ready. The oven’s high heat helps achieve that irresistible crunch and perfectly cooked filling just like Grandma used to make.
How to Serve Grandma’s Old Fashioned Raisin Pie Recipe
Garnishes
A slice of this pie speaks for itself, but a scoop of vanilla ice cream or a dollop of freshly whipped cream turns each bite into an indulgent celebration. Sprinkle a little ground cinnamon on top for extra warmth and aroma, or add a few toasted pecans for a crunchy contrast.
Side Dishes
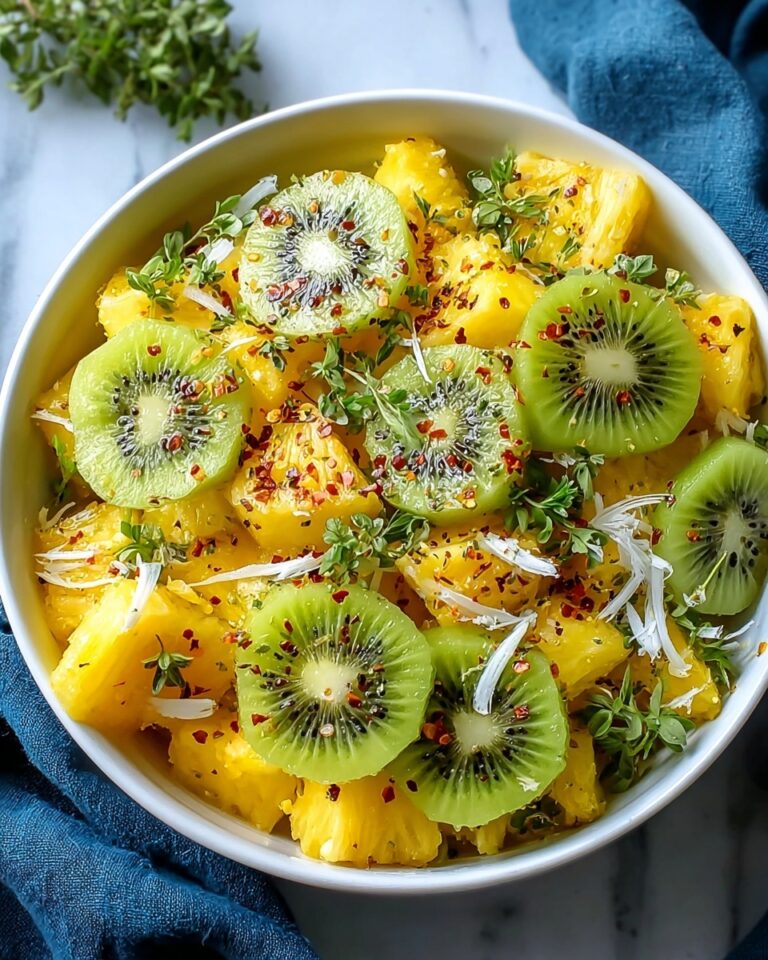
This raisin pie pairs beautifully with a light cup of coffee or tea, allowing the pie’s complex sweetness to shine. For something more substantial, consider serving it alongside a fresh fruit salad or a simple green salad with citrus vinaigrette to balance the richness on your palate.
Creative Ways to Present
Serve slices with a drizzle of honey or warm caramel sauce poured over the top for added decadence. You can also cut mini versions of this pie in ramekins for personalized treats at gatherings, making everyone feel like they’re enjoying a special slice of Grandma’s love.
Make Ahead and Storage
Storing Leftovers
If you have any leftovers, store them tightly covered in the refrigerator. The pie holds beautifully for up to 4 days, and the flavors often deepen with time, making each subsequent slice even more delightful.
Freezing
To freeze the pie, wrap it tightly in plastic wrap and then in aluminum foil to prevent freezer burn. It will keep well for up to 2 months. When ready to enjoy, thaw it overnight in the fridge before reheating to maintain its lovely texture.
Reheating
Reheat slices gently in a preheated oven at 350°F (175°C) for 10-15 minutes or until warmed through. This helps keep the crust crisp and brings the filling back to that fresh-baked goodness.
FAQs
Can I use golden raisins instead of regular raisins?
Absolutely! Golden raisins will impart a slightly different flavor and a lighter color, but they work wonderfully in this pie and may add a lovely fruity brightness.
Do I need to prebake the pie crusts?
No need to prebake! The filling cooks thoroughly inside the pie, and baking both crusts together ensures the perfect flaky texture and that deep dish experience Grandma intended.
Can I substitute lemon juice with something else?
You can use a mild vinegar like apple cider vinegar, but lemon juice offers the freshest, most natural brightness that balances the sweetness best, so it’s worth sticking with if possible.
What is the best way to prevent a soggy bottom crust?
Using deep dish pie shells helps, and ensuring the filling isn’t too wet by properly cooking and thickening before assembly will prevent sogginess. Also, baking at a higher temperature helps crisp the crust quickly.
Is it okay to use margarine instead of butter in the filling?
For the best flavor and texture, stick to real butter. Margarine can change the taste and richness of the filling, and butter gives that authentic, creamy finish that makes this pie so memorable.
Final Thoughts
Grandma’s Old Fashioned Raisin Pie Recipe is more than just a dessert—it’s a warm, comforting slice of heritage that invites you to slow down, savor, and connect with simpler times. Whether you’re making it for family gatherings or a weekend treat, this pie delivers joy in every bite, reminding us why some recipes truly stand the test of time. I can’t wait for you to try it and create your own sweet memories!
Print
Grandma’s Old Fashioned Raisin Pie Recipe
- Prep Time: 15 minutes
- Cook Time: 40 minutes
- Total Time: 55 minutes
- Yield: 1, 9-inch pie (approximately 8 servings)
- Category: Dessert
- Method: Baking
- Cuisine: American
Description
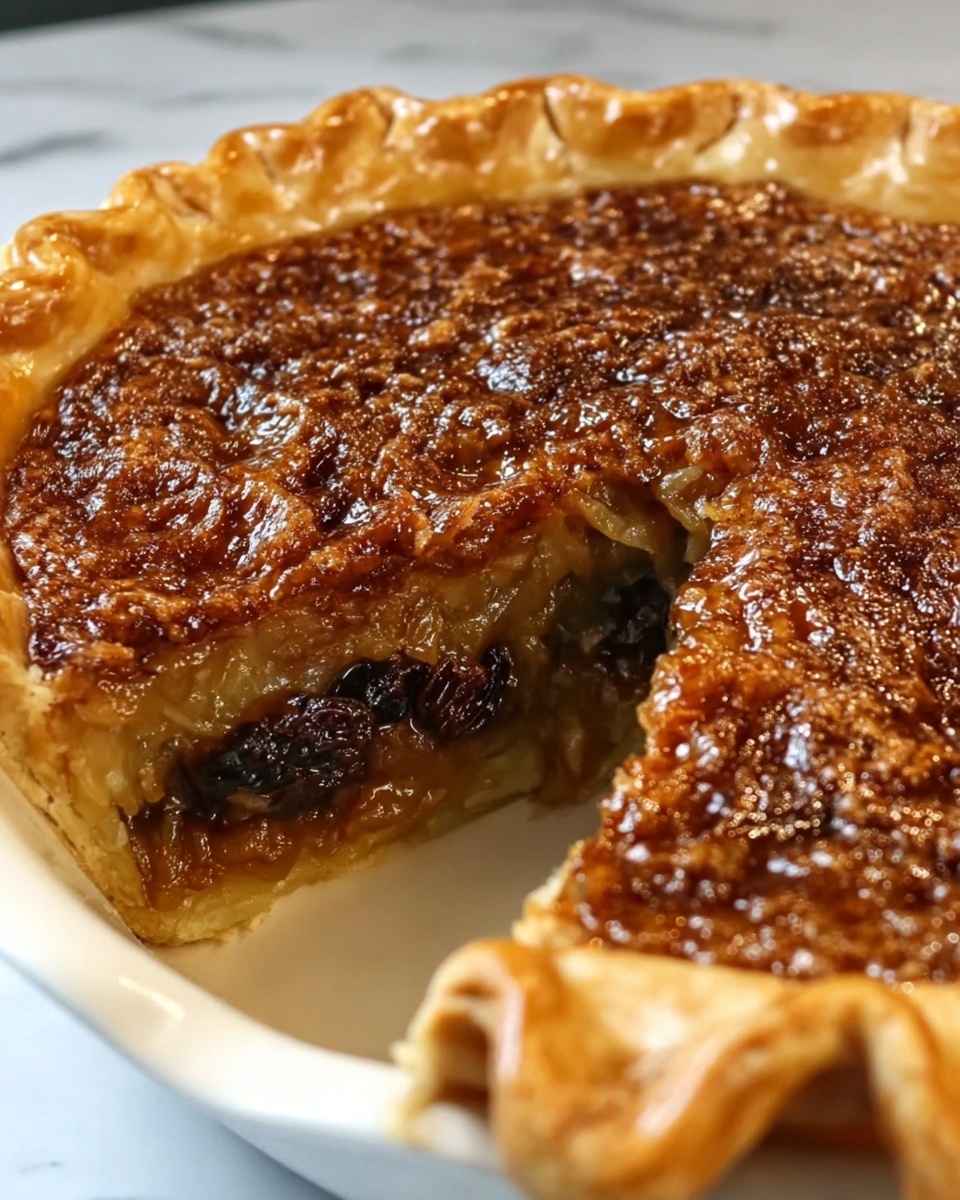
Grandma’s Old Fashioned Raisin Pie is a nostalgic dessert featuring a sweet and spiced raisin filling cooked to perfection inside a flaky double crust. This classic pie combines the rich flavors of cinnamon, lemon, and vanilla for a comforting treat that serves approximately 8 people.
Ingredients
Filling Ingredients
- 4 cups water
- 4 cups raisins
- 1 cup light brown sugar
- 5 tablespoons cornstarch
- 1/2 teaspoon cinnamon
- 1/2 teaspoon salt
- 2 teaspoons lemon juice
- 3 tablespoons butter (not margarine)
- 1 teaspoon vanilla extract
Pie Crust
- 2, 9-inch deep dish pie shells
Instructions
- Prepare the Raisins: Combine 4 cups of raisins and 4 cups of water in a medium pot. Bring the mixture to a boil over medium-high heat and cook for 5 minutes to plump the raisins and infuse flavor into the water.
- Make the Filling: In a separate bowl, blend together 1 cup light brown sugar, 5 tablespoons cornstarch, 1/2 teaspoon cinnamon, and 1/2 teaspoon salt. Gradually stir this dry mixture into the hot raisin-water mixture to combine evenly.
- Cook and Thicken the Syrup: Return the mixture to a simmer and cook while stirring constantly until the syrup thickens significantly. Remove the pot from heat, then stir in 2 teaspoons lemon juice, 3 tablespoons butter, and 1 teaspoon vanilla extract. Let the filling cool slightly to thicken further and prevent soggy crust.
- Assemble the Pie: Pour the warm raisin filling evenly into one of the 9-inch deep dish pie shells.
- Top the Pie: Remove the crust from the second pie shell and gently place it over the filled pie. Seal the edges by pinching them together carefully, then cut a few slits in the top crust to allow steam to escape during baking.
- Bake: Preheat your oven to 425°F (220°C). Place the pie on a middle rack and bake for 30 to 35 minutes or until the crust turns golden brown and the filling is bubbly and set. Remove from oven and let cool before serving.
Notes
- Use unsalted butter to better control the salt levels in the pie.
- Ensure the filling cools slightly before adding the top crust to avoid a soggy pie crust.
- The slits on top of the crust are essential for steam release and to prevent the pie from bursting.
- Serve with vanilla ice cream or whipped cream for an extra special treat.
- Leftover pie can be stored covered in the refrigerator for up to 3 days.


