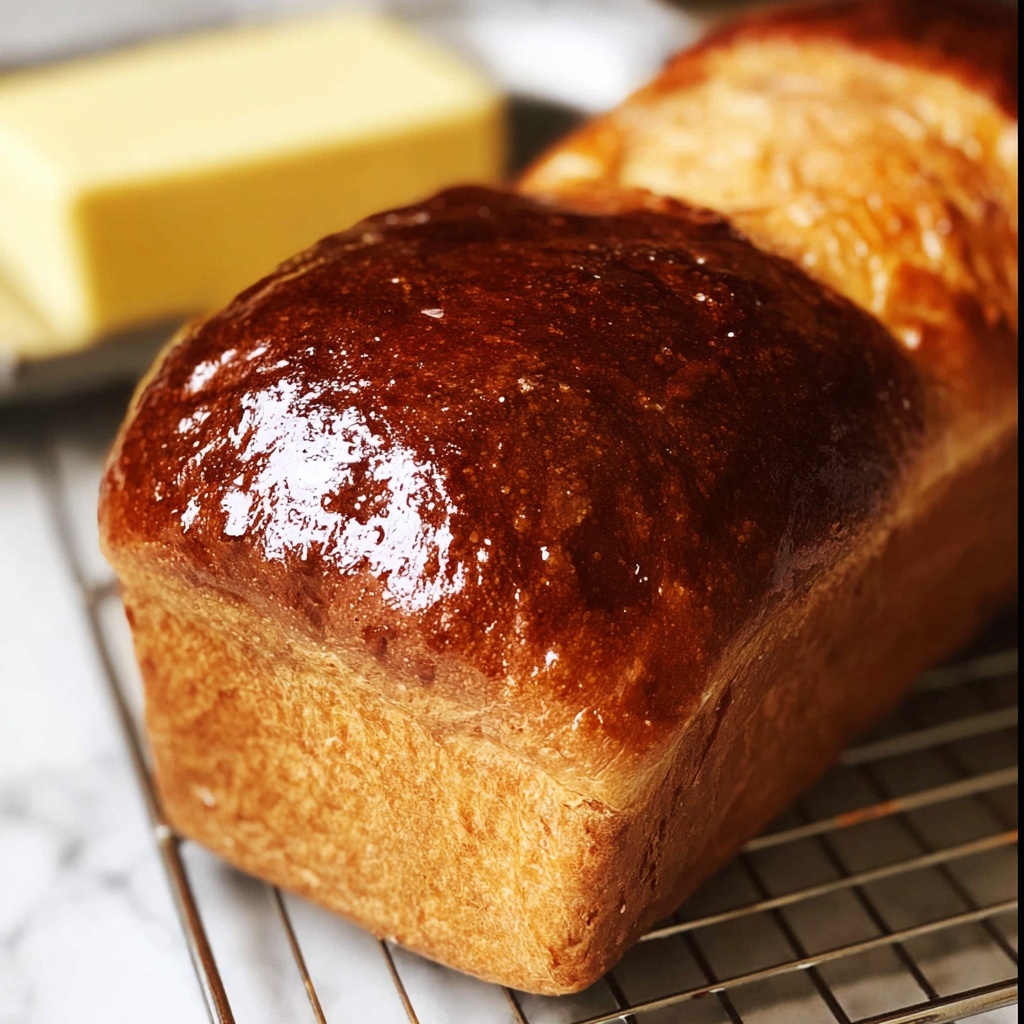
If you’ve ever dreamed of baking a bread that combines deep, hearty flavors with a tender crumb and a touch of nostalgia, look no further than Grandma Prudy’s Classic Rye Bread Recipe. This cherished family recipe yields slices packed with the subtle sweetness of molasses, the bright pop of caraway seeds, and the unmistakable rich earthiness of rye flour. It’s an absolutely delightful loaf that transforms simple ingredients into a loaf so inviting you’ll want to share slices with everyone you know. Whether you’re a seasoned bread maker or a beginner ready to tackle your first rye, Grandma Prudy’s Classic Rye Bread Recipe is the perfect place to start your baking journey.
Ingredients You’ll Need
Every great loaf of bread begins with the basics, and Grandma Prudy’s Classic Rye Bread Recipe couldn’t be simpler. Each ingredient plays a key role — from the active yeast that wakes up your dough, to the rye flour that lends its signature flavor and color. Together, they create a loaf that’s balanced, aromatic, and irresistibly soft.
- Active dry yeast (1 scant tablespoon): The magical leavening agent that makes the dough rise beautifully.
- Sugar (1 teaspoon plus 1/2 cup): Feeds the yeast and adds just the right touch of sweetness.
- Warm water (1/4 cup plus 2 cups): Activates yeast and hydrates the flours for that perfect dough texture.
- Molasses (2 tablespoons): Delivers a lovely deep flavor and gorgeous color to the bread crust.
- Shortening (2 tablespoons): Adds softness and richness—try butter-flavored Crisco for an extra comforting note.
- Kosher salt (2 teaspoons): Balances sweetness and enhances all the other flavors.
- Caraway seed (1 tablespoon, optional): Imparts that classic rye bread fragrance and subtle crunch.
- Light or dark rye flour (2 cups): The star of the show, providing that signature rye taste and dense crumb.
- Vital wheat gluten (1/4 cup): Keeps the bread tender and helps it rise despite rye’s lower gluten content.
- All purpose flour (3 to 3 ½ cups): Supports the structure for a loaf that’s soft yet sturdy.
- Vegetable or olive oil (for greasing): Prevents sticking without adding heaviness.
- Butter (1/4 cup): For finishing the crust with a melt-in-your-mouth buttery shine.
How to Make Grandma Prudy’s Classic Rye Bread Recipe
Step 1: Activate Your Yeast
Start by stirring together 1 scant tablespoon of active dry yeast with 1 teaspoon sugar and 1/4 cup warm water that’s about the temperature of a cozy bath. Let it sit for 5 minutes so the yeast gets bubbly and lively—that foaming action is your best sign that the yeast is ready to work its magic.
Step 2: Mix the Sweet and Savory Ingredients
Once your yeast is foaming, add 1/2 cup sugar, 2 tablespoons molasses, 2 tablespoons shortening, 2 teaspoons kosher salt, and 1 tablespoon caraway seeds if you like that familiar rye kick. Stir it all together with 2 cups warm water. This creates a wonderfully fragrant foundation for your dough.
Step 3: Combine Your Flours and Gluten
Next, spoon and level 2 cups of rye flour into your bowl, then add 1/4 cup vital wheat gluten. Using a dough hook or wooden spoon, mix gently to combine. The gluten is essential here because rye flour alone doesn’t have enough to give your bread the right structure.
Step 4: Incorporate the All Purpose Flour
Slowly add 3 cups of all purpose flour, one cup at a time, mixing on low speed in between additions. The dough will be sticky — this is perfectly normal for rye bread. Resist the urge to dump in heaps more flour; keeping the dough slightly sticky ensures your bread stays moist and tender.
Step 5: Knead the Dough
Knead the dough gently on medium-low speed for about 7 to 10 minutes. Add up to an extra half cup of all purpose flour if the dough is excessively sticky, but try to keep it minimal. The goal is a dough that clings to the sides of the bowl but doesn’t stick to the bottom. If you don’t have a mixer, a 12-minute hand knead on an oiled surface does the trick just as well.
Step 6: First Rise
Grease a large bowl with vegetable oil and transfer your dough inside, shaping it into a ball. Turn it over a few times so it gets coated evenly in oil. Cover with parchment paper or greased plastic wrap, then place in a warm spot (like your oven warmed briefly then turned off) for about an hour, or until the dough has doubled in size.
Step 7: Second Rise Preparation
Once doubled, punch down the dough, reshape it into a ball, re-grease your bowl, and pop the dough back inside. Cover and let it rise again for another hour until doubled. This second rise improves the bread’s texture and flavor depth dramatically.
Step 8: Shape Your Loaves
Oil your work surface and prepare four 7×4 inch pans with nonstick spray. Divide the dough into four equal pieces. Pat each piece into a rough 7-inch square, then roll up tightly like a cozy little blanket, pinching the dough edges to seal and tucking the ends underneath. Place each roll seam side down into the pans, then cover and let them rise until they crown over the pans by about an inch. This usually takes about 45 minutes.
Step 9: Bake to Perfection
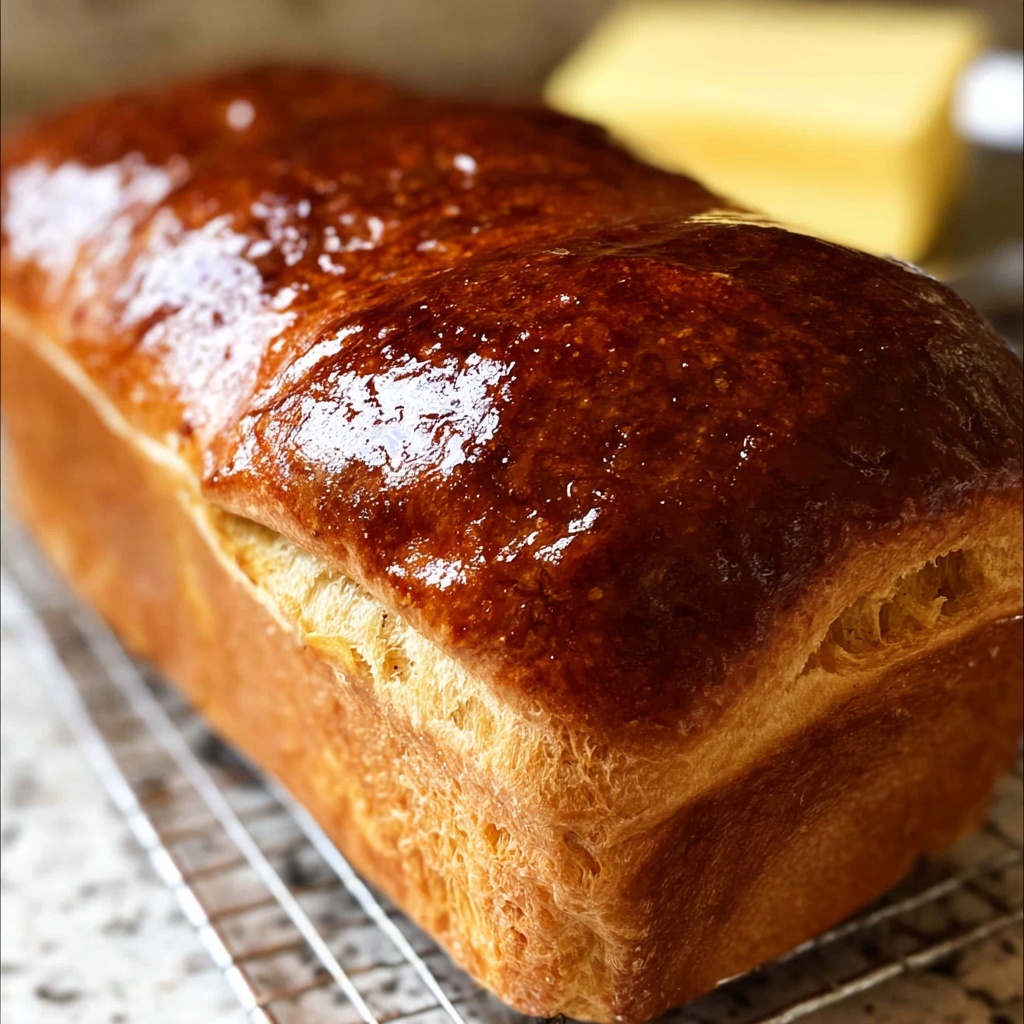
Preheat your oven to 375 degrees F without the bread inside. Then bake for 30-35 minutes (or 40-45 minutes if using larger 9×5 pans). The best way to check doneness is with an instant-read thermometer, which should read 205 degrees F in the center of the bread. If you don’t have one, look for a deep brown crust that may even look a little darker than you expect; rye flour naturally produces a darker crust.
Step 10: Buttered Finish and Cooling
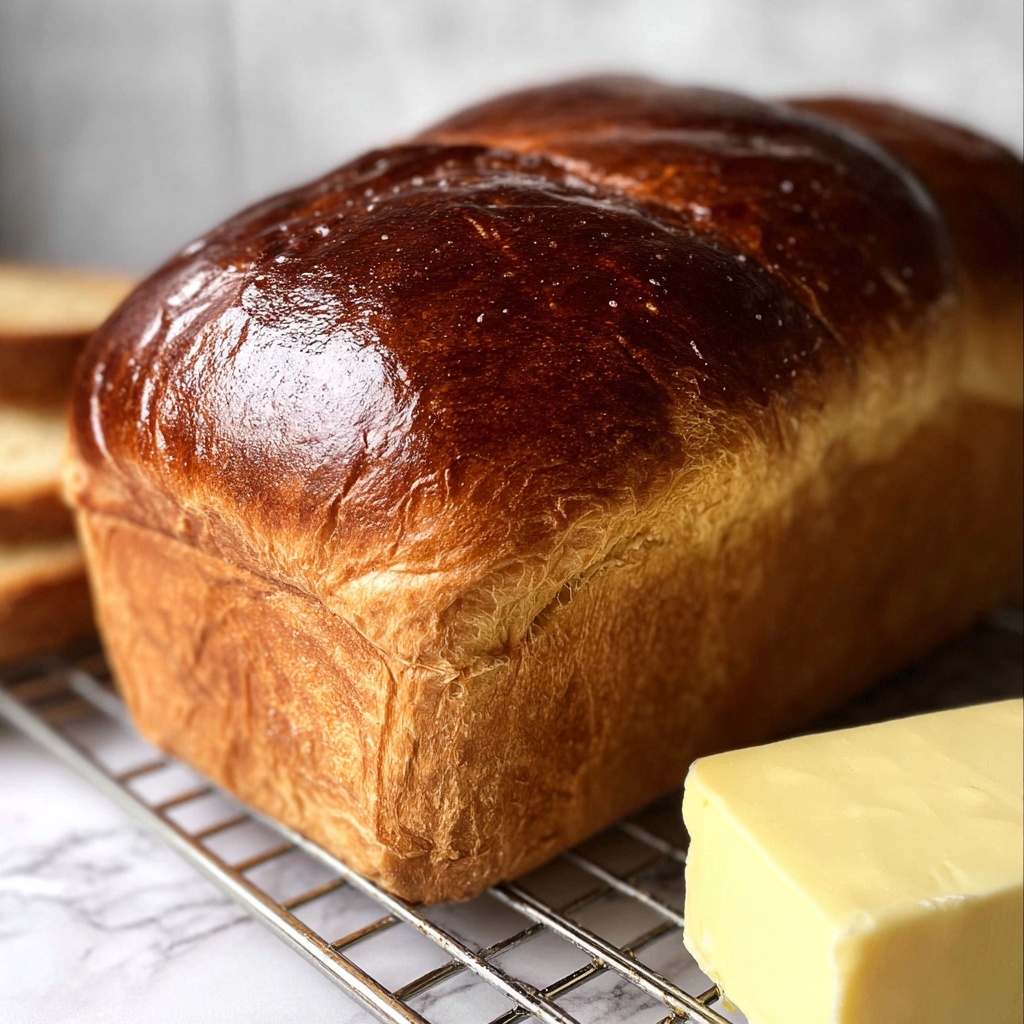
Once out of the oven, rub the warm crust with butter for a glossy, tender finish. Carefully remove the loaves from the pans and place them on their sides on a wire rack to cool for at least 30 to 60 minutes. This step is crucial to avoid crushing your delicate rye crumb. Then slice with a serrated knife, taking those first slices slow and steady.
How to Serve Grandma Prudy’s Classic Rye Bread Recipe
Garnishes
Nothing beats a thick slice of toasted rye bread with a generous slather of butter. For a classic touch, sprinkle a little extra caraway seed on top before toasting. If you’re feeling adventurous, spread a bit of creamy liver pate or tangy mustard for that retro vibe Grandma Prudy would be proud of.
Side Dishes
This rye bread pairs beautifully with hearty stews, cured meats, sharp cheeses, and even sweet jams and preserves. It’s the perfect base for a robust sandwich or a sidekick to your favorite soup on a chilly day.
Creative Ways to Present
Try slicing thin rounds for elegant crostini topped with smoked salmon and dill, or cube it for a rye bread stuffing during holiday dinners. When toasted, the crumb crisps up beautifully, making it a fantastic vehicle for dips or spreads at your next gathering.
Make Ahead and Storage
Storing Leftovers
Once completely cooled, wrap your rye bread slices in a large ziplock bag and store on the counter for up to three days. It’s best to slice as you go because rye bread dries out faster than wheat varieties.
Freezing
If you want to enjoy Grandma Prudy’s Classic Rye Bread Recipe longer, freezing is your best friend. Place the slices or whole loaves in a ziplock bag with as much air pressed out as possible, then freeze for up to three months. This locks in moisture and flavor beautifully.
Reheating
To thaw, leave the bread sealed at room temperature for about an hour. For a quick fix, partially frozen slices go right into the toaster for a perfectly crisp crust and warm crumb. Avoid microwaving for too long or high heat, which can make the bread tough.
FAQs
Can I make this rye bread without a stand mixer?
Absolutely! Kneading by hand on an oiled surface works wonderfully well. It takes a bit more elbow grease, about 10 to 12 minutes, but you’ll develop a deep connection to your dough and love the hands-on experience.
What if my dough doesn’t rise?
If your yeast doesn’t foam during the activation step, your yeast might be dead or the water too hot. Always test yeast in warm water around 105-110 degrees F and start fresh yeast if it doesn’t bubble within 5 minutes.
Can I skip the caraway seeds?
Yes, caraway seeds are optional. They offer a traditional rye flavor note, but the bread will still be delicious without them, especially if you’re not a fan of their licorice-like taste.
Why do I need vital wheat gluten in this recipe?
Rye flour has less gluten, which is essential for bread structure. Adding vital wheat gluten ensures your loaf rises well and has a moist yet springy texture.
Why should I let the bread cool before slicing?
Rye bread is tender and soft, so slicing too soon can crush the loaf and create a gummy texture. Waiting 30 to 60 minutes helps the crumb set perfectly, making slicing easy and giving you that ideal bite.
Final Thoughts
There’s something truly special about the warmth and heartiness infused into each loaf of Grandma Prudy’s Classic Rye Bread Recipe. It’s a bread that carries tradition, comfort, and a rich flavor that only a lovingly made rye can offer. I encourage you to give this recipe a whirl—your kitchen will smell incredible, and your taste buds will thank you. Trust me, once you’ve experienced this classic rye, you’ll want to make it part of your own family’s favorites too.
Print
Grandma Prudy’s Classic Rye Bread Recipe
- Prep Time: 20 minutes
- Cook Time: 30 minutes
- Total Time: 1 hour 50 minutes
- Yield: 40 slices (4 loaves)
- Category: Bread
- Method: Baking
- Cuisine: American
Description
Grandma Prudy’s Rye Bread is a classic, lovingly crafted homemade bread recipe featuring a rich blend of rye and all-purpose flours, molasses, caraway seeds, and a touch of vital wheat gluten for enhanced texture. This soft, tender rye bread has a deep flavor, perfect for sandwiches or toasting with butter and preserves. The recipe guides you through the traditional process of activating yeast, kneading, multiple risings, shaping, and baking to achieve perfect loaves with a beautifully browned crust and moist crumb.
Ingredients
Yeast Mixture
- 1 scant tablespoon active dry yeast (about one 1/4 ounce packet)
- 1 teaspoon sugar (to feed the yeast)
- 1/4 cup warm water (105-110°F)
Main Dough
- 1/2 cup granulated sugar
- 2 tablespoons molasses
- 2 tablespoons shortening (butter-flavored Crisco recommended)
- 2 teaspoons kosher salt (use less if using table salt)
- 1 tablespoon caraway seed (optional)
- 2 cups warm water
- 2 cups light or dark rye flour (spooned and leveled)
- 1/4 cup vital wheat gluten
- 3 cups all-purpose flour (plus up to 1/2 cup more if needed)
Additional
- Vegetable oil or olive oil (for greasing and rolling)
- 1/4 cup butter (for rubbing on bread after baking)
Instructions
- Activate Yeast: In a stand mixer bowl, combine 1 scant tablespoon active dry yeast, 1 teaspoon sugar, and 1/4 cup warm water (105-110°F). Stir to combine and wait 5 minutes until the yeast bubbles and foams.
- Add Sweeteners and Salt: Once foamy, add 1/2 cup granulated sugar, 2 tablespoons molasses, 2 tablespoons shortening, 2 teaspoons kosher salt, and 1 tablespoon caraway seeds (if using). Stir to mix well.
- Add Water and Stir Dough: Pour in 2 cups warm water and mix with a dough hook or wooden spoon until combined.
- Add Rye Flour and Gluten: Add 2 cups rye flour and 1/4 cup vital wheat gluten to the mixture. Start mixer on low speed to avoid flour flying.
- Add All-Purpose Flour: Gradually add 3 cups all-purpose flour, one cup at a time, mixing on low speed between additions. Avoid exceeding 3 cups initially to maintain dough consistency.
- Knead Dough: Knead the dough on medium-low speed for about 5 minutes. The dough will be sticky but begin to clean the bowl edges. Add up to an additional 1/2 cup flour as needed, kneading a total of 7-10 minutes. Dough should clean sides but not bottom of the bowl. Alternatively, knead by hand on an oiled surface for 10-12 minutes.
- Prepare Bowl and First Rise: Grease a large bowl with 1 tablespoon vegetable oil. Scrape dough into it, shape into a ball, and turn to coat with oil. Cover with parchment paper or greased plastic wrap. Let rise in a warm area (oven warmed to about 100°F then turned off) for 1 hour or until doubled in size.
- Punch Down and Second Rise: Punch down dough, reshape into a ball, grease the bowl again, coat dough with oil, cover, and let rise in a warm place another hour until doubled.
- Prepare for Shaping: Punch dough down again. Prepare a work surface lightly oiled (avoid flour to prevent stiffness). Also grease four 7×4 inch loaf pans with nonstick spray. Alternatively, use two 9×5 or 8×4 inch pans.
- Shape Loaves: Divide dough into 4 equal parts. Pat each piece into a 7-inch square, fold and roll into a tight loaf, pinching edges and tucking ends underneath. Place seam side down in prepared pans.
- Final Rise: Cover pans with parchment or greased plastic wrap and let rise in a warm place for 45 minutes or until dough rises an inch or more above pan edges.
- Preheat Oven: Preheat oven to 375°F. Remove pans from warm place before baking; do not preheat oven with bread inside.
- Bake Bread: Bake 7×4 inch pans for 30-35 minutes. If using 9×5 inch pans, bake 40-45 minutes. Bread is done when an instant-read thermometer inserted in center reads 205°F (or 208-210°F for larger pans), or when top is well browned or slightly darker.
- Butter and Cool: Remove hot pans to wire racks. Immediately rub 1/4 cup butter over tops of bread to melt. Carefully turn bread out onto racks and cool on their sides to prevent squishing. Let cool 30-60 minutes before slicing.
- Slice and Serve: Use a sharp serrated knife to slice bread with gentle sawing motions. Serve with butter, jam, or other toppings of choice.
- Store Bread: Once completely cool, store in a large ziplock bag at room temperature for up to 3 days, slicing as needed. For longer storage, freeze in airtight bags for up to 3 months. Thaw at room temperature or partially frozen then toast to finish thawing.
Notes
- Use warm water around 105-110°F for yeast activation, not hotter, to avoid killing yeast.
- Do not add too much flour; rye dough should remain slightly sticky for best texture.
- The caraway seed is optional but adds authentic rye flavor.
- Keep your rising environment warm but not hot; around 75-85°F is ideal.
- Always cool rye bread before slicing to prevent crushing the tender crumb.
- Using a thermometer ensures perfectly baked bread without guessing.
- Bread can be shaped into either four small loaves or two larger loaves depending on pan size.
- Butter on hot bread is traditional and adds moisture and flavor.
- Store bread properly to maintain freshness; freezing is recommended for longer preservation.


