
“`html
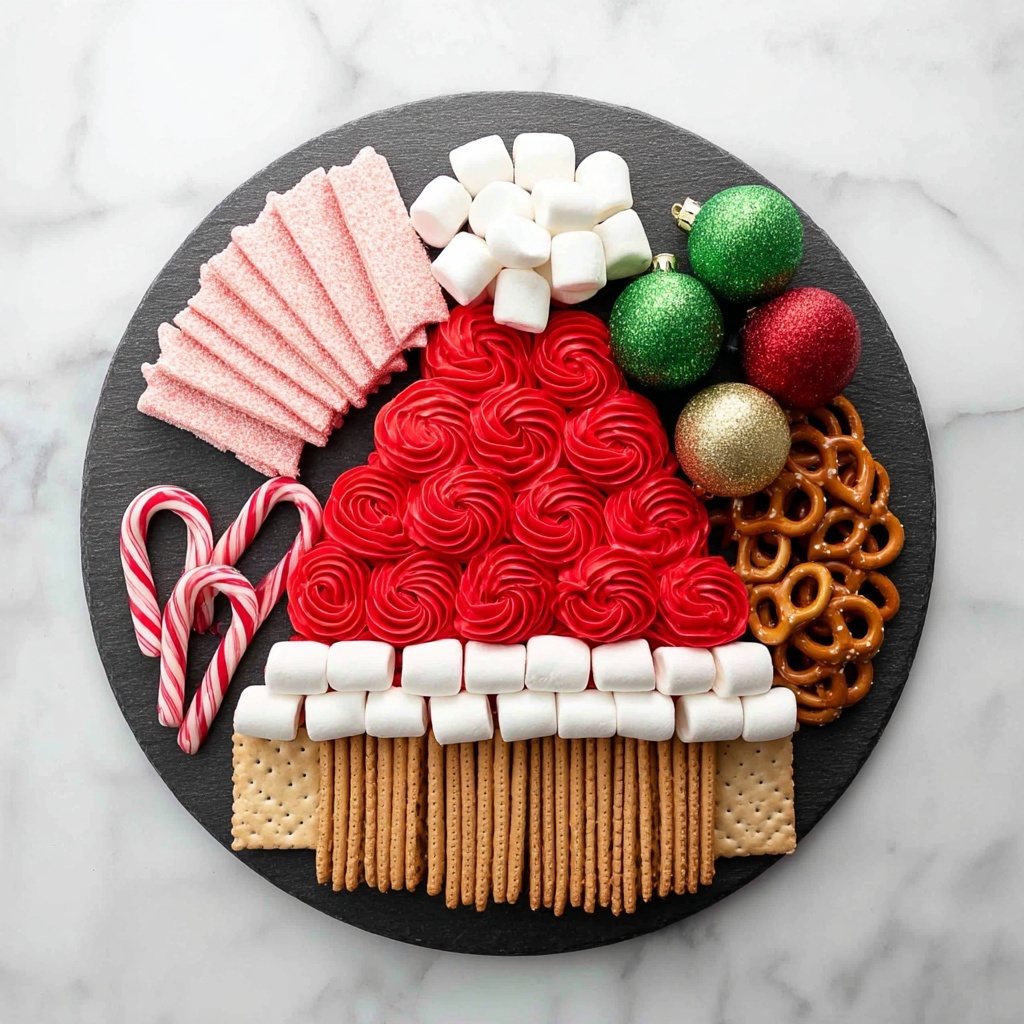
There is something magically festive and irresistibly charming about creating a holiday centerpiece that tastes as amazing as it looks. The Easy Buttercream Santa Hat Board Recipe is exactly that perfect blend of fun, flavor, and simple elegance. This delightful board features luscious red and white buttercream in the shape of Santa’s hat, paired beautifully with crunchy pretzels, biscoff cookies, and soft marshmallows. Whether you’re hosting a holiday party or looking to impress your loved ones with a creative seasonal treat, this recipe brings joy to every bite and smiles to every face.
Ingredients You’ll Need
To bring this festive board to life, all you need are a handful of straightforward, store-bought essentials that marry flavor and texture effortlessly. Each ingredient plays its own role in adding crunch, creaminess, or sweetness, turning your board into a multi-sensory delight.
- Red frosting: The vibrant base of Santa’s hat, adding splashy color and creamy texture.
- White frosting: For the snowy trim and fluffy star, lending contrast and softness.
- Mini pretzels: These bring a salty crunch that cuts through the sweetness perfectly.
- Biscoff cookies: Rich and spiced, these add depth and a hint of caramelized flavor.
- Strawberry wafer cookies: Light and fruity, they enhance the festive look with a lovely pink touch.
- Mini marshmallows: Perfect for adding fluffy, bite-sized sweetness and texture.
- Standard size marshmallows: Use these to fill bigger spaces and add cozy, cloud-like softness.
How to Make Easy Buttercream Santa Hat Board Recipe
Step 1: Smooth and Fluff Your Frostings
The trick to an effortlessly beautiful Santa hat is in the frosting’s texture. Begin by stirring your store-bought frostings to create a smooth, fluffy consistency. Using a handheld mixer with one beater inserted directly into the frosting can, blend each can for about 45 seconds until silky and light. The fluffier the frosting, the easier it will be to pipe those perfect rosettes.
Step 2: Prepare Your Piping Tools
Once your frostings are whipped to perfection, fit two piping bags with 1M star tips—one bag for red and one for white. This setup will make it super simple to create those signature rosettes and fluffy edges for the Santa hat, giving your board that handcrafted charm without any stress.
Step 3: Plan Your Hat Placement
Deciding where to position your Santa hat on the board lets you build around it gracefully. You might go for a centered look for classic balance or opt for an off-center spot if you want to showcase your assortment of cookies and pretzels beautifully alongside the frosting design. Trust your creative instincts here—it’s all about what feels festive and fun for your gathering!
Step 4: Pipe Rosettes to Form the Hat
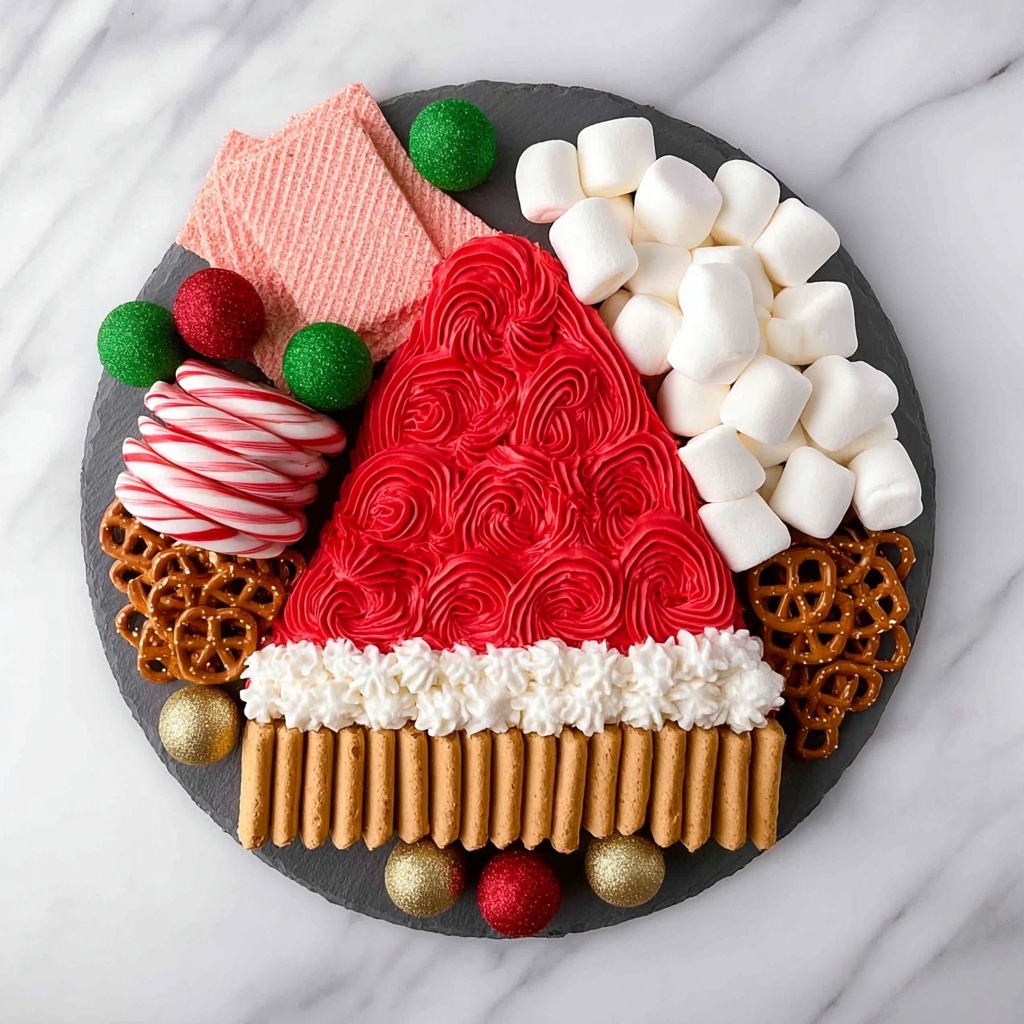
With your red frosting, hold the piping bag slightly above the board, then squeeze out frosting in a steady circular motion to create rosettes. Remember, the secret to those luscious rosettes is consistent pressure and avoiding dragging the tip across the board, which flattens them out. Build multiple rows of rosettes, stacking up until you form the classic triangular shape of Santa’s hat.
Step 5: Add the White Trim and Fluffy Top
Next, switch to the white frosting to pipe a wider base row of rosettes along the bottom of the hat, mimicking Santa’s snowy hatband. For the iconic pom-pom at the tip, create star-shaped dollops by squeezing frosting, then pausing before pulling away your tip to form a textured, cotton-ball effect. This final touch really brings the hat to life with that cozy, wintry vibe.
Step 6: Decorate with Your Favorite Treats
Now for the fun part—arranging your mini pretzels, biscoff cookies, strawberry wafers, and marshmallows alongside the hat. Mix and match textures and colors as you position them artistically around the hat to transform the entire board into a playful holiday feast. Every bite becomes a delightful surprise of crunch, cream, and sweetness.
How to Serve Easy Buttercream Santa Hat Board Recipe
Garnishes
To elevate your Easy Buttercream Santa Hat Board Recipe even more, consider adding a few fresh mint sprigs or edible gold stars for sparkle. A light dusting of powdered sugar can mimic fresh snow, making the board feel like a winter wonderland that’s ready to be devoured.
Side Dishes
This festive board pairs beautifully with mulled wine, hot cocoa, or spiced cider to fully embrace the season. For a savory balance, serve alongside a cheese platter with mild cheddar and gouda—these will provide a delicious contrast while complementing the sweetness of the frosting and cookies.
Creative Ways to Present
Presentation is everything with this recipe. Try using a rustic wooden board or a festive holiday-themed platter as your canvas. You can even wrap the board in clear cellophane with a big red bow for a stunning edible gift that will wow friends and family alike. Don’t be afraid to get playful with the arrangement—each cookie and pretzel can tell part of your holiday story!
Make Ahead and Storage
Storing Leftovers
If you happen to have leftovers (though it’s hard to resist!), cover the board tightly with plastic wrap and store it in the refrigerator. The frosting will stay creamy and the cookies will retain a bit of their crispness for up to three days.
Freezing
Because this board relies on fresh frosting and cookies, freezing is not recommended—it may change the texture of the frostings and make some treats soggy upon thawing. It’s best to enjoy the board fresh for optimal taste and appearance.
Reheating
No reheating needed here since this is a no-bake, cool-serve treat. If you want to soften any hardened frosting, let the board sit at room temperature for 15-20 minutes before serving to bring the buttercream back to its lush, silky consistency.
FAQs
Can I make the frostings from scratch instead of store-bought?
Absolutely! While the Easy Buttercream Santa Hat Board Recipe is designed for simplicity using store-bought frosting, homemade buttercream can add a personalized touch. Just be sure your frosting has enough stiffness for piping rosettes so they hold their shape well.
What if I don’t have a piping bag or 1M tips?
No worries! You can use a zip-top bag with the corner snipped off to pipe your frosting. For the star tips, try a generous dollop piped with a spoon or spread with a small spatula to create texture, though the look will be a bit different.
Can I use other cookies or candies instead of biscoff and strawberry wafers?
Definitely! Feel free to swap in your favorite seasonal treats. Peppermint bark, ginger snaps, or chocolate-covered pretzels all pair beautifully and add a festive flair to your board.
How far in advance can I prepare the board before serving?
It’s best to assemble the board just a few hours before serving to keep all the components fresh and looking their best. If pressed for time, pipe the hat earlier and add cookies and marshmallows at the last minute.
My frostings were too runny, how can I fix them?
If your frosting feels too soft to pipe, try chilling it in the refrigerator for about 15-20 minutes. This firms it up and makes it easier to create those beautiful rosettes without them collapsing.
Final Thoughts
There is a special kind of joy found in sharing the Easy Buttercream Santa Hat Board Recipe with friends and family during the holidays. Its playful design, delicious combinations, and straightforward preparation make it a standout festive treat everyone will adore. So grab your frostings, gather your favorite sweets, and get ready to make some sweet holiday memories that taste as good as they look!
“`
Print
Easy Buttercream Santa Hat Board Recipe
- Prep Time: 20 minutes
- Cook Time: 0 minutes
- Total Time: 20 minutes
- Yield: 12 servings
- Category: No-Cook
- Method: No-Cook
- Cuisine: American
Description
Create a festive and visually delightful buttercream Santa hat-themed treat board with easy-to-use store-bought frostings and an assortment of sweet and crunchy snacks, perfect for holiday gatherings or a fun winter-themed party display.
Ingredients
Frostings
- 1 store bought can of red frosting
- 1 store bought can of white frosting
Snacks and Treats
- 1 cup mini pretzels
- 1 small pack Biscoff cookies
- 1 small pack strawberry wafer cookies
- 1 cup mini marshmallows
- 1 cup standard size marshmallows
Instructions
- Mix Frostings: Start by mixing your store-bought frostings to achieve a smooth and fluffy texture. Use a handheld mixer with one beater inserted directly into the frosting can and mix for about 45 seconds.
- Mix Both Colors: Repeat the mixing process for both the red and white frostings to prepare them for piping.
- Prepare Piping Bags: Fit two piping bags each with a 1M piping tip, one for the red frosting and the other for the white frosting.
- Fill Bags: Fill one piping bag with the red frosting and the other with the white frosting, ensuring they are ready to pipe smoothly.
- Choose Hat Placement: Decide on the placement of your Santa hat on the board; it can be centered or off-centered depending on your design preference.
- Consider Board Layout: If using longer wafers or snacks, offset the hat placement for better balance and visual appeal.
- Create Rosettes: To make the rosettes, hold the piping bag slightly above the board and squeeze with consistent pressure, moving in a circular motion.
- Maintain Rosette Shape: Avoid dragging the piping tip on the board to keep the rosettes fluffy and rounded.
- Form Rows: Pipe several rosettes in a row and continue stacking rows until the triangular shape of the Santa hat is formed.
- Add Hat Brim: Pipe a longer line of white rosettes along the bottom edge to create the fluffy brim of the Santa hat.
- Create Star Tip: Use the white frosting to pipe a star tip at the tip of the hat by squeezing out a small amount, stopping the squeeze, and then pulling away the tip to form a textured cotton ball.
- Position Treats: Arrange your mini pretzels, Biscoff cookies, strawberry wafers, and marshmallows artistically around the hat or on the board to complete the festive presentation.
Notes
- Using store-bought frosting speeds up the process and ensures ease of piping.
- Adjust the placement of the Santa hat for balance depending on the size and shape of your board and snacks.
- The 1M piping tip produces classic rosette shapes that add texture to the hat design.
- Choosing a handheld mixer with one beater helps keep frosting containers intact and less messy during mixing.
- This no-bake arrangement makes for a quick and fun holiday treat board suitable for any skill level.
