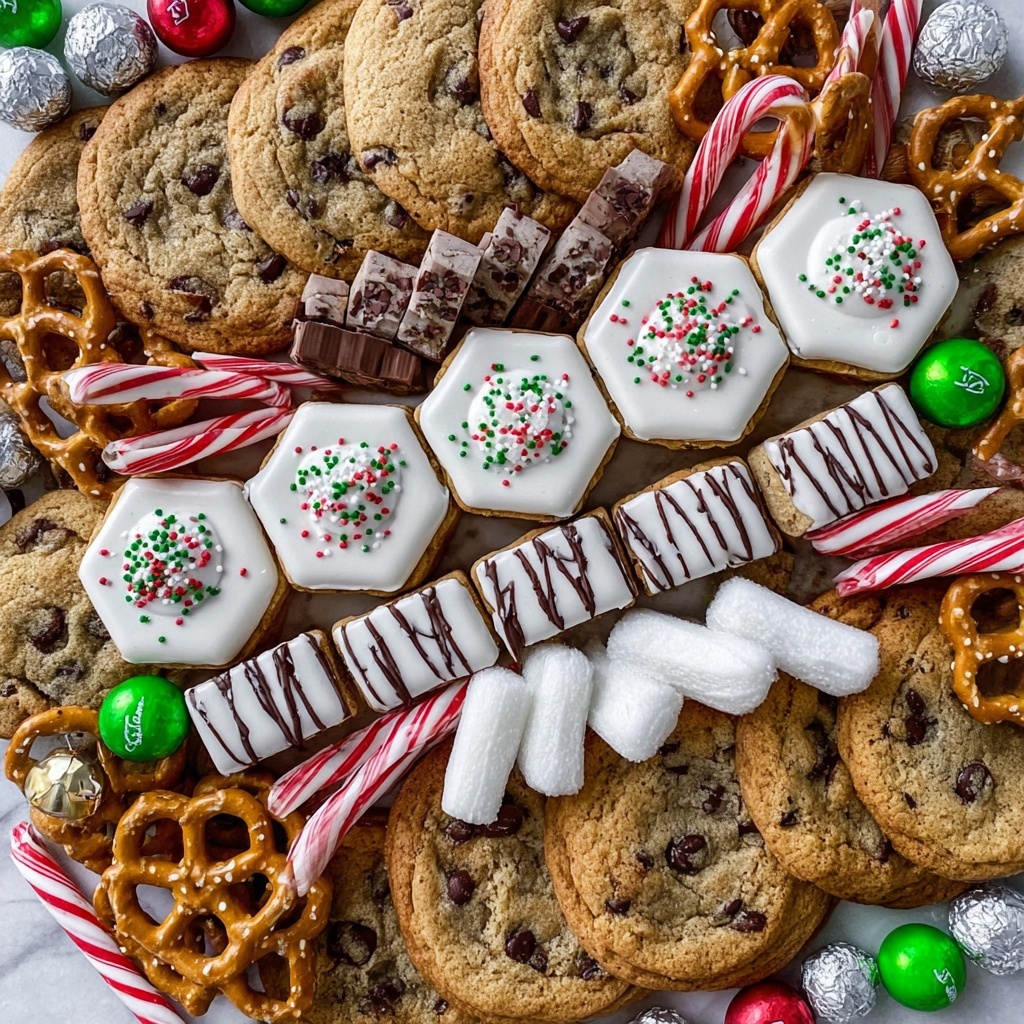
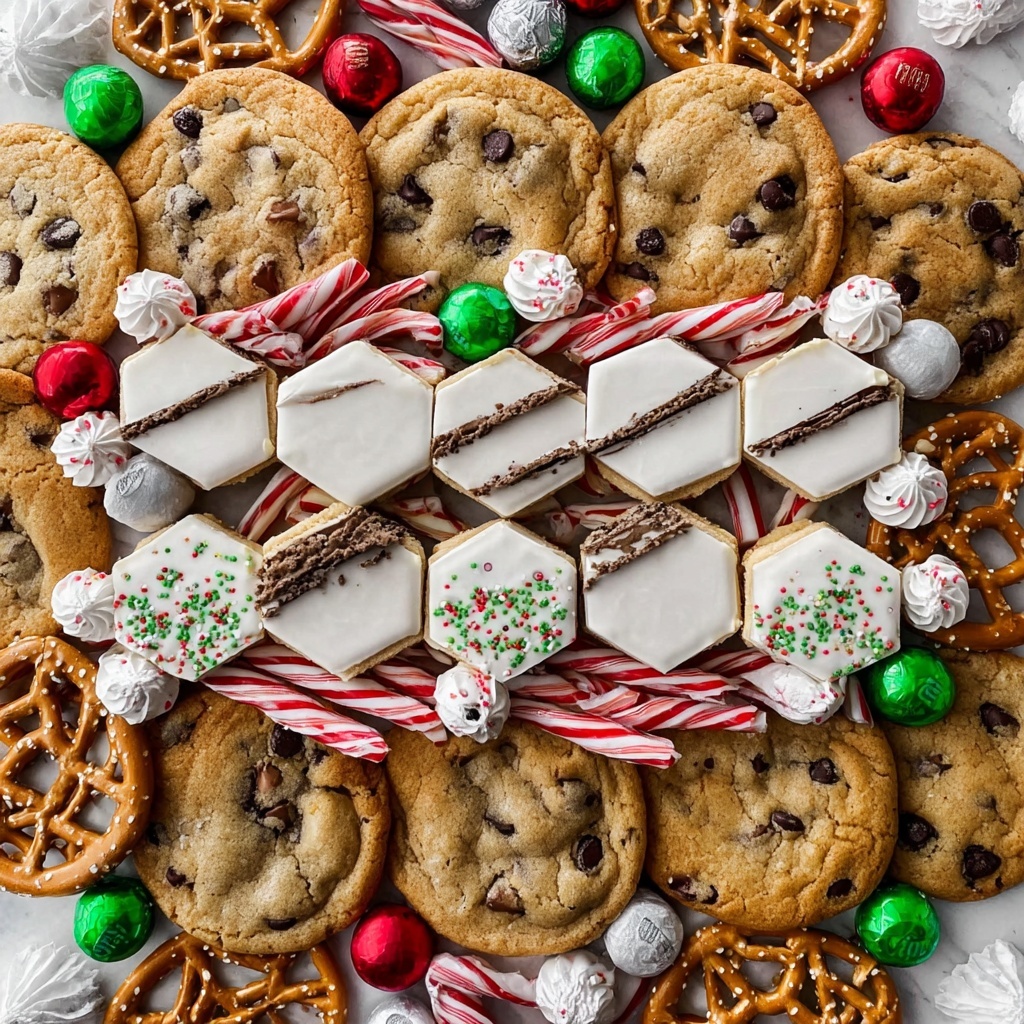
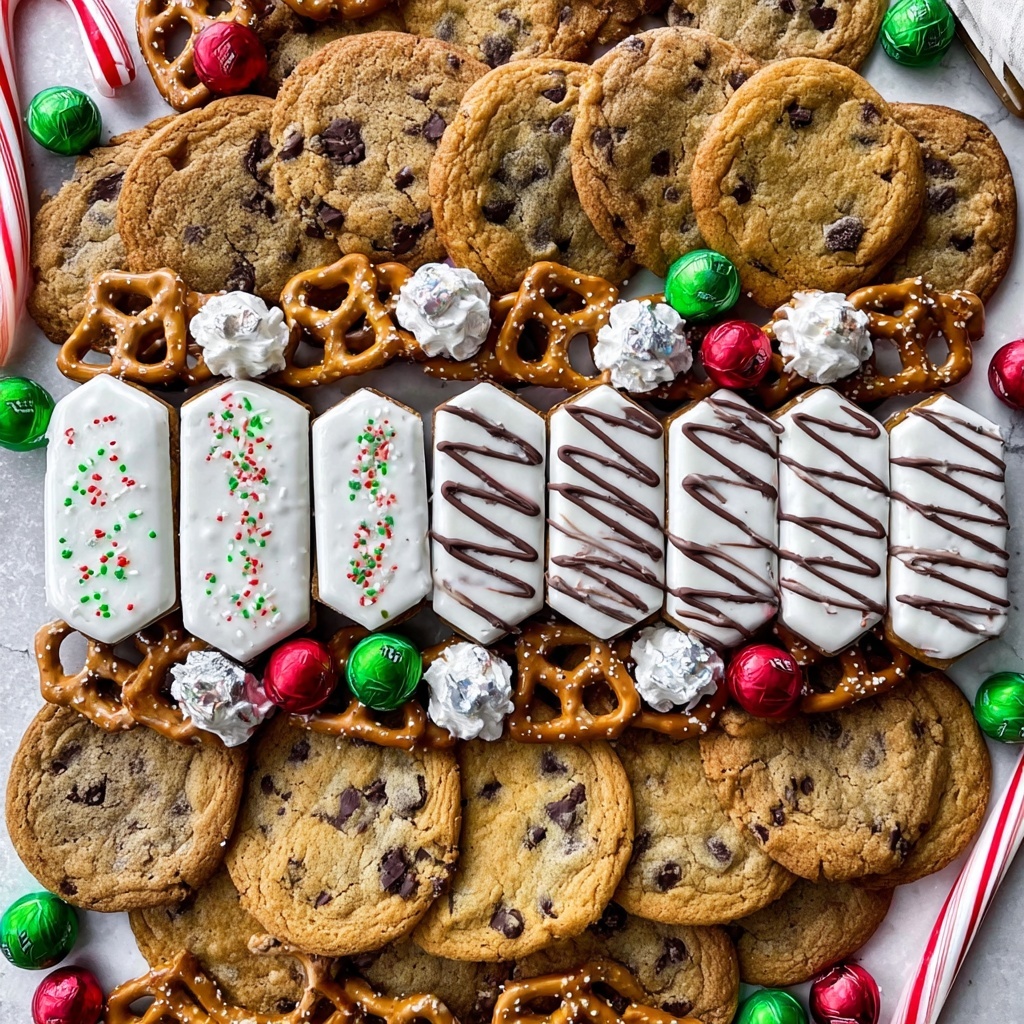
If you are looking to impress your friends and family with a show-stopping centerpiece this holiday season, look no further than this Christmas Dessert Board Recipe. It is a festive, vibrant spread filled with an irresistible mix of sweet treats that bring together classic holiday flavors and fun textures. Whether it’s for a party or a cozy night in, this dessert board transforms the spirit of Christmas into a delicious, edible celebration that’s as delightful to look at as it is to eat.
Ingredients You’ll Need
Putting together this Christmas Dessert Board Recipe is a breeze with simple but thoughtfully chosen ingredients. Each item adds something special—whether it’s a pop of color, a crunchy element, or a soft, sweet bite—making the board a perfect harmony of festive flavors and textures.
- 4 Zebra Cakes: These fluffy, striped cakes bring a sweet and creamy center creating a focal point on the board.
- 18 Chocolate Chip Cookies: Classic cookies add a comforting crunch and timeless flavor everyone loves.
- 1 Pack of Mini Oatmeal Frosted Cookies: Their chewy texture and gentle sweetness help bridge flavors across the board.
- 4-6 Mini Powdered Donuts: Soft and lightly dusted with powdered sugar, they add a snowy, festive touch.
- 1 Bag of Chocolate Covered Pretzels: The salty-sweet combo offers a delightful contrast to the sweeter treats.
- 14 Green and Red Candy Canes: These lend traditional Christmas flavor and vibrant color pops throughout the board.
- 4 Candy Cane Sticks: Perfect for adding height and whimsy to your dessert display.
- Green Twist Pops: Their glossy swirl and candy crunch brighten up corners beautifully.
- Red Twist Pops: A classic holiday candy adding rich color and variety.
- 14 Red and Green Rock Candy Pops: These crystal-like treats provide sparkle and a fun sugary crunch.
- 8 Pirouline Wafers: Elegant rolled wafers with a subtle chocolate swirl add a sophisticated crunch.
- Christmas Mix Kisses: Mini chocolate kisses wrapped in holiday foil add little bursts of chocolate treasure.
- Red and Green Sprinkles: To sprinkle over the entire board, they bring festive flair and a playful texture finish.
How to Make Christmas Dessert Board Recipe
Step 1: Clean and Prepare Your Board
Start with a clean, dry serving board. This ensures your dessert spread is hygienic and ready to showcase all the colorful treats beautifully. A wooden or festive-themed board works wonderfully to enhance the holiday vibe.
Step 2: Start Placing Zebra Cakes, Donuts, and Cookies
Place the 4 zebra cakes right in the center of your board as the star attraction. Then, surround these cakes with the chocolate chip cookies so they create a welcoming frame of crunch and sweetness.
Step 3: Add the Mini Powdered Donuts
Arrange the mini powdered donuts evenly around the chocolate chip cookies. The powdered sugar dusting adds softness and snowy holiday flair, visually contrasting with the deeper cookie tones.
Step 4: Fill In With Pretzels, Oatmeal Cookies, and Candy Canes
Position chocolate covered pretzels on each side of the chocolate chip cookies, balancing salty and sweet. Then add mini oatmeal frosted cookies by topping some chocolate chip cookies to cover gaps, filling spaces with chewy texture. Sprinkle candy canes randomly to bring those classic Christmas scents and colors throughout the board.
Step 5: Decorate With Pops and Pirouline Wafers
Place green and red twist pops diagonally on the corners, and spread out the red and green rock candy pops nearby. This adds height and sparkle. Then, lay pirouline wafers diagonally in open spaces to add elegant, crispy accents.
Step 6: Add Christmas Kisses and Peppermint Sticks
Fill empty gaps with Christmas mix kisses for little chocolate bursts. Finally, tuck peppermint sticks anywhere you want extra color and festive charm, making sure the board looks abundant and joyful.
Step 7: Sprinkle With Festive Sprinkles
This last step is the best part—joyfully scatter your red and green sprinkles all over for a playful, holiday confetti effect. Don’t be shy; add as much as you’d like to make the board look merry and bright.
Step 8: Serve and Enjoy!
Once your Christmas Dessert Board Recipe is perfectly adorned, gather your loved ones around and dive into this delightful assortment of holiday cheer. It’s not just a feast for the taste buds but for the eyes and heart as well.
How to Serve Christmas Dessert Board Recipe
Garnishes
Adding fresh garnishes like mint leaves or edible gold dust can elevate your Christmas Dessert Board Recipe with a hint of freshness and luxury. Orb decorative bowls with whipped cream or holiday berries nearby for extra flair and flavor options.
Side Dishes
Complement this dessert board with warm beverages such as hot cocoa, mulled wine, or spiced cider to enhance those cozy holiday vibes. Small bowls of nuts or seasonal fruit like clementines and pomegranate can balance the sweetness perfectly.
Creative Ways to Present
Consider using varying heights on your serving table by placing some elements on small cake stands or festive plates around the board. Wrapping the board in twinkle lights or sprinkling fresh pine needles around adds an extra magical touch that will delight guests.
Make Ahead and Storage
Storing Leftovers
If you have any leftover treats, store them in an airtight container at room temperature for up to 3 days to keep cookies and cakes fresh. Avoid refrigeration as it can dry out some baked goods.
Freezing
Most of the items on this dessert board are best enjoyed fresh, but if needed, you can freeze zebra cakes and some cookies individually wrapped for up to one month. Thaw at room temperature before arranging again.
Reheating
Since this dessert board relies mostly on room-temperature sweets, reheating isn’t necessary, but if you want warm cookies, pop them in the oven for a few minutes to restore that just-baked aroma and texture.
FAQs
Can I substitute any ingredients on the Christmas Dessert Board Recipe?
Absolutely! The beauty of this dessert board lies in its flexibility. Feel free to swap in your favorite holiday treats or dietary-friendly options while keeping the color and texture variety in mind.
How long does the Christmas Dessert Board Recipe stay fresh?
When stored properly in airtight containers, most treats remain fresh for about 2 to 3 days. Some candies and pretzels may last longer if kept dry.
Is this recipe suitable for kids’ parties?
Yes! The colorful presentation, familiar treats, and sweet flavors make this Christmas Dessert Board Recipe a fantastic and fun choice for children and adults alike.
What’s the best board to use for assembling this dessert?
A large wooden cutting board or a festive serving tray works perfectly. Make sure it’s clean and dry before starting, and you can even decorate the edges with garlands or ribbons for added holiday cheer.
Can I prepare this dessert board ahead of time?
You can assemble the board a few hours before serving to keep treats fresh and looking their best. Just cover tightly with plastic wrap and store in a cool place until ready to serve.
Final Thoughts
This Christmas Dessert Board Recipe is a surefire way to bring warmth, joy, and a splash of sweetness to your holiday gathering. It’s effortless to put together but makes a grand impression, combining tradition and creativity in every bite. Don’t hesitate to customize it with your favorite treats and watch how it becomes the highlight of your festive celebrations. Give it a try—it will make your Christmas moments even sweeter!
Print
Christmas Dessert Board Recipe
- Prep Time: 10 minutes
- Cook Time: 0 minutes
- Total Time: 10 minutes
- Yield: 1 dessert board, serves approximately 8-10 people
- Category: Dessert
- Method: No-Cook
- Cuisine: American
Description
Create a festive and visually stunning Christmas Dessert Board featuring a delightful assortment of cakes, cookies, pretzels, candy canes, and holiday-themed candies, perfect for sharing at your holiday gatherings.
Ingredients
Desserts
- 4 Zebra Cakes
- 18 Chocolate Chip Cookies
- 1 Pack of Mini Oatmeal Frosted Cookies
- 4–6 Mini Powdered Donuts
Candies and Snacks
- 1 Bag of Chocolate Covered Pretzels
- 14 Green and Red Candy Canes
- 4 Candy Cane Sticks
- Green Twist Pops
- Red Twist Pops
- 14 Red and Green Rock Candy Pops
- 8 Pirouline Wafers
- Christmas Mix Kisses
- Red and Green Sprinkles
Instructions
- Clean the Board: Thoroughly clean and dry your serving board to ensure a hygienic base for arranging your desserts and candies.
- Start Arrangement: Begin arranging your board by placing the Zebra Cakes, mini powdered donuts, and chocolate chip cookies as the foundation.
- Position Zebra Cakes: Place the Zebra Cakes in the center of the board to act as the focal point, then surround them evenly with the chocolate chip cookies to create a layered effect.
- Add Mini Donuts: Place the 4 mini powdered donuts just outside the ring of chocolate chip cookies, adding variety and visual interest.
- Gather Remaining Items: Prepare your remaining ingredients including pretzels, oatmeal cookies, candy canes, rock candy pops, twist pops, and Pirouline wafers for final placement.
- Place Pretzels: Position the chocolate covered pretzels on the middle areas of each side of the chocolate chip cookies, balancing the board symmetrically.
- Decorate with Pops and Candy Canes: Arrange twist pops diagonally on two corners of the board, replicate this with rock candy pops on opposite corners, and then randomly distribute candy canes across the board for color and holiday cheer.
- Fill Spaces with Wafers and Cookies: Lay Pirouline wafers diagonally in open spaces around the board, and place mini oatmeal cookies atop the chocolate chip cookies to cover gaps and add texture.
- Add Christmas Kisses: Scatter the Christmas mix kisses throughout the board, filling empty areas to enhance the festive look and provide extra sweet treats.
- Place Peppermint Sticks: Insert peppermint sticks where you feel the board needs extra pops of red and white color, balancing the overall arrangement.
- Sprinkle Decorations: Generously add red and green sprinkles all over the board, making the entire dessert display colorful, festive, and fun.
- Serve and Enjoy: Present the Christmas Dessert Board to your guests and enjoy the holiday celebration with this beautifully curated assortment of sweet treats.
Notes
- Use a large wooden or acrylic serving board for the best presentation.
- Arrange items carefully to balance colors and textures for visual appeal.
- Feel free to substitute or add your favorite holiday candies to personalize the board.
- Keep the board refrigerated if preparing in advance, covered with plastic wrap to maintain freshness.
- This no-cook recipe is ideal for quick assembly and instant festive enjoyment.

