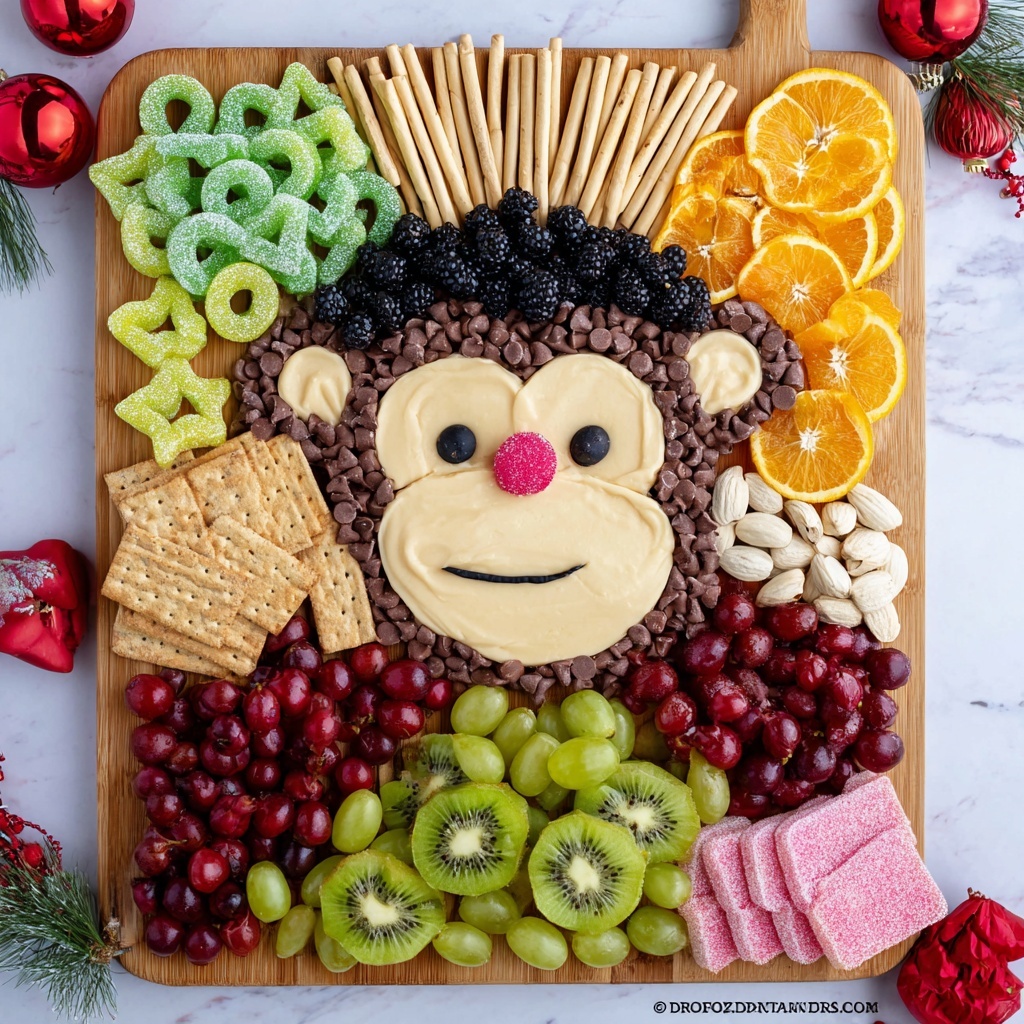
If you want to wow your guests with an irresistibly festive and fun display, the Christmas Deer Charcuterie Board Recipe is your perfect go-to. This vibrant and playful board combines creamy chocolate-dipped whipped cream, crisp nuts, fresh fruits, and delightful candies to create a reindeer face that’s as delicious as it is charming. It is not only a feast for the eyes but also a luscious treat that captures the joyful spirit of the season in every bite.
Ingredients You’ll Need
Gathering the right ingredients is simple but absolutely crucial to bring the Christmas Deer Charcuterie Board Recipe to life. Each component adds unique texture, color, or flavor, from the crunch of nuts to the juiciness of fresh fruit and the smoothness of whipped cream. Together, they make a perfectly balanced and festive charcuterie masterpiece.
- 1 cup Almonds: For a crunchy, nutty contrast that balances the sweetness beautifully.
- 1 cup Hazelnut: Adds rich flavor and a rustic touch to the board’s texture.
- 1/2 cup Grapes: Provides juicy bursts of freshness and color.
- 1 cup Whipping Cream: Turns into fluffy cream that forms the base of the reindeer face.
- 1 cup Blueberries: Their dark blue tones serve perfectly as accents on the antlers.
- 2 tablespoons Dark chocolate: For melting and mixing into the whipped cream and decoration—it’s the foundation of the deer’s features.
- 2-3 Kiwis (sliced): Bright green slices add a pop of vibrant color around the edges.
- 1 – 2 Oranges: Sliced for tangy citrus bursts and festive orange color.
- 6 Breadsticks: Used creatively as the reindeer’s antlers for an elegant structure.
- 1 cup Crackers: Perfect for adding crunch and as easy dippers around the board.
- 1/3 cup Jelly candies: Sweet and colorful treats that decorate the antlers and nose.
- 1/3 cups Marshmallow: Soft and fluffy, ideal for forming the eyes.
- 1/4 Coconut flakes: Light and snowy flakes that add texture and a wintery touch.
How to Make Christmas Deer Charcuterie Board Recipe
Step 1: Prepare the Flavored Whipped Cream
Start by whipping the cream until stiff peaks form; this will be the creamy canvas for your deer face. Divide the whipped cream into two parts. To one half, add 1/2 tablespoon of melted dark chocolate to create a lighter brown shade. Mix the other half with the rest of the melted chocolate to achieve a deeper dark brown. These two beautifully shaded creams will help create the deer’s adorable face and details. Use a pastry bag for easy and precise decorating.
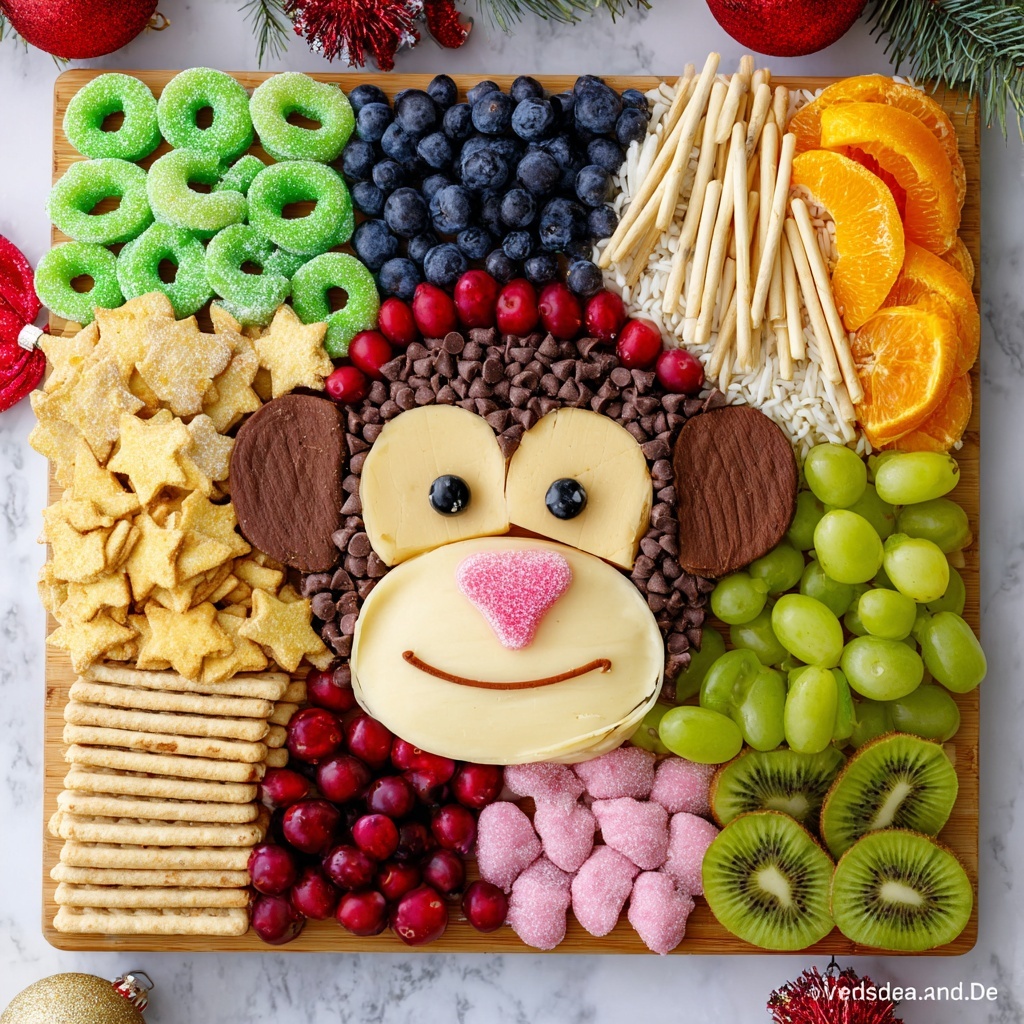
Step 2: Craft the Reindeer Facial Features
For the eyes, place marshmallows as whites, and carefully dot melted dark chocolate for the pupils—this brings the reindeer’s gaze to life. Line the mouth delicately using small chocolate drops for definition. Use a bright jelly candy, such as a raspberry-flavored jelly, as the nose for a cute, fruity pop that’s reminiscent of Rudolph’s famous red nose.
Step 3: Assemble the Antlers with Breadsticks and Decorations
Use the breadsticks to shape the antlers gracefully on the board. Accent these with clusters of blueberries for depth and color, then top with green gummy candies and a few gummy raspberries to mimic festive berries and greenery. The combination creates a whimsical and textured effect that will draw everyone’s eyes immediately.
Step 4: Add Fresh Fruits on the Sides
Surround the reindeer face with a vibrant bed of sliced kiwi, offering a fresh and tangy contrast that balances the sweetness. Tuck juicy grapes and bright orange slices into the corners to complete a colorful, holiday-inspired palette that invites guests to snack happily from all angles.
Step 5: Garnish with Crackers and Coconut Flakes
Scatter crackers around the arrangement for a crunchy, salty complement to the sweet fruits and creams. Sprinkle coconut flakes over the top for a light, snowy effect that adds both texture and a festive touch reminiscent of a winter wonderland.
Step 6: Final Touches with Nuts and Marshmallows
Finish your board by adding clusters of almonds and more marshmallows to fill in any gaps, ensuring the board looks abundant and full. These final touches add satisfying crunchy and soft elements that keep every bite interesting and joyful.
How to Serve Christmas Deer Charcuterie Board Recipe
Garnishes
Keeping garnishes simple but seasonal enhances both flavor and presentation. A few sprigs of fresh rosemary or mint can add a lush green pop and a subtle aroma that complements the nuts and fruit. These little touches bring out the best in your Christmas Deer Charcuterie Board Recipe and heighten the festive feel.
Side Dishes
Pair this charcuterie with light, complementary sides such as a crisp green salad or small bowls of olives and pickles for an added burst of flavor and freshness. These sides help balance the richness of the creamy chocolate and provide guests with palate-cleansing bites in between.
Creative Ways to Present
For an unforgettable presentation, try serving your board on a rustic wooden slab or a festive holiday-themed platter. You can also add mini fairy lights around the edges or use pinecones and holiday ornaments to enhance the Christmas vibe. Presenting your Christmas Deer Charcuterie Board Recipe with thoughtful decor makes it an instant conversation starter and centerpiece.
Make Ahead and Storage
Storing Leftovers
Leftover components from your Christmas Deer Charcuterie Board Recipe keep best when stored separately in airtight containers. Keep whipped cream refrigerated and cover fruits to maintain freshness. Nuts and crackers should be stored in sealed bags or containers to preserve their crunch.
Freezing
While fruit and crackers do not freeze well, you can freeze small portions of whipped cream by spooning dollops onto a parchment-lined tray and freezing until solid. Transfer them to a container and thaw gently in the fridge before using. This trick lets you prepare whipped cream ahead without sacrificing texture or flavor.
Reheating
This recipe is best served fresh and doesn’t require reheating since it’s mostly composed of fresh and chilled elements. However, if any melted chocolate needs softening, a gentle warm water bath will do the trick without altering texture.
FAQs
Can I substitute the whipped cream with something else?
Absolutely! For a dairy-free alternative, coconut whipped cream works wonderfully and adds a subtle tropical flair that pairs well with the fruits and chocolate.
How far in advance can I prepare the board?
For the best freshness, assemble the board no more than a few hours before serving and keep it covered in the fridge until ready. Prepping individual components ahead of time can save you stress on the day.
What if I don’t have breadsticks for antlers?
You can substitute pretzel rods or even thin carrot sticks if you want a savory crunch and a colorful twist. Both options hold well visually and taste great.
Can kids help make this charcuterie board?
Definitely! It’s a fun, hands-on activity for kids to create the reindeer face and decorate the board with fruits and candies. Just supervise the use of melted chocolate and pastry bags.
Is this recipe suitable for large groups?
Yes, it’s easily scalable! Just multiply the ingredients accordingly and consider arranging several smaller boards to allow guests to gather comfortably around the spread.
Final Thoughts
The Christmas Deer Charcuterie Board Recipe is a festive, joyful way to bring friends and family together with a meal that’s as beautiful as it is delicious. Its playful design invites everyone to enjoy both the art and the flavors of the holidays. Give this recipe a try, and watch your holiday celebrations light up with happiness and cheer.
Print
Christmas Deer Charcuterie Board Recipe
- Prep Time: 15 minutes
- Cook Time: 2 minutes
- Total Time: 17 minutes
- Yield: 10 servings
- Category: Appetizer
- Method: No-Cook
- Cuisine: American
Description
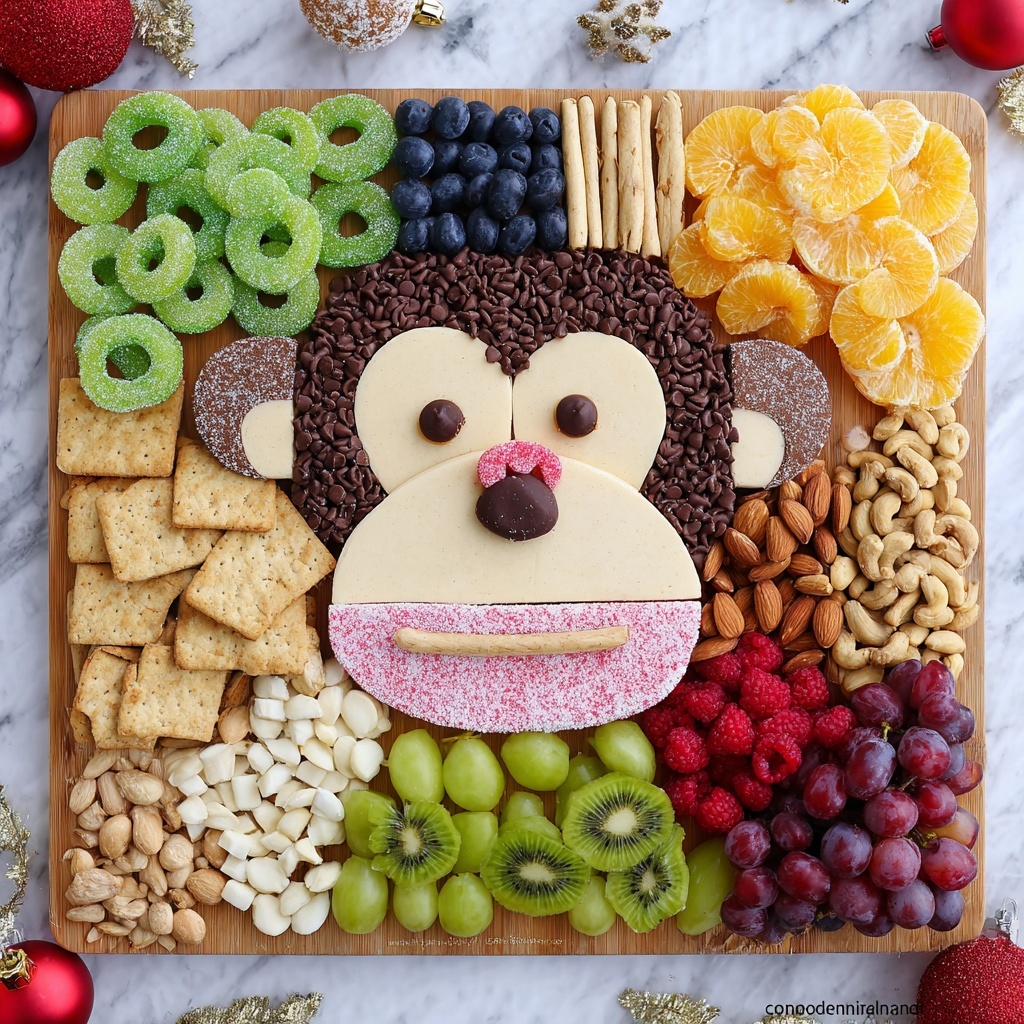
Celebrate the festive season with this delightful Christmas Charcuterie Board, featuring an array of nuts, fruits, chocolates, and creative decorations shaped like a reindeer’s face. Perfect for holiday gatherings, this easy-to-assemble board combines sweet, savory, and fresh flavors with a charming presentation.
Ingredients
Nuts
- 1 cup Almonds
- 1 cup Hazelnuts
Fruits
- 1/2 cup Grapes
- 2–3 Kiwis, sliced
- 1–2 Oranges, sliced
- 1 cup Blueberries
Dairy & Chocolate
- 1 cup Whipping Cream
- 2 tablespoons Dark chocolate
Other Components
- 6 Breadsticks
- 1 cup Crackers
- 1/3 cup Jelly candies (including raspberry jelly)
- 1/3 cup Marshmallows
- 1/4 cup Coconut flakes
Instructions
- Whip the Cream: Start by whipping the cream until stiff peaks form. Divide the whipped cream into two equal parts for coloring.
- Prepare Chocolate Creams: Melt the dark chocolate. Add 1/2 tablespoon of the melted chocolate to one half of the whipped cream to create a light brown chocolate cream. Add the remaining melted chocolate to the other half to produce a darker brown cream. These will form the basis for the reindeer’s face. Use a pastry bag to pipe the creams.
- Create Reindeer Face Details: Use marshmallows to make the eyes, and place drops of dark chocolate as pupils. Line the mouth with chocolate drops and use a jelly raspberry candy for the nose.
- Assemble Antlers and Decorations: Arrange breadsticks as the reindeer’s antlers. Place blueberries on top of the antlers, followed by green gummy candies and gummy raspberries to add color and texture.
- Add Fresh Fruits Around the Board: Place sliced kiwi on the sides. Arrange grapes and sliced oranges in the corners to add freshness and vibrant color to your board.
- Finish with Crackers, Nuts, and Toppings: Top sections of the board with crackers and sprinkle coconut flakes over them. Add hazelnuts, almonds, and additional marshmallows around the edges for variety and balance.
Notes
- Use fresh and high-quality ingredients for best flavor and presentation.
- The whipped cream should be kept refrigerated until assembly to maintain its stiffness.
- Customize the fruit selection based on availability or preferences.
- For a more festive touch, consider adding small decorative picks or edible glitter.
- Serve immediately or keep chilled to ensure freshness, especially the whipped cream components.

