“`html
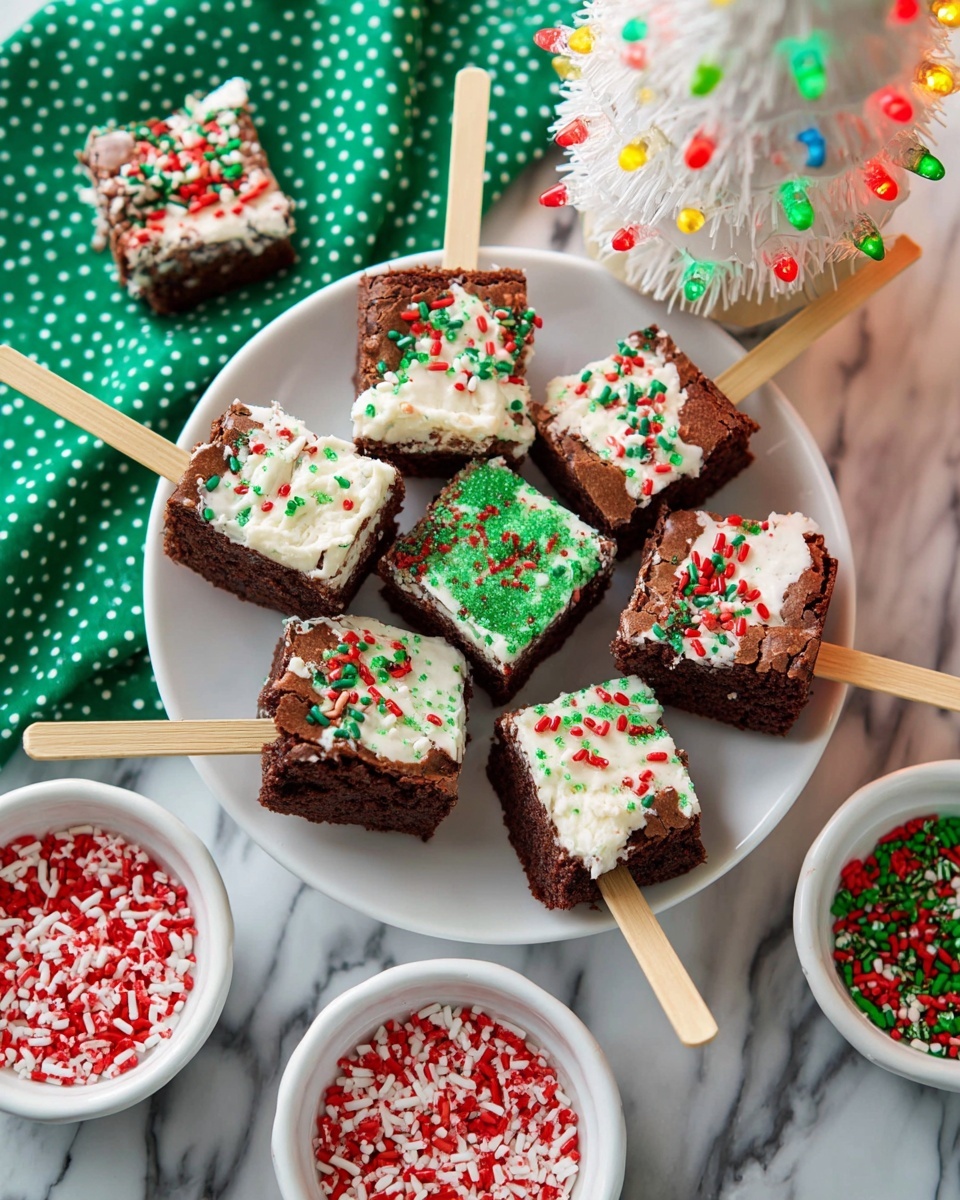
When it comes to festive treats that bring fun and flavor together in the most delightful way, this Christmas Brownie Pops Recipe truly shines. Imagine rich, fudgy brownies transformed into adorable pops, dipped in creamy white chocolate, and then dressed up with colorful holiday sprinkles. It’s the perfect bite-sized indulgence for holiday parties, family gatherings, or even as a joyful gift that spreads smiles. Let’s dive into how you can create these charming, festive brownie pops that everyone will talk about!
Ingredients You’ll Need
The magic behind this Christmas Brownie Pops Recipe starts with simple, easy-to-find ingredients that each play a special role. From the moist and chocolatey base to the sweet, smooth coating and festive sprinkles, every component adds something wonderful to the final treat.
- 18 oz box brownie mix: This forms the rich and fudgy base that makes the brownie pops irresistibly delicious.
- Water, oil, and eggs: Standard mix-ins for the brownie batter that keep the texture moist and perfect.
- 16 popsicle sticks: These make your brownies fun to hold and serve, turning them into festive treats on a stick.
- 12 ounces white melting chocolate: A smooth, creamy coating that adds sweetness and a beautiful canvas for decorations.
- Holiday sprinkles: Colorful and crunchy, they bring the festive spirit and playful texture to each pop.
How to Make Christmas Brownie Pops Recipe
Step 1: Prepare Your Baking Dish
Start by lining an 8×8 baking dish with aluminum foil, then spray it with cooking spray to prevent sticking. This prep ensures your brownies will come out smoothly and cleanly, ready for the next stage.
Step 2: Mix and Bake the Brownies
Follow the instructions on your brownie mix box to prepare the batter using water, oil, and eggs. Pour the batter into the prepared dish, spreading it evenly, and bake according to the directions. The aroma of baking brownies is already a sign of the festive goodness in store!
Step 3: Cool and Chill the Brownies
Once baked, set the dish on a cooling rack for about 10 minutes so the brownies begin to set. Then, transfer the entire dish to the freezer for 45 to 60 minutes. Chilling is key here – it firms up the brownies for easy cutting and popping onto sticks without crumbling.
Step 4: Cut Into Squares and Insert Popsicle Sticks
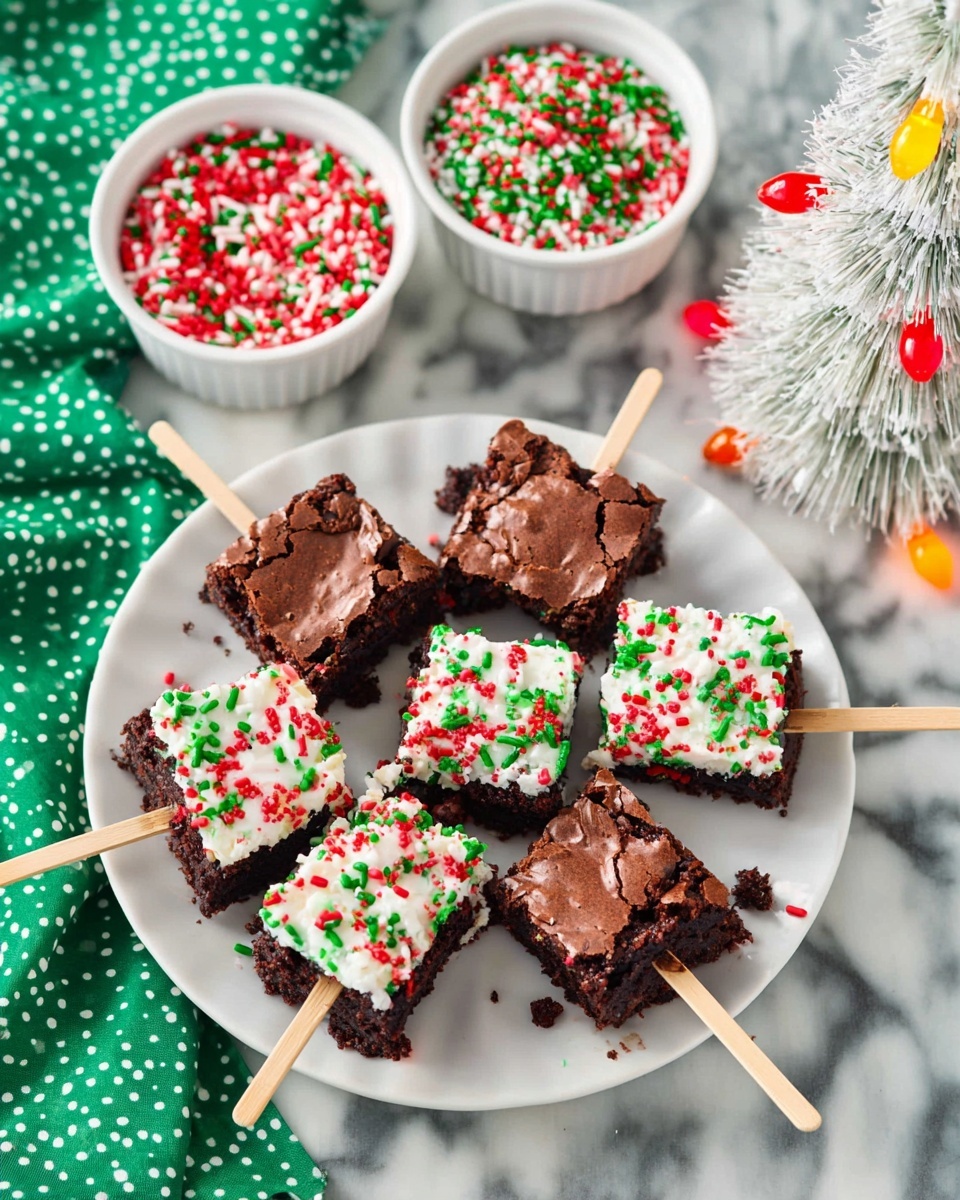
After chilling, carefully lift the brownie block out of the dish using the foil. Place it on a cutting board lined with parchment paper and cut into 16 equal squares. Gently press a popsicle stick into the center of each square, creating cute little brownie pops ready for their final transformation.
Step 5: Melt the White Chocolate
Using a double boiler, melt the white chocolate slowly until it becomes glossy and smooth. Set the bowl on your working surface near your brownie pops for easy dipping. The melting chocolate will be the delicious coating that dresses up the brownie pops beautifully.
Step 6: Dip and Decorate
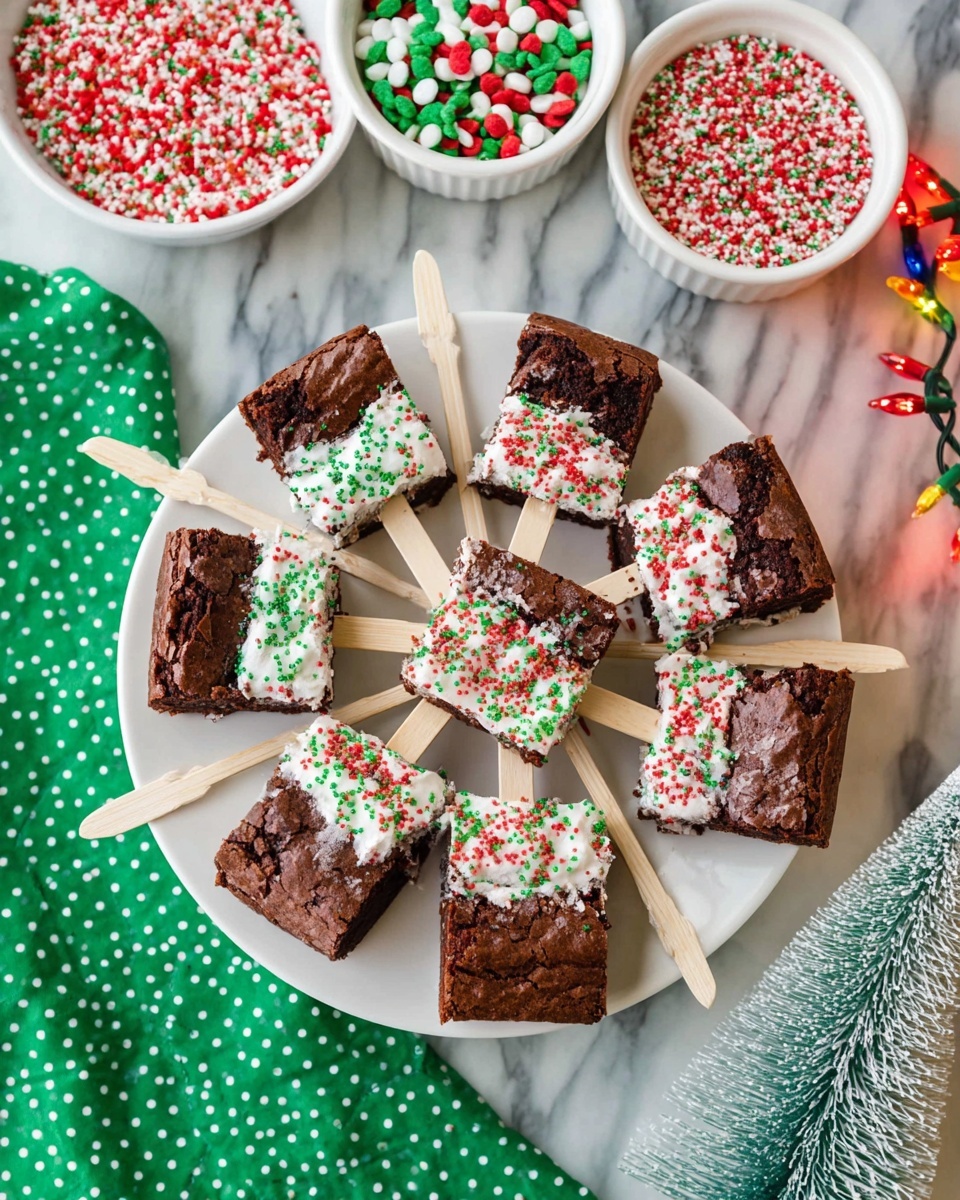
Work quickly but carefully—dip one corner of each brownie pop into the melted white chocolate. This partial dip adds charm and lets the luscious chocolate highlight each piece perfectly. Don’t rush; finishing one pop before moving on ensures a neat, clean finish.
Step 7: Add Festive Sprinkles
While the white chocolate is still soft, sprinkle your holiday decorations over the coated part of each brownie pop. The sprinkles bring crunch, color, and a celebratory feel, turning each brownie into a miniature holiday masterpiece.
Step 8: Let the Chocolate Hardenn
Place your decorated pops on parchment paper or a cooling rack, and once all are ready, refrigerate them for about 10 minutes to let the chocolate set fully. This final chill means your Christmas Brownie Pops Recipe will be perfectly firm and ready to enjoy!
How to Serve Christmas Brownie Pops Recipe
Garnishes
For an extra touch, try adding edible glitter or crushed peppermint candies on top of the sprinkles. Fresh mint leaves or a dusting of powdered sugar around the serving plate can elevate the presentation and make each bite feel even more special.
Side Dishes
Serve these brownie pops alongside a cup of hot cocoa or a festive holiday punch. They pair wonderfully with creamy eggnog or even a scoop of vanilla ice cream for an indulgent treat that complements the fudgy texture.
Creative Ways to Present
Arrange your Christmas Brownie Pops Recipe in a mason jar filled with holiday-themed tissue paper, or stick them upright in a decorated foam block to create a festive “bouquet.” Wrapping each pop in clear cellophane tied with ribbon also makes a charming gift idea for friends and family.
Make Ahead and Storage
Storing Leftovers
Keep any leftover brownie pops in an airtight container in the refrigerator to maintain the chocolate coating’s crispness and the brownie’s moisture. They should stay fresh for up to 4 days, perfect for enjoying a bit of holiday goodness throughout the week.
Freezing
If you want to prepare ahead even further, these brownie pops freeze beautifully. Wrap each one individually in plastic wrap, place them in a freezer-safe bag, and freeze for up to a month. Thaw in the fridge before serving, and you’ll have a festive treat ready anytime.
Reheating
Since these are best enjoyed cool, reheating isn’t necessary or recommended. If you prefer softer brownies, simply bring them to room temperature before eating to soften the fudgy texture without compromising that lovely chocolate coating.
FAQs
Can I use homemade brownie batter instead of a mix?
Absolutely! If you have a favorite homemade brownie recipe, it will work wonderfully in this Christmas Brownie Pops Recipe. Just make sure your brownies are cooled and chilled thoroughly before inserting sticks and dipping.
What if I don’t have popsicle sticks?
You can use wooden skewers or even sturdy straws as alternatives. Just be careful when inserting them to avoid breaking the brownies and ensure they support the weight well.
Can I use other types of chocolate for dipping?
Yes! Dark or milk chocolate can be substituted for the white chocolate. Just adjust the melting technique accordingly and pick sprinkles that complement the chocolate color for a festive flair.
How do I prevent the brownies from crumbling when inserting sticks?
Chilling the brownies until firm is the key to minimizing crumbling. Be gentle and push the stick slowly into the center of each square, supporting the brownie from the other side if needed.
Can these be made gluten-free?
They can! Use a gluten-free brownie mix and verify that your sprinkles and chocolate coating are gluten-free as well to keep your Christmas Brownie Pops Recipe allergy-friendly.
Final Thoughts
There’s something so joyful and approachable about this Christmas Brownie Pops Recipe, blending festive spirit with irresistible chocolatey goodness. Whether you’re making them for a party, a gift, or a cozy night in, these pops are sure to spread happiness with every bite. So go ahead, grab that brownie mix, and start dipping—holiday fun is just a pop away!
“`
Print
Christmas Brownie Pops Recipe
- Prep Time: 35 minutes
- Cook Time: N/A (baking time depends on brownie mix box instructions, approximately 25-35 minutes)
- Total Time: 1 hour 40 minutes (including chilling and cooling times)
- Yield: 16 brownie pops
- Category: Dessert
- Method: Baking
- Cuisine: American
- Diet: Vegetarian
Description
Celebrate the holidays with these festive Christmas Brownie Pops, featuring rich, chewy brownies dipped in smooth white chocolate and decorated with colorful holiday sprinkles. Perfect for parties or gifting, these fun-to-make treats bring a delightful twist to traditional brownies on a stick.
Ingredients
Brownies
- 18 oz box brownie mix
- Water, oil, and eggs (quantities as per brownie mix box instructions)
Dipping & Decoration
- 16 popsicle sticks
- 12 ounces white melting chocolate
- Holiday sprinkles of your choice
Instructions
- Prepare the baking dish: Line an 8×8 inch baking dish with aluminum foil and spray it lightly with cooking spray to prevent sticking.
- Make the brownies: Follow the instructions on the brownie mix box, combining the mix with water, oil, and eggs as required. Pour the prepared batter into the baking dish and bake according to the box directions.
- Cool and chill: Once baked, place the dish on a cooling rack for 10 minutes. Then transfer the entire dish into the freezer for 45 to 60 minutes to chill and firm up the brownies.
- Cut and insert sticks: Remove foil from the sides of the baking dish and transfer the whole brownie block onto a parchment-lined cutting board. Cut the brownies into 16 equal squares and insert one popsicle stick into each square.
- Melt the white chocolate: Using a double boiler, gently melt the white chocolate until smooth and creamy. Remove from heat and set nearby for dipping.
- Dip the brownie pops: Quickly dip a corner of each brownie pop into the melted white chocolate. Work one pop at a time to ensure the chocolate doesn’t harden before dipping.
- Add sprinkles: Immediately sprinkle your chosen holiday decorations on the melted chocolate coating, then set the brownie pop onto parchment paper or a cooling rack to allow the chocolate to harden.
- Chill to set: After all pops have been dipped and decorated, refrigerate them for about 10 minutes to fully set the white chocolate coating.
Notes
- Use an aluminum foil lining for easier removal of the brownies from the baking dish.
- Be sure to chill brownies thoroughly before cutting to prevent crumbling.
- Work quickly when dipping the brownies in melted chocolate to avoid it hardening prematurely.
- Choose holiday-themed sprinkles for a festive touch that suits your decoration preference.
- Refrigerate the dipped pops to help the chocolate coating harden faster and hold sprinkles in place.
