
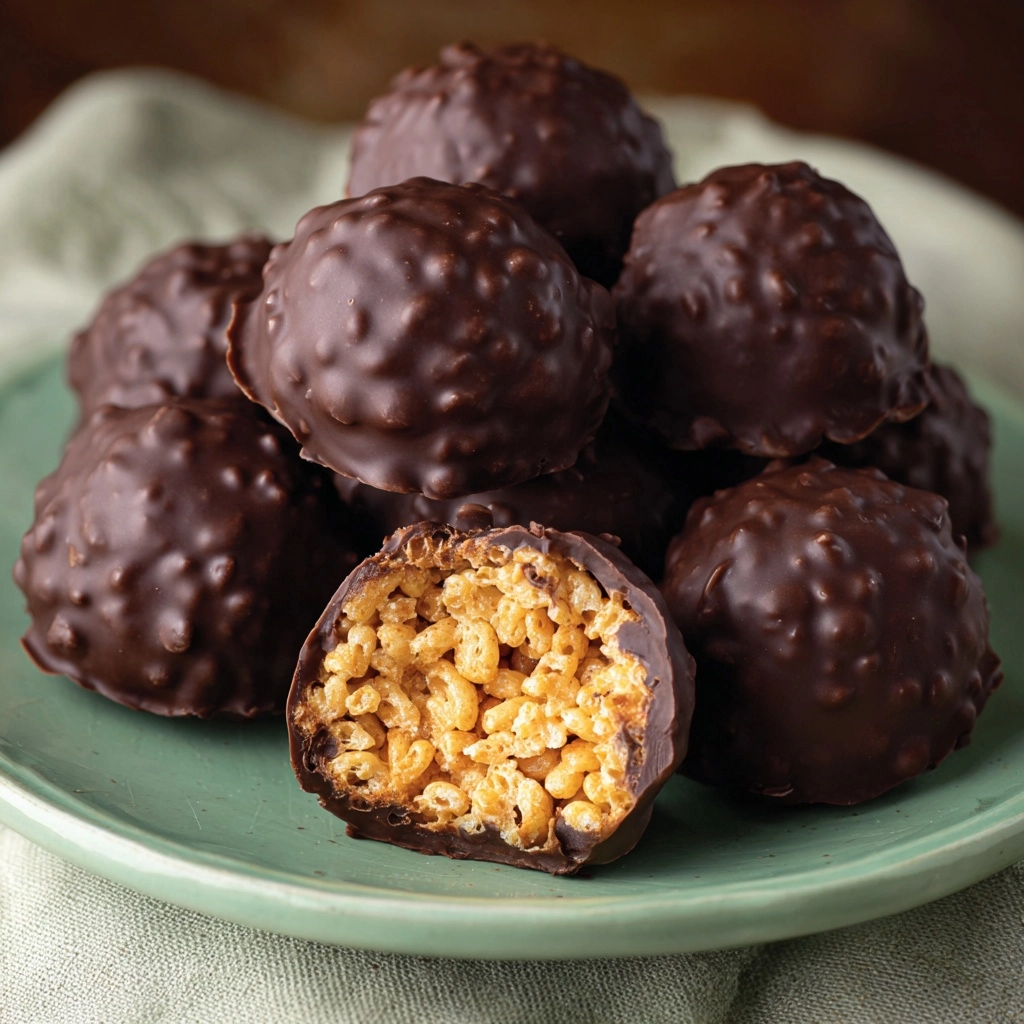
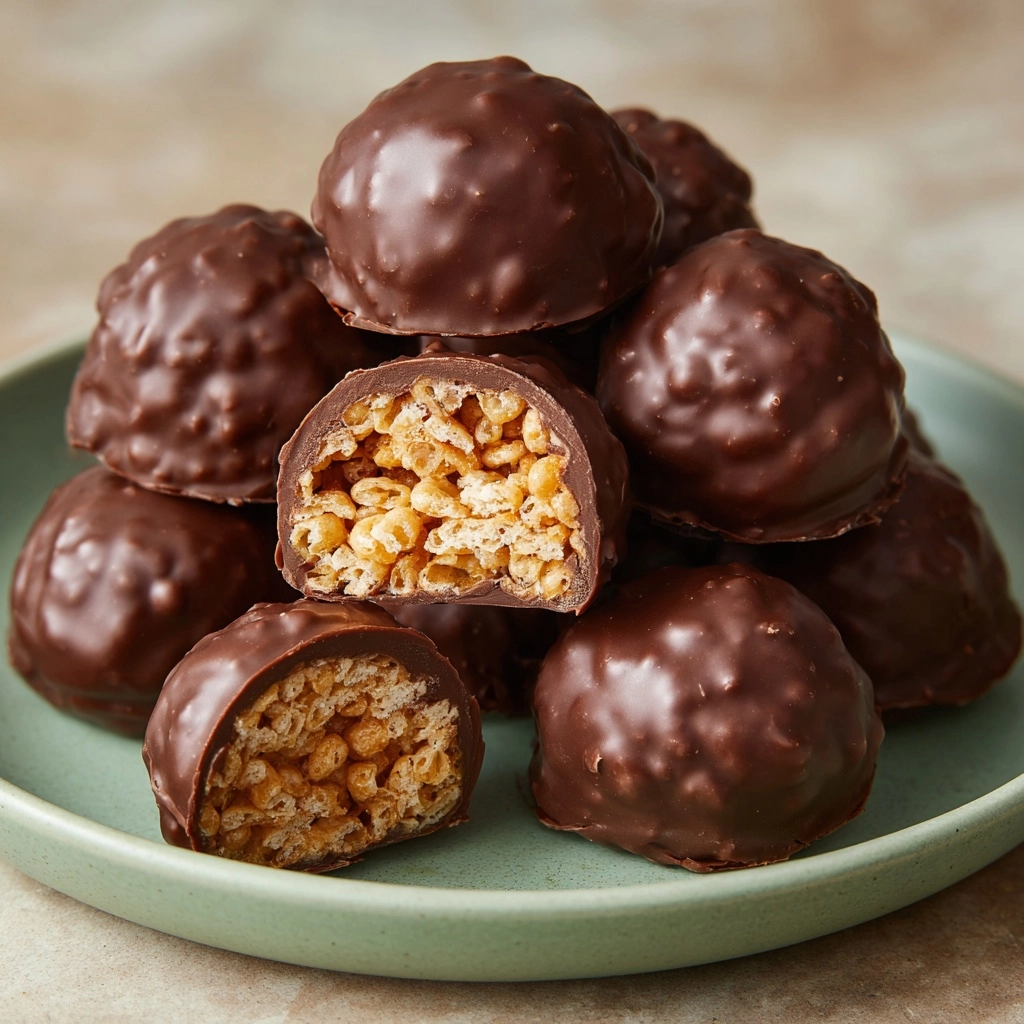
If you’re craving a delightful, easy-to-make treat that brings together the nostalgic crunch of Rice Krispies with the rich indulgence of chocolate and peanut butter, this Chocolate Rice Krispie Balls Recipe is exactly what you need. These bite-sized goodies pack a punch of flavor, texture, and sweetness all wrapped up in one convenient snack. Perfect for sharing with friends, packing into lunchboxes, or simply enjoying whenever the craving strikes, this recipe strikes the perfect balance between prep ease and irresistible taste.
Ingredients You’ll Need
Gathering the right ingredients for this Chocolate Rice Krispie Balls Recipe is a breeze, and each one plays a crucial role in bringing out the perfect harmony of flavor and texture. From the crisp snap of the cereal to the smooth creaminess of peanut butter and the deep chocolate notes, every component contributes to a snack you’ll want on repeat.
- Rice Krispies cereal (3 cups): Provides that signature crunchy base that keeps the balls light and airy.
- Semi-sweet chocolate chips (1 cup): Melt down for lovely chocolate flavor without too much sweetness.
- Creamy peanut butter (½ cup): Adds a luscious, nutty richness that pairs beautifully with chocolate.
- Unsalted butter (¼ cup): Creates a silky texture and helps bind ingredients seamlessly.
- Powdered sugar (1 cup): Sweetens the mix gently and helps with the structure of the balls.
- Vanilla extract (1 teaspoon): Brings a subtle warmth and depth to the chocolate mixture.
- Salt (¼ teaspoon): Enhances and balances all the sweet flavors perfectly.
- Optional sprinkles or crushed nuts: For adding an extra pop of texture and color when rolling the balls.
How to Make Chocolate Rice Krispie Balls Recipe
Step 1: Mix Your Dry Ingredients
Start by combining the Rice Krispies cereal and powdered sugar in a large mixing bowl. This dry mix lays the foundation for your crispy, sweet bite and ensures that every ball has an even sweetness along with that satisfying crunch.
Step 2: Melt the Chocolate Mixture
Next, gently melt the chocolate chips, peanut butter, and unsalted butter together over low heat in a saucepan. Stir continuously until the mixture is smooth and glossy—this velvety chocolate blend is the glue that will hold everything together while delivering rich, indulgent flavor.
Step 3: Add the Finishing Touches
Once melted and smooth, remove the pan from heat and stir in the vanilla extract and salt. These simple additions elevate the overall taste, enhancing the chocolate and peanut butter notes and adding a subtle complexity to the snack.
Step 4: Combine Wet and Dry Mixtures
Pour the warm chocolate mixture over the Rice Krispies and powdered sugar blend. Stir thoroughly but gently, making sure every crunchy morsel is evenly coated with the luscious chocolate-peanut butter sauce for perfect flavor in every bite.
Step 5: Shape Into Balls
Let the mixture cool just enough until it’s firm enough to handle without sticking wildly to your fingers. Then, roll it into lovely one-inch balls. If you’re feeling festive, toss them in your choice of sprinkles or crushed nuts for extra texture and a cute finishing flair.
Step 6: Chill and Set
Arrange the balls on a parchment-lined baking sheet and refrigerate for at least 30 minutes. Chilling allows them to firm up beautifully, giving you that gratifying snap when you bite into them. Once set, they’re ready to enjoy or store for later snacking.
How to Serve Chocolate Rice Krispie Balls Recipe
Garnishes
Sprinkles and crushed nuts aren’t just for show—they add delightful crunch and color that make these treats pop at parties or on a dessert platter. For something extra, consider rolling the balls in cocoa powder or finely shredded coconut to introduce new layers of flavor and texture.
Side Dishes
Keep the vibe sweet and simple by pairing these Chocolate Rice Krispie Balls Recipe delights with fresh fruit slices, a glass of cold milk, or even a scoop of vanilla ice cream for an indulgent mini dessert spread.
Creative Ways to Present
Arrange these chocolatey delights in a mason jar with festive ribbons for gifting or stack them beautifully on a tiered tray for an impressive snack display. Wrapping each ball individually in colorful cellophane also makes an adorable, portable snack perfect for school lunches or office treats.
Make Ahead and Storage
Storing Leftovers
Store any leftover Chocolate Rice Krispie Balls Recipe snacks in an airtight container in the refrigerator to keep their shape and freshness intact. They will stay tasty and ready to enjoy for up to one week, making them perfect for gradual snacking without losing their charm.
Freezing
To enjoy these treats even longer, freeze them in a single layer on a baking sheet before transferring to a freezer-safe container or bag. Frozen Chocolate Rice Krispie Balls Recipe treats can last up to two months and thaw quickly at room temperature when you’re ready for a sweet bite.
Reheating
Because these are no-bake treats, reheating isn’t necessary or recommended. Just let frozen balls thaw naturally, or enjoy them chilled for a refreshing snack with a slightly firmer texture.
FAQs
Can I substitute the peanut butter with another nut butter?
Absolutely! Almond butter or sunflower seed butter make excellent alternatives, especially if you’re avoiding peanuts. Each will add a slightly different flavor profile but maintain the creamy texture needed for binding.
Are these Chocolate Rice Krispie Balls Recipe treats gluten-free?
Traditional Rice Krispies cereal contains malt flavoring derived from barley, which is not gluten-free. However, you can use a certified gluten-free crispy rice cereal to make this recipe safe for gluten-sensitive diets.
How long does it take to make these Chocolate Rice Krispie Balls Recipe snacks?
The prep and melting process only takes about 20 minutes total, but remember to add chilling time of at least 30 minutes to let them set up perfectly before enjoying.
Can I add other mix-ins for extra crunch?
Yes! Feel free to mix in mini marshmallows, crushed pretzels, or even crispy nuts before shaping the balls for added texture that’s fun and surprising.
Are these suitable for kids’ lunchboxes?
They make a fantastic no-mess, handheld treat perfect for lunchboxes or after-school snacks. Just pack them in a sealed container to keep them fresh and firm until snack time.
Final Thoughts
Now that you have this fantastic Chocolate Rice Krispie Balls Recipe in your back pocket, you’re ready to whip up a batch anytime a sweet tooth calls. These treats are simple enough for a weeknight snack yet impressive enough to share at parties or gift with friends. Dive in, have fun with the garnishes, and enjoy every crunchy, chocolatey bite!
Print
Chocolate Rice Krispie Balls Recipe
- Prep Time: 15 minutes
- Cook Time: 5 minutes
- Total Time: 50 minutes
- Yield: 24 balls
- Category: Dessert, Snack
- Method: No-Cook
- Cuisine: American
- Diet: Vegetarian
Description
Delicious and easy-to-make Chocolate Rice Krispie Balls that combine crispy cereal with a rich, creamy chocolate and peanut butter mixture. These no-bake treats are perfect for snacks, parties, or lunchboxes, offering a delightful balance of sweetness and crunch with optional sprinkles or crushed nuts for added flavor and texture.
Ingredients
Dry Ingredients
- 3 cups Rice Krispies cereal
- 1 cup powdered sugar
- ¼ teaspoon salt
Wet Ingredients
- 1 cup semi-sweet chocolate chips
- ½ cup creamy peanut butter
- ¼ cup unsalted butter
- 1 teaspoon vanilla extract
Optional
- Sprinkles or crushed nuts for rolling
Instructions
- Combine Dry Ingredients: In a large mixing bowl, mix together the Rice Krispies cereal and powdered sugar until evenly combined.
- Melt Chocolate Mixture: In a saucepan over low heat, melt the semi-sweet chocolate chips, creamy peanut butter, and unsalted butter together, stirring continuously until the mixture is smooth and homogenous.
- Add Flavorings: Remove the saucepan from heat and stir in the vanilla extract and salt to enhance the flavor.
- Mix Wet and Dry Ingredients: Pour the melted chocolate mixture over the Rice Krispies and powdered sugar mixture. Stir thoroughly until all the cereal is fully coated with the chocolate mixture.
- Cool Mixture: Allow the mixture to cool slightly until it becomes firm enough to handle without sticking excessively.
- Form Balls: Using your hands, shape the mixture into 1-inch balls and place them on a baking sheet lined with parchment paper.
- Add Optional Coating: If desired, roll each ball in sprinkles or crushed nuts to add extra texture and flavor.
- Chill: Refrigerate the formed balls for at least 30 minutes to allow them to firm up completely.
- Storage: Store the finished rice krispie balls in an airtight container in the refrigerator until ready to serve.
Notes
- Substitute almond butter or sunflower seed butter for a peanut-free option.
- For extra crunch, add a handful of mini marshmallows or crushed pretzels into the mixture before shaping.
- These no-bake treats are ideal for holidays, lunchboxes, or quick party snacks.


