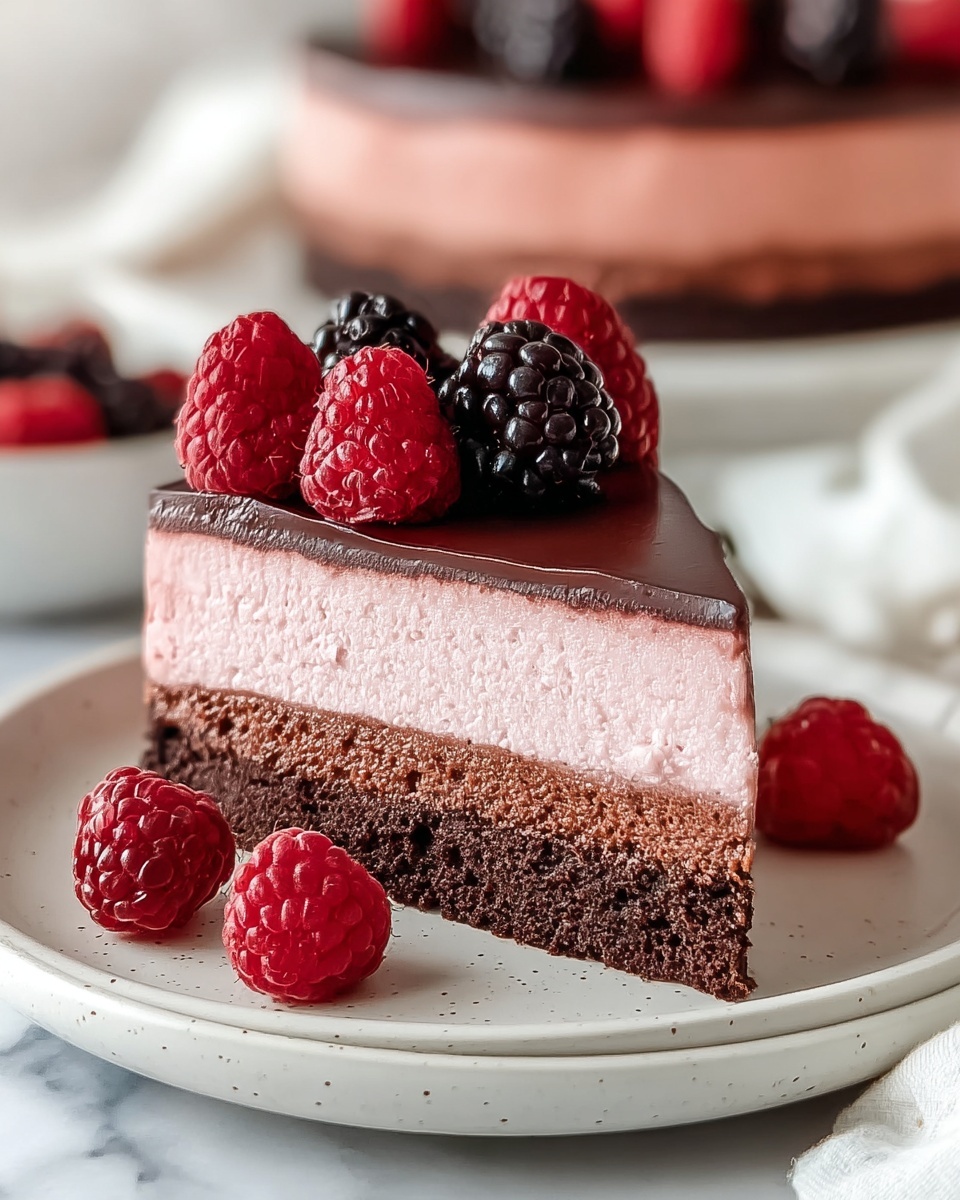
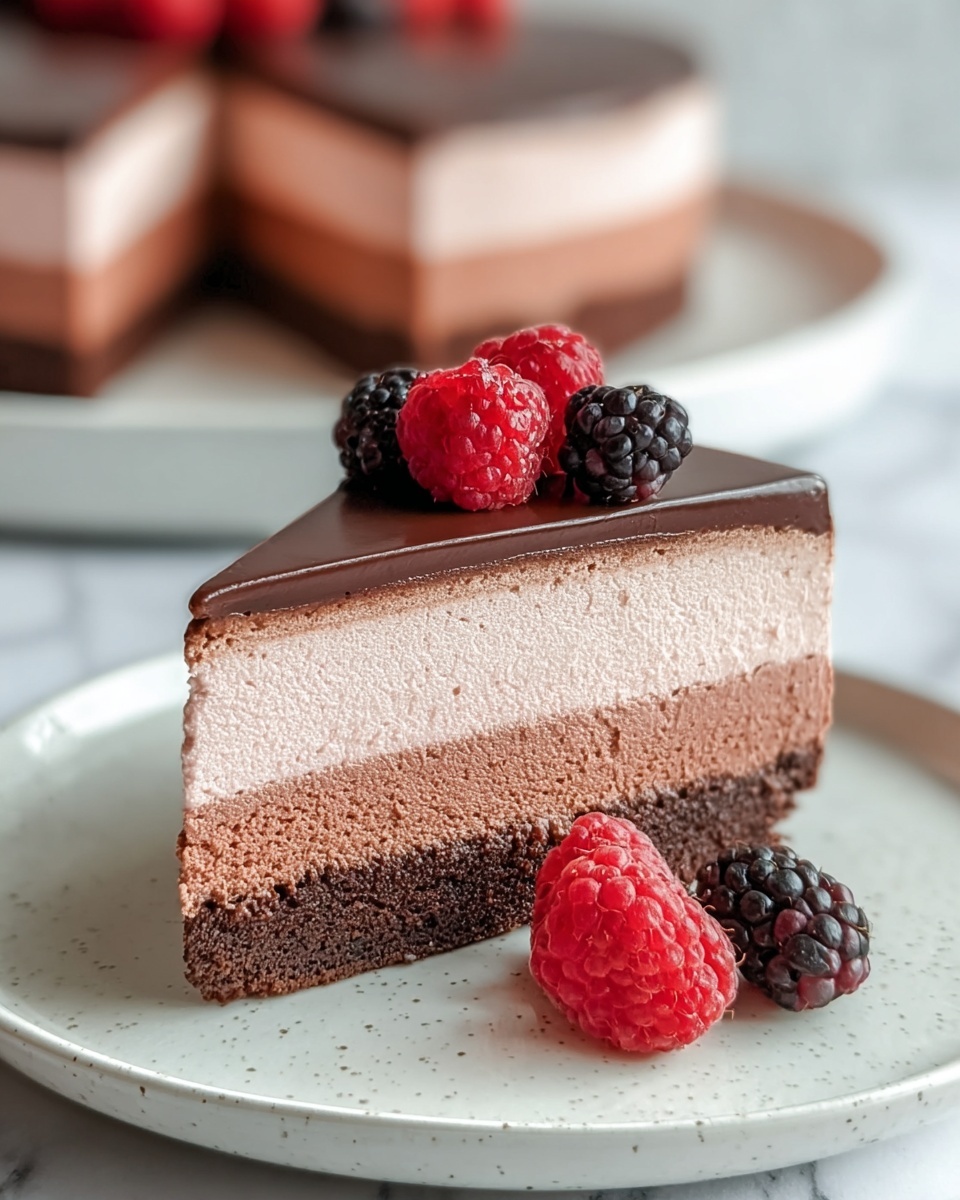
If you adore the perfect balance of rich, fudgy chocolate paired with the bright, tangy burst of fresh raspberries, then this Chocolate Raspberry Mousse Cake Recipe is about to become your new go-to dessert. Combining a dense cocoa-infused brownie base with a light, airy raspberry mousse topping, this cake brings together the best of texture and flavor in one beautifully layered masterpiece. Whether you’re celebrating a special occasion or simply craving a slice of pure indulgence, this recipe will delight every chocolate and berry lover with each luscious bite.
Ingredients You’ll Need
Every ingredient in this Chocolate Raspberry Mousse Cake Recipe plays a key role, from creating the perfect fudgy base to lending that vibrant red swirl of flavor and color in the mousse. The beauty here is in its simplicity—each component is straightforward but essential to achieving that wow factor.
- Sugar (1 cup, 200g): Adds the needed sweetness to balance the rich cocoa and tart raspberries.
- Unsalted butter (½ cup, 115g), melted: Gives the cake a moist, tender crumb and smooth texture.
- Large eggs (2): Bind the ingredients and provide structure to the cake base.
- All-purpose flour (½ cup, 60g): The backbone of the cake, supporting the rich chocolate flavor.
- Unsweetened cocoa powder (½ cup, 50g): Packs an intense chocolate punch without sweetness.
- Heavy cream (1 cup, 250ml): Whipped to create the light and creamy raspberry mousse layer.
- Raspberry puree (½ cup, 120g): Imparts fresh tartness and stunning color to the mousse.
- Sugar (¼ cup, 50g): Sweetens the raspberry puree, balancing sourness.
- Gelatin powder (1 teaspoon): Ensures the mousse sets perfectly without losing its fluffy texture.
- Water (2 tablespoons): For blooming the gelatin to activate it smoothly.
How to Make Chocolate Raspberry Mousse Cake Recipe
Step 1: Prepare Your Cake Base
Start by preheating your oven to 350°F (175°C). Grease and line a 9-inch round cake pan with parchment paper—this will ensure your chocolate brownie releases easily when baked. Taking this extra step makes all the difference when removing the finished base.
Step 2: Mix the Wet Ingredients
In a mixing bowl, combine your sugar with melted butter for a rich, silky texture. Beat in the eggs thoroughly; this not only blends the mixture but also helps the cake rise just perfectly. The smooth blend here sets the stage for a well-textured brownie layer.
Step 3: Add the Dry Ingredients
Sift in your all-purpose flour and unsweetened cocoa powder to the wet mixture. Sifting ensures no lumps and a perfectly smooth batter. Stir gently until everything is incorporated into a luscious, velvety chocolate batter ready to bake.
Step 4: Bake the Brownie Base
Pour the batter into your prepared pan, spreading evenly. Bake for 20 to 25 minutes, checking with a toothpick that it comes out clean for a perfectly fudgy, yet set base. Allowing it to cool completely is crucial before adding the mousse layer to prevent melting or deflation.
Step 5: Bloom the Gelatin
Sprinkle the gelatin over water in a small bowl and let it bloom for 5 minutes. This step activates the gelatin, ensuring it dissolves smoothly later to give your mousse a stable yet airy finish.
Step 6: Prepare the Raspberry Mixture
Warm the raspberry puree and sugar together gently until the sugar dissolves completely. This gentle heat sharpens the raspberry flavor and ensures sweetness is perfectly balanced. Remove from heat and stir in the bloomed gelatin until fully dissolved for that flawless mousse texture.
Step 7: Whip the Cream
Allow the raspberry mixture to cool to room temperature while you whip the heavy cream. Beat it until stiff peaks form—this is your mousse’s cloud-like foundation. The timing here is key to maintain lightness when folding in the fruit mixture.
Step 8: Combine and Assemble
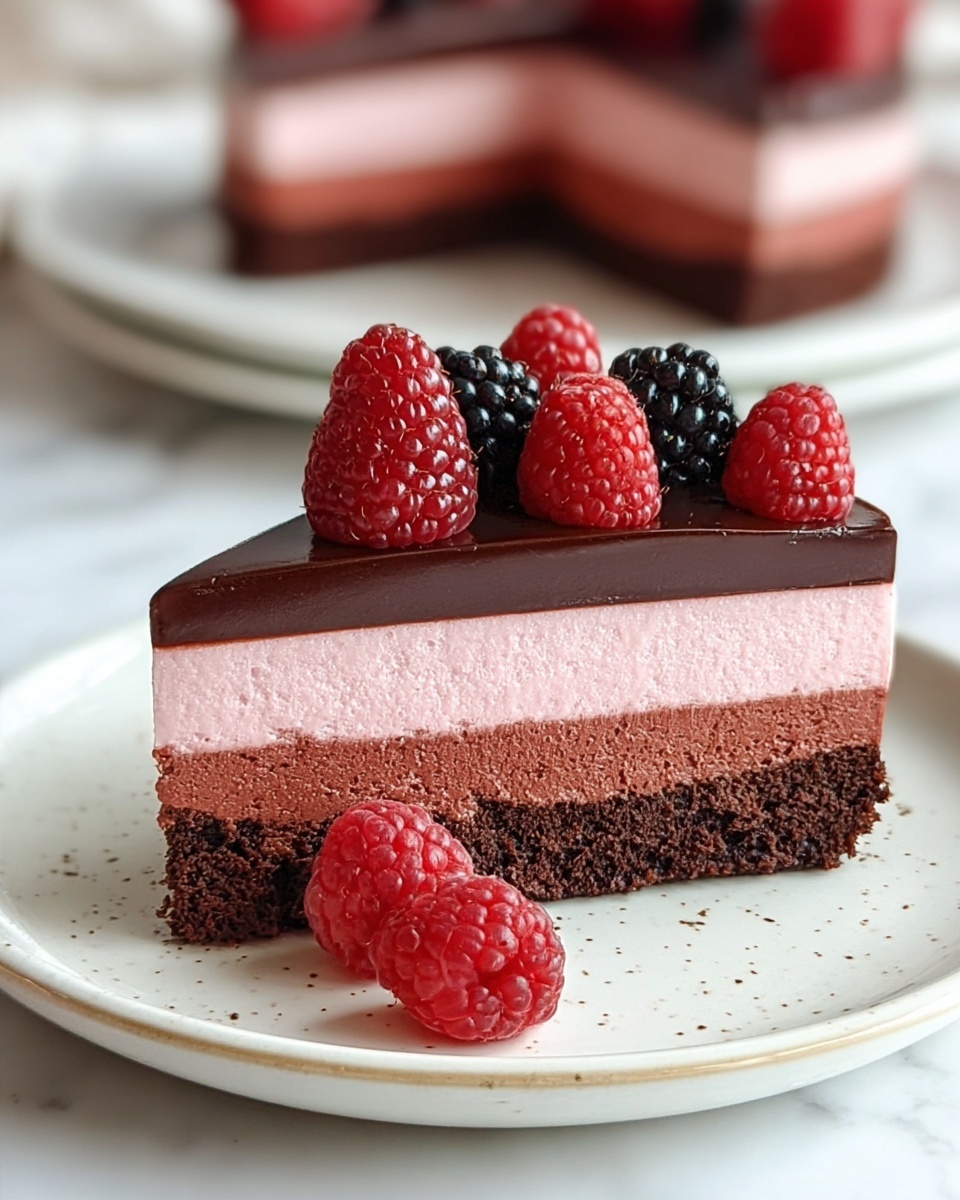
Gently fold the cooled raspberry mixture into the whipped cream, combining without losing that airy texture. Once your brownie base has fully cooled, place it on a serving platter, then spread the raspberry mousse evenly over the top, creating a beautiful contrast of colors and textures.
Step 9: Chill and Set
Refrigerate your assembled cake for at least 4 hours to allow the mousse to set firmly but maintain its soft, tender quality. Patience here rewards you with a cake that slices cleanly and melts in your mouth.
How to Serve Chocolate Raspberry Mousse Cake Recipe
Garnishes
Fresh raspberries, a dusting of cocoa powder, or even delicate chocolate shavings complement this cake perfectly. These simple touches not only add visual flair but elevate every bite with a hint of freshness or extra chocolatey richness.
Side Dishes
A scoop of vanilla ice cream or a dollop of freshly whipped cream pairs wonderfully. Alternatively, a light, fruity salad or chilled sparkling wine balances the richness for a truly memorable dessert course.
Creative Ways to Present
Try slicing the cake into individual portions and serving on colorful plates with a drizzle of raspberry sauce. Layering with fresh mint leaves adds a pop of color and freshness that makes this cake look as stunning as it tastes.
Make Ahead and Storage
Storing Leftovers
Keep leftover cake covered in the fridge to maintain moisture and keep the mousse fresh. It will stay delicious for up to three days, making it a perfect make-ahead treat that doesn’t lose its luster.
Freezing
This cake can be frozen if wrapped tightly in plastic wrap and then foil. Freeze for up to one month, then thaw in the refrigerator overnight to preserve the mousse’s delicate texture without weeping or separation.
Reheating
Since this is a chilled mousse cake, reheating is not recommended. Instead, allow it to come to room temperature for about 20 minutes before serving to enhance flavor and soften the texture slightly without melting the mousse.
FAQs
Can I use frozen raspberries for the puree?
Absolutely! Just thaw and strain them to remove excess liquid before pureeing. This helps keep your mousse from getting too runny while still delivering that lovely raspberry flavor.
Is gelatin necessary for the mousse layer?
Yes, gelatin is key to help the mousse set and hold its shape while maintaining a silky, airy texture. Without it, the mousse may be too soft and won’t slice as neatly.
Can I make this cake gluten-free?
Definitely! Swap the all-purpose flour with your favorite gluten-free flour blend, keeping the measurement the same. This way, everyone can enjoy the richness without gluten concerns.
How long does it take to prepare and bake this cake?
The total hands-on prep is about 30 minutes, and baking takes around 25 minutes. Then you’ll need to refrigerate the cake for at least 4 hours for the mousse to set properly.
What is the best way to slice this mousse cake?
Use a sharp knife warmed slightly under hot water and wiped dry between slices. This technique helps cut through the soft mousse smoothly without tearing or sticking.
Final Thoughts
This Chocolate Raspberry Mousse Cake Recipe is one of those delightful desserts that feels both indulgent and elegant without complicated steps. Every forkful offers a dreamy balance of dense chocolate and bright raspberry that will keep you coming back for more. I can’t wait for you to try it and share it with friends and family—the smiles it brings are truly worth every minute in the kitchen.
Print
Chocolate Raspberry Mousse Cake Recipe
- Prep Time: 30 minutes
- Cook Time: 25 minutes
- Total Time: 5 hours 55 minutes
- Yield: 8-10 servings
- Category: Dessert
- Method: Baking
- Cuisine: American
- Diet: Vegetarian
Description
A decadent Chocolate Raspberry Mousse Cake combining a rich cocoa brownie base with a light, airy raspberry mousse topping. Perfectly balanced between indulgent chocolate and fresh raspberry flavors, this elegant dessert is ideal for special occasions or a luxurious treat.
Ingredients
Brownie Base
- 1 cup (200g) sugar
- ½ cup (115g) unsalted butter, melted
- 2 large eggs
- ½ cup (60g) all-purpose flour
- ½ cup (50g) unsweetened cocoa powder
Raspberry Mousse
- 1 cup (250ml) heavy cream
- ½ cup (120g) raspberry puree
- ¼ cup (50g) sugar
- 1 teaspoon gelatin powder
- 2 tablespoons water
Instructions
- Preheat and Prepare Pan: Preheat your oven to 350°F (175°C). Grease and line a 9-inch (23cm) round cake pan with parchment paper to ensure easy removal of the brownie base.
- Mix Wet Ingredients: In a mixing bowl, combine sugar and melted butter. Add the eggs and mix until the mixture is smooth and well combined.
- Incorporate Dry Ingredients: Sift flour and cocoa powder into the wet mixture. Stir gently until you achieve a smooth batter without lumps.
- Bake Brownie Base: Pour the batter into the prepared cake pan. Bake for 20-25 minutes or until a toothpick inserted into the center comes out clean, indicating the brownie is done.
- Cool Brownie: Allow the brownie to cool completely in the pan to prevent breaking when removing.
- Bloom Gelatin: Sprinkle gelatin powder over water in a small bowl. Let it sit for 5 minutes to absorb water and soften.
- Prepare Raspberry Mixture: Heat raspberry puree and sugar in a saucepan over low heat until the sugar dissolves. Remove from heat and stir in the bloomed gelatin until fully dissolved.
- Cool Raspberry Mixture: Allow this mixture to cool to room temperature to avoid melting the whipped cream.
- Whip Cream: In a separate bowl, whip heavy cream until stiff peaks form, giving the mousse its light texture.
- Fold Mousse: Gently fold the cooled raspberry mixture into the whipped cream until well blended, forming the raspberry mousse.
- Assemble Cake: Remove cooled brownie base from the pan and place it on a serving platter.
- Spread Mousse: Evenly spread the raspberry mousse over the brownie base to create a smooth topping layer.
- Chill to Set: Refrigerate the assembled cake for at least 4 hours until the mousse is firm and set before serving.
Notes
- Ensure the brownie base is fully cooled before adding mousse to prevent melting.
- Blooming gelatin properly is crucial for mousse setting; do not skip or reduce the gelatin amount.
- Use fresh or high-quality frozen raspberries for the puree to enhance flavor.
- Adjust sugar in mousse based on the tartness of the raspberries.
- For a more intense chocolate flavor, consider using dark cocoa powder.
- This cake is best served chilled and within 2 days for optimal freshness.

