
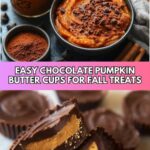
If you’re looking for a cozy, crowd-pleasing treat that perfectly blends the season’s best flavors, then this Chocolate Pumpkin Butter Cups Recipe is your new go-to dessert. Imagine smooth, rich chocolate mingling with creamy pumpkin butter infused with warm pumpkin spice—each bite brings that perfect balance of sweetness, spice, and a little nutty goodness. It’s not just a dessert, but a celebration of fall wrapped up in a bite-sized cup that’s as fun to make as it is to eat.
Ingredients You’ll Need
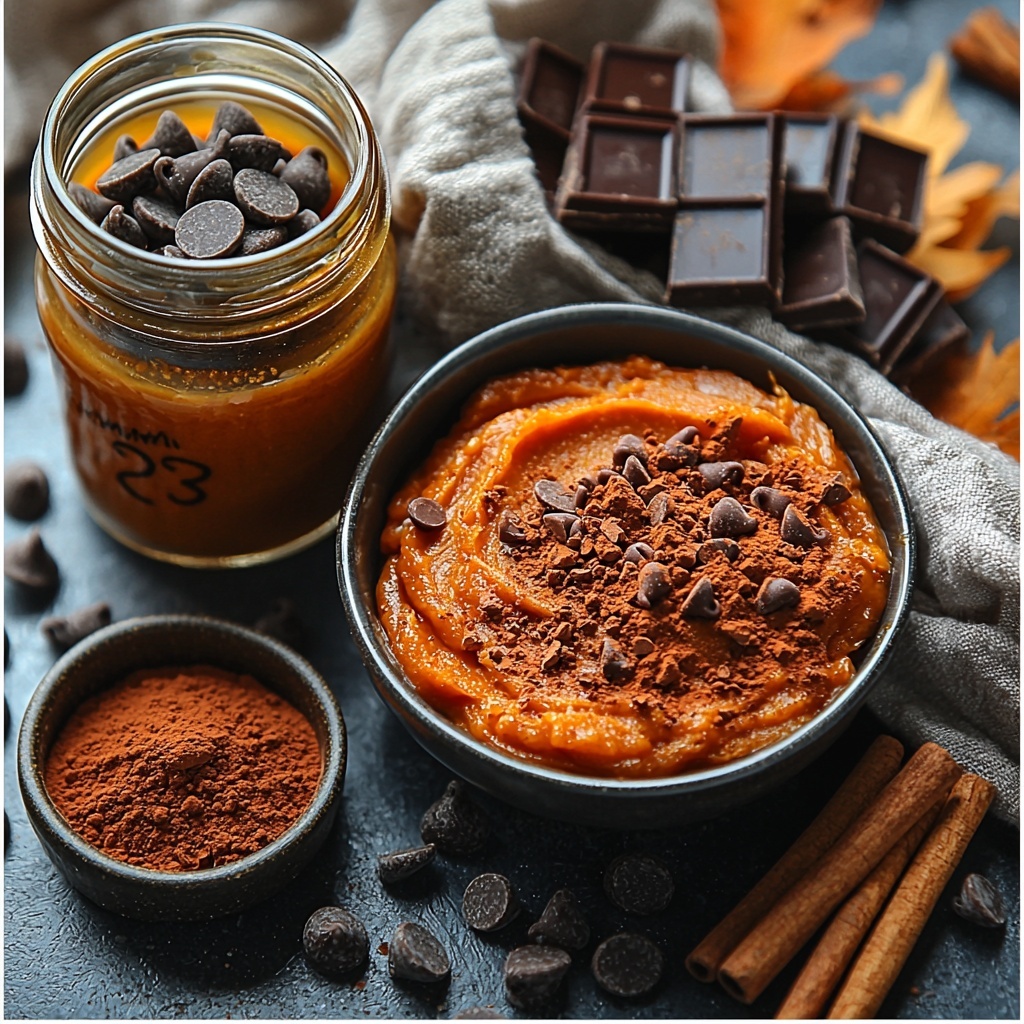
These simple ingredients come together beautifully to give you that classic rich chocolate taste paired with the comforting warmth of pumpkin spice. Each item plays an essential role, whether it’s adding creaminess, sweetness, or that signature seasonal flavor.
- Pumpkin Puree: Provides a smooth, naturally sweet base and that irresistible pumpkin flavor.
- Almond Butter (or nut butter of choice): Adds creamy texture and a subtle nutty flavor that complements the pumpkin perfectly.
- Honey (or maple syrup): Natural sweetener that balances the spices and enriches the filling.
- Pumpkin Spice: Brings classic warmth with cinnamon, nutmeg, and cloves for that unmistakable fall taste.
- Chocolate Chips: High-quality melting chocolate creates that luscious exterior and buffers the pumpkin filling delightfully.
- Coconut Oil: Helps melt the chocolate smoothly and gives a glossy finish that hardens beautifully.
How to Make Chocolate Pumpkin Butter Cups Recipe
Step 1: Prepare Your Molds
Start by arranging silicone molds on a baking sheet. This gives you stability while filling and transferring them to the fridge, ensuring your butter cups keep their shape perfectly.
Step 2: Melt the Chocolate
Combine chocolate chips with coconut oil using a double boiler or microwave, stirring until completely smooth and glossy. This smooth chocolate coating will envelop your pumpkin butter filling in rich, velvety chocolate.
Step 3: Create the Chocolate Base
Pour about one tablespoon of the melted chocolate into each mold, gently coating the bottom evenly. Pop these into the fridge for 10 minutes so the base can set firmly before adding the filling.
Step 4: Mix the Pumpkin Filling
In a bowl, mix pumpkin puree, almond butter, honey, and pumpkin spice until you have a smooth and luscious filling. This luscious blend is what makes these cups special—creamy, flavorful, and just sweet enough.
Step 5: Add Pumpkin Filling to Molds
Once the chocolate base is firm, spoon the pumpkin mixture into each mold, smoothing the top out. Try to get an even layer so every bite has that perfect filling-to-chocolate ratio.
Step 6: Top with More Chocolate
Cover each pumpkin-filled mold with the remaining melted chocolate, spreading or pouring it gently until fully covered. Tap the tray to release any bubbles, making sure the top is smooth and sealed.
Step 7: Chill and Set
Place the finished cups in the fridge for at least 90 minutes to fully harden before carefully popping them out of the molds. The wait is totally worth it for these beautifully set treats.
How to Serve Chocolate Pumpkin Butter Cups Recipe

Garnishes
Sprinkle a pinch of crushed toasted pepitas or a dusting of cinnamon on top just before serving. This adds a lovely crunch and highlights the warm spice notes in each cup.
Side Dishes
Pair these buttery cups with a warm cup of chai or a dark coffee to enhance the rich spices and chocolate. They also make a delightful little finish to a festive fall meal or holiday gathering.
Creative Ways to Present
Serve them in small decorative cupcake liners or arrange them on a rustic wooden platter with autumn leaves for a charming seasonal presentation. You can even package them in a pretty box for a homemade gift that’s sure to impress.
Make Ahead and Storage
Storing Leftovers
If you have any leftovers (which is rare!), keep them in an airtight container in the refrigerator. They’ll stay fresh for up to one week while maintaining that smooth texture and bold flavor.
Freezing
You can freeze these butter cups for up to 3 months. Just layer them with parchment paper in a sealed container to prevent sticking, then thaw in the fridge when ready to enjoy.
Reheating
These are best served chilled, so skip reheating. If the chocolate feels too hard straight from the fridge, just leave them at room temperature for 10 minutes before serving to soften slightly.
FAQs
Can I use a different nut butter?
Absolutely! Almond butter adds a nice mild flavor, but peanut butter, cashew butter, or sunflower seed butter work well, too. Just pick your favorite nut or seed butter for a personalized twist.
Is there a vegan option for the sweetener?
Yes, substituting honey with maple syrup makes this recipe completely vegan-friendly while maintaining that subtle sweetness.
What if I don’t have pumpkin spice on hand?
You can make your own by blending cinnamon, nutmeg, ginger, and cloves in proportions to taste. This keeps the warm flavor profile intact without needing a pre-mixed spice.
Can I use dairy chocolate instead of dark chocolate?
Yes, feel free to use your preferred chocolate chips. Just keep in mind that dairy or milk chocolate will make your butter cups sweeter and a bit softer.
How long do these cups last at room temperature?
Because of the pumpkin filling, it’s best to keep them refrigerated and only leave them out for short periods to avoid spoilage.
Final Thoughts
There’s something truly magical about creating small, flavorful bites that capture the essence of fall, and this Chocolate Pumpkin Butter Cups Recipe does just that beautifully. Whether you’re sharing with friends, gifting to loved ones, or treating yourself after a long day, these cups are bound to bring warmth, joy, and a little indulgence. Give them a try—you might just find your new favorite seasonal sweet treat!
Print
Chocolate Pumpkin Butter Cups Recipe
- Prep Time: 20 minutes
- Cook Time: 10 minutes
- Total Time: 1 hour 20 minutes
- Yield: 12 cups
- Category: Dessert
- Method: No-Cook
- Cuisine: American
- Diet: Gluten Free
Description
Delight in these rich and creamy Chocolate Pumpkin Butter Cups, a perfect seasonal treat combining smooth pumpkin puree, nutty almond butter, and warm pumpkin spice encased in a luscious chocolate shell. These no-bake cups are easy to prepare and ideal for fall gatherings or a healthy indulgence.
Ingredients
Filling
- 1/2 Cup Pumpkin Puree
- 1/3 Cup Almond Butter (or nut butter of choice)
- 2 Tablespoons Honey (or maple syrup)
- 2 Teaspoons Pumpkin Spice
Chocolate Coating
- 1 Cup Chocolate Chips
- 1 Tablespoon Coconut Oil
Instructions
- Prepare molds: Arrange silicone molds on a baking sheet to provide stability for easy handling during preparation and chilling.
- Melt chocolate: Combine the chocolate chips and coconut oil in a double boiler or microwave-safe bowl. Heat gently until completely melted and smooth, stirring occasionally to prevent burning.
- First chocolate layer: Spoon about one tablespoon of melted chocolate into each mold, spreading it evenly to coat the bottom thoroughly. Place the molds in the refrigerator or freezer for 10 minutes to allow the chocolate to harden.
- Prepare filling: In a mixing bowl, whisk together the pumpkin puree, almond butter, honey, and pumpkin spice until smooth and well combined, creating a creamy and flavorful mixture.
- Fill cups: Spoon the pumpkin mixture onto the hardened chocolate bases, smoothing out the tops evenly with the back of the spoon or a spatula.
- Seal with chocolate: Pour the remaining melted chocolate over the filled cups to cover the pumpkin filling completely. Gently tap the molds to release any trapped air bubbles and level the surface.
- Set cups: Chill the completed butter cups in the refrigerator for at least 90 minutes or until fully set. Once firm, carefully pop them out of the molds and serve.
Notes
- You can substitute almond butter with any nut or seed butter like cashew or sunflower seed butter.
- Maple syrup is a vegan-friendly alternative to honey.
- Use good quality chocolate chips for the best flavor and texture.
- These butter cups should be stored in the refrigerator to maintain firmness.
- For quicker setting, you can use the freezer but consume within a few days for optimal taste.
