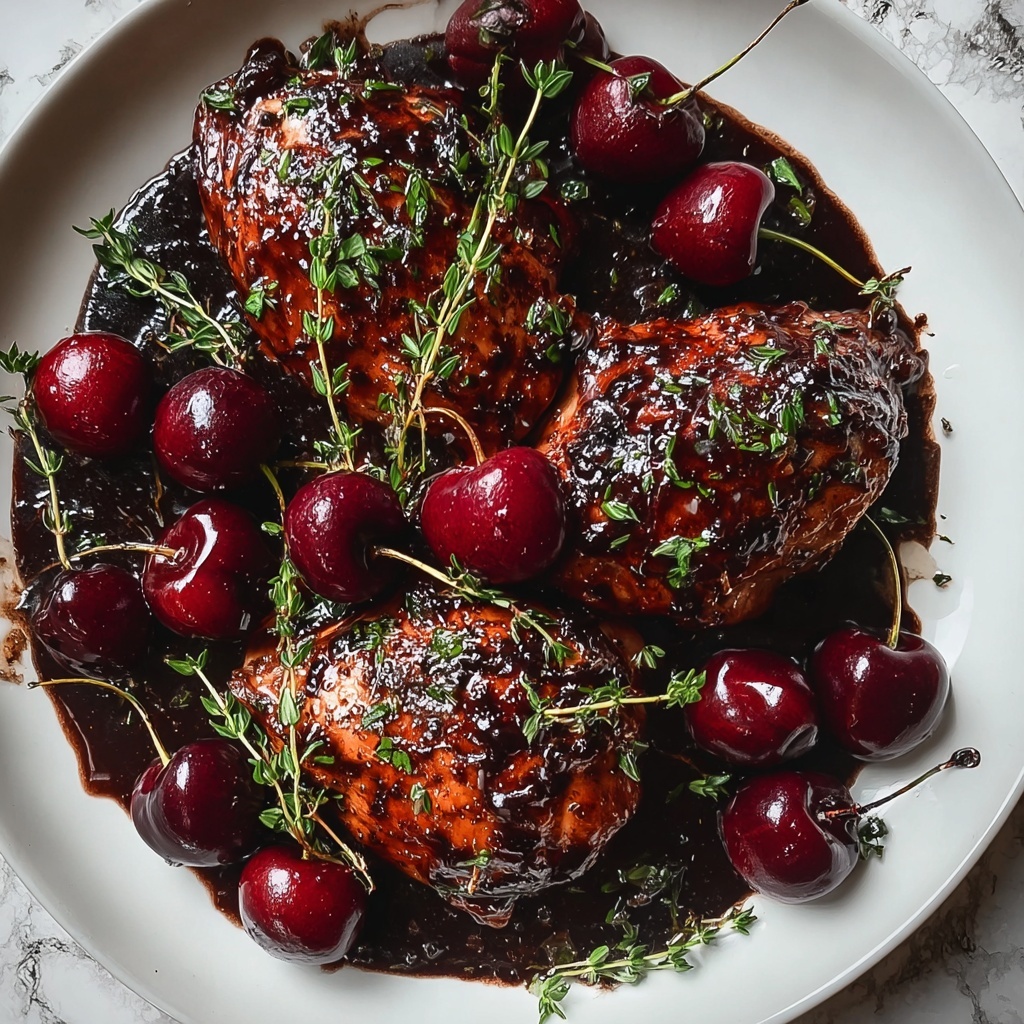
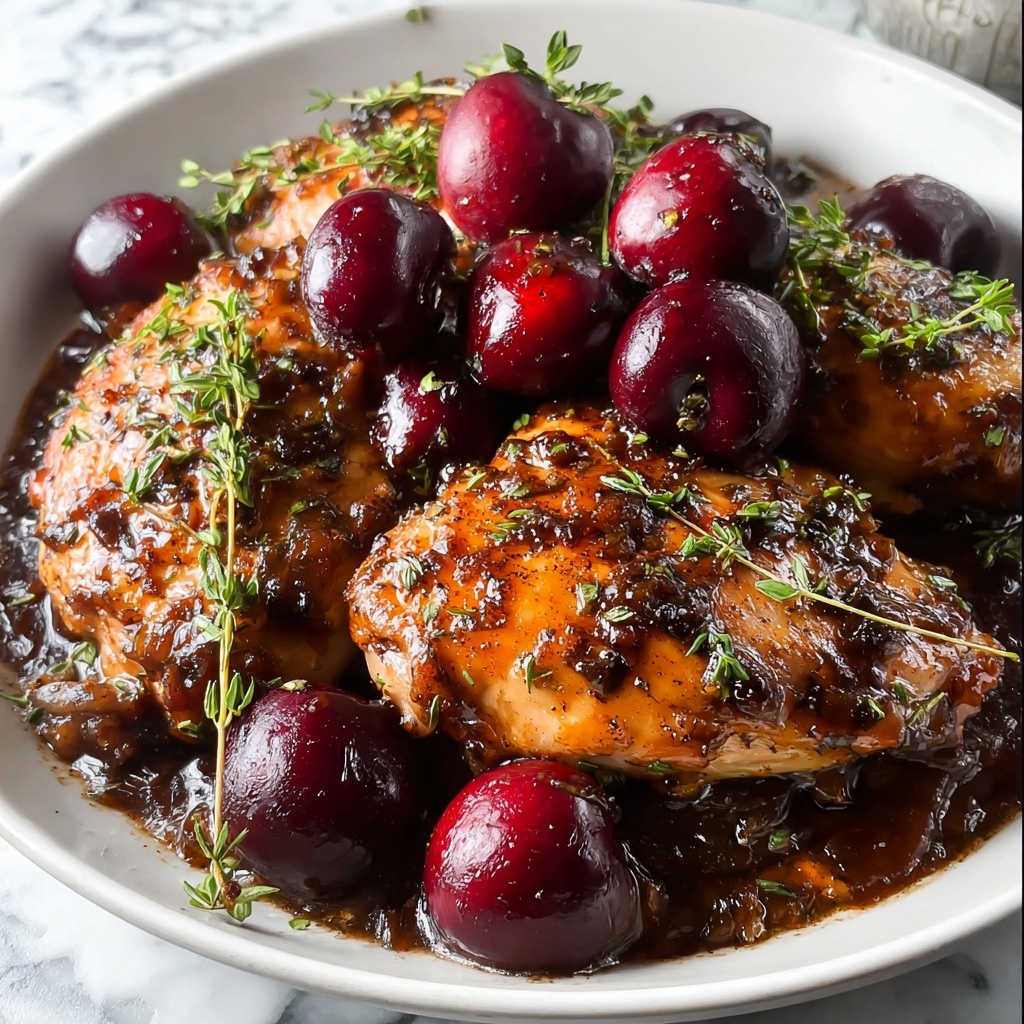
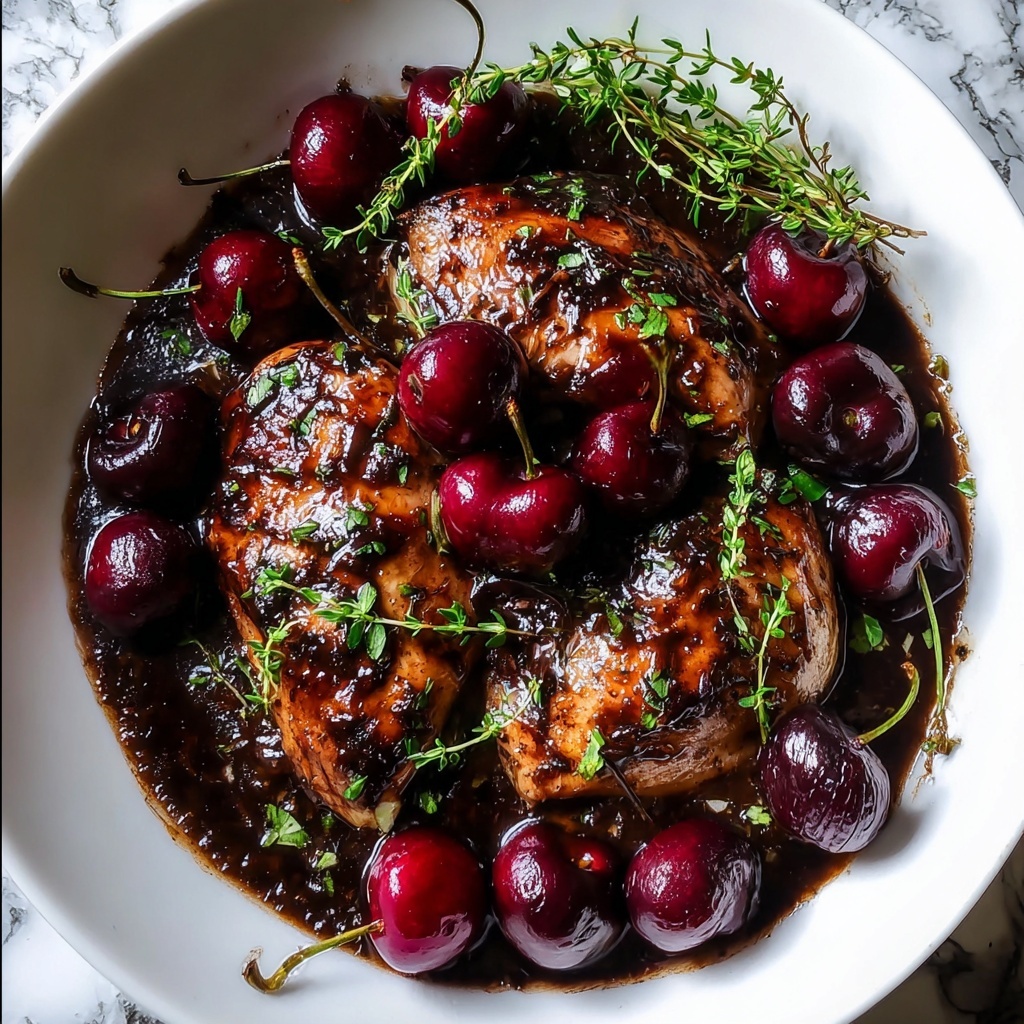
If you’re craving a dish that brilliantly balances sweet, tangy, and savory flavors, this Cherry Balsamic Glazed Chicken Recipe is your new best friend in the kitchen. Tender chicken breasts get a gorgeous, glossy coating of a rich cherry and balsamic reduction that feels both indulgent and fresh. With just a handful of simple ingredients, this recipe transforms ordinary chicken into an elegant, flavorful meal perfect for weeknights or impressing guests without hours of fuss. Trust me, once you try this, it will become a beloved staple you’ll want to share again and again.
Ingredients You’ll Need
The beauty of this recipe lies in its simplicity, using ingredients that bring amazing flavor and vibrant color to the dish without overwhelming complexity. Each component plays an essential role in building layers of taste and texture that make this Cherry Balsamic Glazed Chicken Recipe truly shine.
- 4 boneless, skinless chicken breasts: The lean protein base that soaks up all the delicious glaze wonderfully.
- 1 cup fresh or frozen pitted cherries: Adds natural sweetness and a beautiful pop of color to the glaze.
- 1/4 cup balsamic vinegar: Brings a rich, tangy depth that perfectly balances the cherries’ sweetness.
- 2 tablespoons honey: Offers subtle sweetness and helps create that irresistible sticky glaze.
- 1 tablespoon olive oil: For searing the chicken to golden perfection with a hint of fruitiness.
- 2 cloves garlic, minced: Provides a savory kick that enhances every bite.
- Salt and pepper to taste: Essential seasoning to elevate all the flavors.
- Fresh thyme sprigs for garnish (optional): Adds a fragrant herbal note and a beautiful presentation touch.
How to Make Cherry Balsamic Glazed Chicken Recipe
Step 1: Prepare and Season the Chicken
Start by preheating your oven to 400°F (200°C), so it’s ready when you need it. While you wait, generously season both sides of the chicken breasts with salt and pepper. This simple step ensures every bite is flavorful, creating a perfect foundation for the glaze to come.
Step 2: Sear the Chicken to Golden Perfection
Heat olive oil in a large oven-safe skillet over medium-high heat. Place the chicken breasts carefully in the pan and let them sear undisturbed for about 4 minutes per side. This step locks in juices and gives the chicken a gorgeous golden brown crust that adds both texture and flavor. Once seared, transfer the chicken to a plate and set aside.
Step 3: Build the Cherry Balsamic Glaze
Using the same skillet, quickly sauté the minced garlic for about 30 seconds, just until fragrant. Then, add the cherries, balsamic vinegar, and honey. Stir them together and cook for 5 minutes, until the mixture thickens slightly and the cherries start to soften. This step is magical—the glaze begins to develop that perfect balance of sweet and tangy that defines this Cherry Balsamic Glazed Chicken Recipe.
Step 4: Combine and Bake
Return the seared chicken breasts to the skillet, nestling them into the cherry glaze, and spoon some of the mixture over the tops of the chicken. Transfer the entire skillet to your preheated oven and bake for 15 to 20 minutes. You’re aiming for the chicken to reach a safe internal temperature of 165°F (74°C), ensuring it’s juicy and cooked through.
Step 5: Rest and Garnish
Once the chicken is perfectly cooked, remove the skillet from the oven and let the chicken rest for a few minutes. This resting allows juices to redistribute, keeping each bite moist. For an extra touch of freshness and aroma, garnish with a few fresh thyme sprigs before serving. Now you’re ready to enjoy the rewarding flavors of this Cherry Balsamic Glazed Chicken Recipe.
How to Serve Cherry Balsamic Glazed Chicken Recipe
Garnishes
Fresh thyme sprigs are a classic choice here, adding a subtle herbal nuance and making your dish look stunning on the plate. If you want to get creative, you might also sprinkle chopped toasted almonds or a little lemon zest for brightness that complements the glaze beautifully.
Side Dishes
This chicken shines best alongside simple, fresh sides that soak up the sauce. Consider creamy mashed potatoes, garlic roasted vegetables, or a crisp green salad. Each side complements the sweet and tangy glaze while keeping the meal balanced and colorful.
Creative Ways to Present
For a show-stopping presentation, serve your Cherry Balsamic Glazed Chicken Recipe over creamy polenta or even quinoa topped with extra cherry glaze drizzled over the chicken. Plating the chicken on a wooden board with fresh herbs scattered around brings a rustic charm that’s perfect for entertaining.
Make Ahead and Storage
Storing Leftovers
Any leftover Cherry Balsamic Glazed Chicken Recipe stores beautifully in an airtight container in the refrigerator for up to 3 days. The flavors meld even further after resting, making it a tasty leftover for lunches or quick dinners.
Freezing
If you want to save this dish for future meals, freeze the cooked chicken breasts separately from the glaze to maintain texture. Use freezer-safe containers or heavy-duty bags for up to 2 months. Thaw overnight in the refrigerator before reheating.
Reheating
To reheat, gently warm the chicken and glaze in a skillet over low heat or microwave in short bursts until heated through. This helps keep the chicken moist and the cherry balsamic sauce glossy and delicious.
FAQs
Can I use frozen cherries for this recipe?
Absolutely! Frozen cherries work perfectly in this Cherry Balsamic Glazed Chicken Recipe. Just make sure to thaw and drain any excess juice before cooking to avoid diluting the glaze.
Is it possible to use chicken thighs instead of breasts?
Yes, chicken thighs are a great option and will stay juicy and tender. Adjust the cooking time slightly as thighs may take a bit longer to reach the proper temperature.
Can I make the glaze ahead of time?
You can prepare the cherry balsamic glaze a day ahead and store it in the fridge. Reheat gently before combining with the chicken to keep all those vibrant flavors intact.
What can I substitute for balsamic vinegar?
If you don’t have balsamic vinegar on hand, a mix of red wine vinegar and a touch of honey can mimic its sweet and tangy profile, but balsamic remains the best choice for authentic flavor.
Is this recipe gluten-free?
Yes! All the ingredients in the Cherry Balsamic Glazed Chicken Recipe are naturally gluten-free, making it a safe and delicious option for anyone avoiding gluten.
Final Thoughts
There is something truly special about this Cherry Balsamic Glazed Chicken Recipe that feels both comforting and elegant at the same time. It’s the kind of dish that brings smiles around the table and invites second helpings without guilt. I can’t wait for you to try it and make it a part of your cooking repertoire—you’ll wonder how you ever lived without it!
Print
Cherry Balsamic Glazed Chicken Recipe
- Prep Time: 10 minutes
- Cook Time: 30 minutes
- Total Time: 40 minutes
- Yield: 4 servings
- Category: Main Course
- Method: Baking
- Cuisine: American
Description
This Cherry Balsamic Glazed Chicken features tender chicken breasts seared to perfection and baked with a sweet-tart cherry and balsamic glaze. The combination of fresh cherries, honey, garlic, and balsamic vinegar creates a luscious sauce that beautifully complements the savory chicken. A quick and elegant dish perfect for weeknight dinners or special occasions.
Ingredients
Chicken
- 4 boneless, skinless chicken breasts
- Salt and pepper to taste
- 1 tablespoon olive oil
Cherry Balsamic Glaze
- 1 cup fresh or frozen pitted cherries
- 1/4 cup balsamic vinegar
- 2 tablespoons honey
- 2 cloves garlic, minced
Garnish
- Fresh thyme sprigs for garnish (optional)
Instructions
- Preheat Oven: Preheat your oven to 400°F (200°C) to ensure it reaches the proper temperature for baking the chicken evenly after searing.
- Season Chicken: Season the chicken breasts on both sides with salt and pepper to enhance their flavor before cooking.
- Sear Chicken: Heat olive oil in a large oven-safe skillet over medium-high heat. Add the chicken breasts and sear for about 4 minutes per side until golden brown, creating a flavorful crust.
- Remove Chicken: Take the seared chicken out of the skillet and set aside temporarily to prepare the glaze.
- Sauté Garlic: In the same skillet, add minced garlic and sauté for about 30 seconds until fragrant, being careful not to burn it.
- Make Sauce: Add the cherries, balsamic vinegar, and honey to the skillet. Stir and cook for approximately 5 minutes or until the mixture thickens slightly to form a glaze.
- Combine Chicken & Sauce: Return the chicken breasts to the skillet, spooning the cherry glaze generously over each piece to coat them well.
- Bake: Transfer the skillet to the preheated oven. Bake the chicken for 15-20 minutes or until fully cooked through and an internal temperature of 165°F (74°C) is reached.
- Rest Chicken: Remove the skillet from the oven and let the chicken rest for a few minutes to allow juices to redistribute, ensuring moist and tender meat.
- Garnish & Serve: Garnish with fresh thyme sprigs if desired and serve the chicken warm, spooning extra glaze from the pan over the top.
Notes
- If fresh cherries are unavailable, thawed frozen cherries work well as a substitute.
- For a spicier kick, add a pinch of red pepper flakes when sautéing the garlic.
- Ensure the skillet is oven-safe before transferring it to the oven to avoid damage or injuries.
- To check doneness, use a meat thermometer rather than relying solely on time for perfectly cooked chicken.
- This dish pairs beautifully with roasted vegetables, mashed potatoes, or a light green salad.


