If you’re looking for a snack that packs a punch of flavor and a delightful crunch, the Air Fryer Stuffed Pickles Recipe is an absolute game changer. This treat combines tangy, juicy pickles with a luscious, cheesy filling that crisps up beautifully in the air fryer. It’s a perfect balance of creamy, savory, and tart that will surprise your taste buds and leave you reaching for more. Whether you’re entertaining guests or craving a unique appetizer, this recipe turns simple ingredients into a crowd-pleaser with minimal effort and maximum flavor.
Ingredients You’ll Need
The magic of this Air Fryer Stuffed Pickles Recipe lies in its simple yet carefully chosen ingredients. Each element brings its own charm—the cream cheese adds creamy richness, ranch seasoning delivers a burst of tangy herbs, shredded cheddar cheese contributes a sharp, melty goodness, and pickles provide that essential zesty crunch.
- Cream cheese: Use softened cream cheese to make mixing and stuffing smooth and easy.
- Ranch seasoning: Adds a flavorful herb and spice blend that elevates the filling.
- Shredded cheddar cheese: Choose sharp or mild depending on your taste for a melty, cheesy center.
- Pickles: Opt for large dill pickles, sliced lengthwise and hollowed out for the perfect stuffing vessel.
How to Make Air Fryer Stuffed Pickles Recipe
Step 1: Prepare the filling
Start by combining the softened cream cheese, ranch seasoning, and shredded cheddar cheese in a mixing bowl. Stir gently but thoroughly until everything is evenly mixed. This creamy blend will be the heart and soul of your Air Fryer Stuffed Pickles Recipe, providing a rich, tangy, and cheesy bite that contrasts wonderfully with the pickles.
Step 2: Hollow out the pickles
Next, slice your pickles in half lengthwise. Using a small spoon or melon baller, carefully scoop out the centers to create a hollow cavity. Don’t worry about removing every bit of pickle flesh—you want enough space to stuff the cheesy filling without breaking the pickle halves. This step is crucial to get that perfect balance of crunchy and creamy in every bite.
Step 3: Stuff the pickles
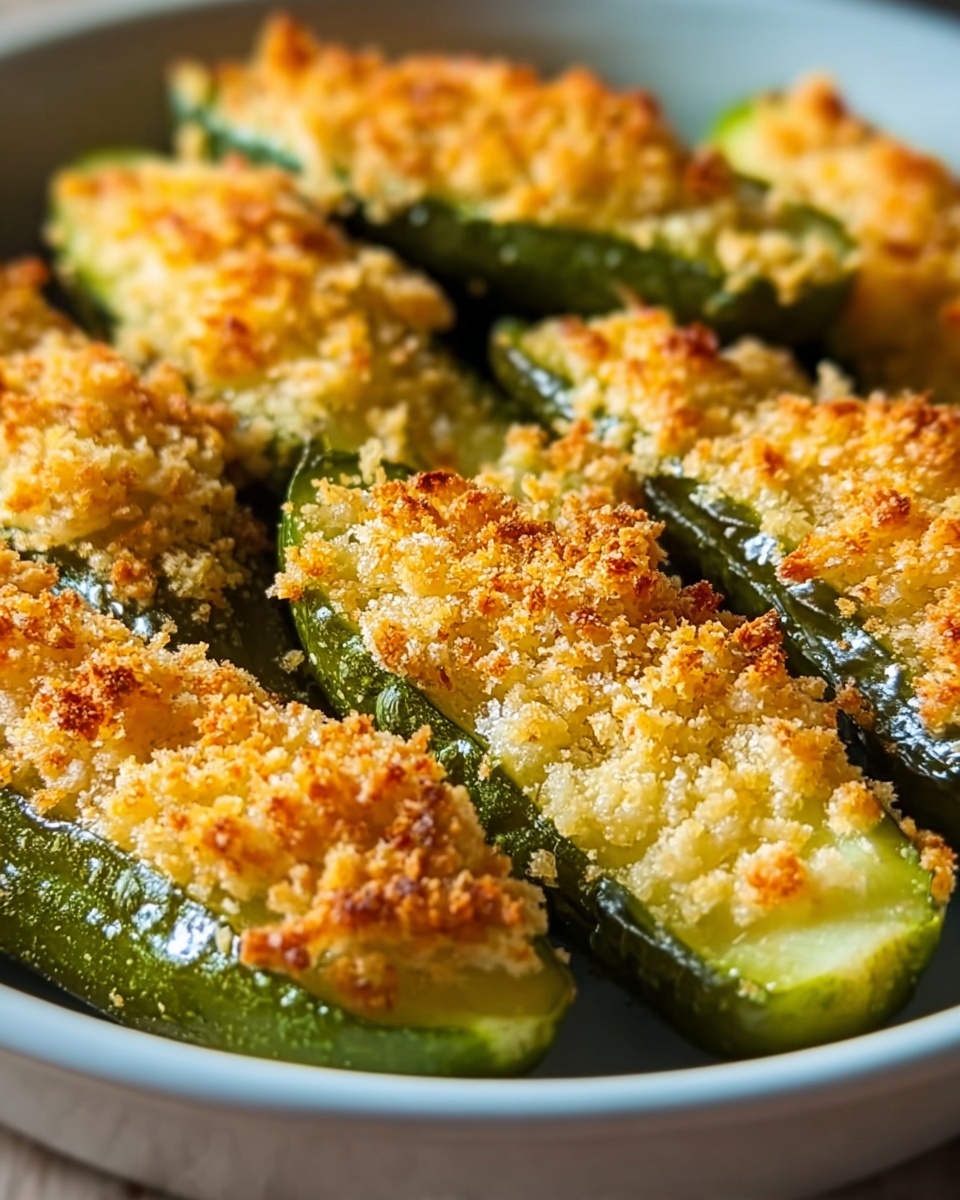
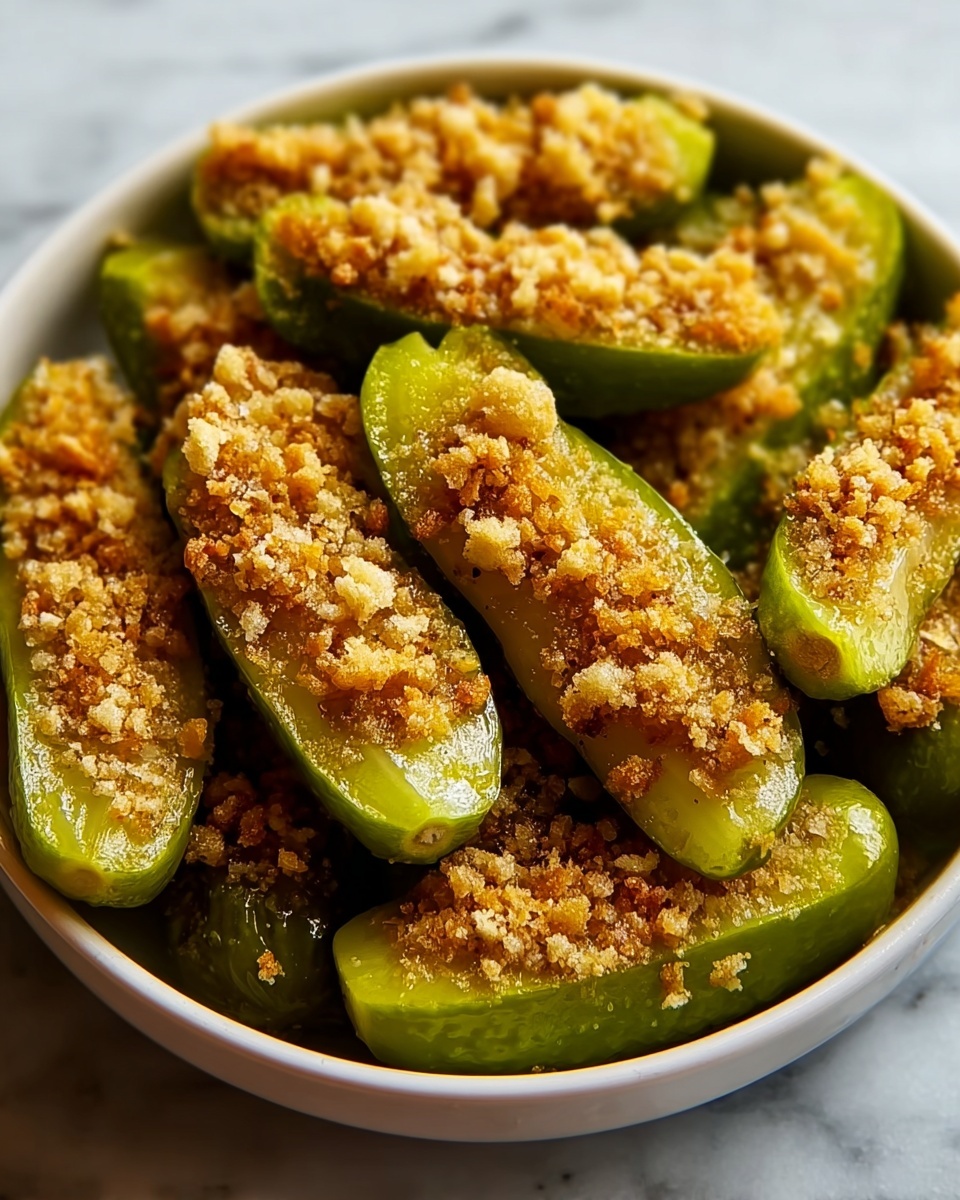
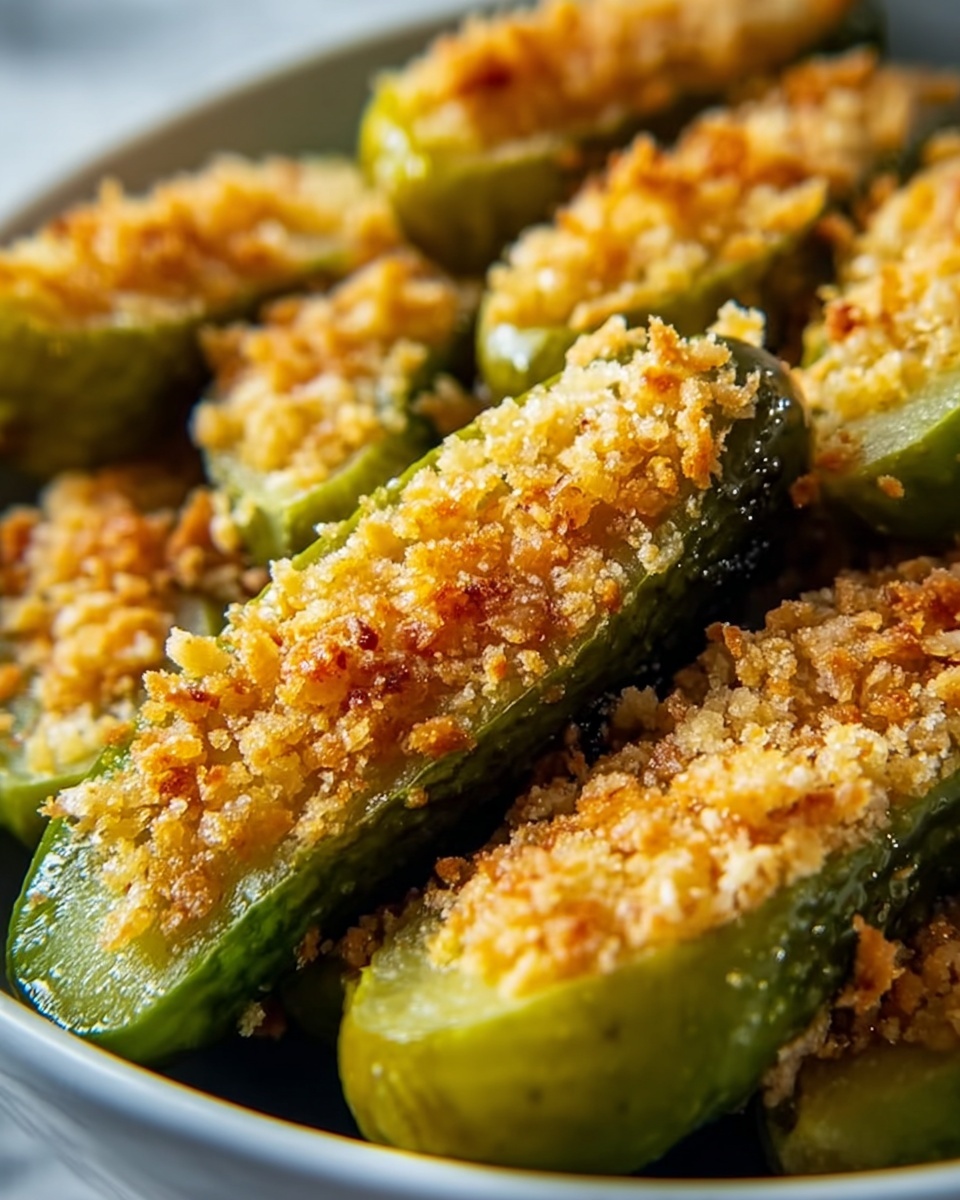
Fill each hollowed pickle half with the prepared cream cheese mixture. Pack it in tight but gently so you don’t tear the pickle skin. The goal is a generous stuffing that will melt inside the pickle, creating a gooey and flavorful center once cooked. These stuffed pickles already look irresistible before they even hit the air fryer!
Step 4: Air fry until melty
Arrange the stuffed pickles carefully in your air fryer basket. Set the temperature to 400°F (200°C) and cook for about 8 minutes. Keep an eye on them as the cheese melts and bubbles, forming a golden, slightly crispy top. The air fryer crisps the outside of the pickle while keeping the filling luscious and warm—producing a snack you’ll want to whip up again and again.
How to Serve Air Fryer Stuffed Pickles Recipe
Garnishes
To add a fresh pop, sprinkle chopped fresh parsley or chives over the hot stuffed pickles before serving. A light drizzle of hot sauce or a dusting of smoked paprika also complements the cheesy filling with an extra layer of kick and color.
Side Dishes
This snack pairs perfectly with a cool dipping sauce like ranch or a creamy garlic aioli. For a fuller spread, serve alongside crispy fries, a fresh garden salad, or your favorite charcuterie board to balance textures and flavors.
Creative Ways to Present
For parties, try arranging the stuffed pickles on a wooden board or platter with toothpicks for easy grabbing. You can also slice them into bite-sized rounds after air frying for appetizer-style serving. Pairing with vibrant garnishes and dips will make the dish shine on any table.
Make Ahead and Storage
Storing Leftovers
If you have leftovers, store the Air Fryer Stuffed Pickles in an airtight container in the refrigerator. They maintain their flavor for up to 2 days, but the texture will be best enjoyed fresh from the air fryer.
Freezing
While this recipe is best fresh, you can freeze the stuffed pickles before air frying. Place them on a tray to freeze individually, then transfer to a freezer bag. When ready to cook, air fry from frozen, increasing the cook time slightly to ensure they heat through and get crispy.
Reheating
To reheat, pop the stuffed pickles back into the air fryer for 3-5 minutes at 350°F (175°C). This will bring back their crispy edges and melty filling much better than a microwave, keeping the snack tasty and satisfying.
FAQs
Can I use other types of pickles for this recipe?
Absolutely! While dill pickles are classic, sweet or bread-and-butter pickles can offer a different but delicious twist. Just choose large pickles that can be hollowed out easily.
Is this recipe gluten-free?
Yes! This Air Fryer Stuffed Pickles Recipe uses naturally gluten-free ingredients, making it a great option for anyone avoiding gluten.
Can I add other fillings or flavors?
Definitely! Consider mixing in some crispy bacon bits, jalapeños for heat, or different shredded cheeses to customize your stuffed pickles.
How do I prevent the pickles from becoming soggy?
Choosing firm, large pickles helps. Also, air frying at a high temperature creates a crispy exterior while keeping the interior moist but not soggy.
What’s the best air fryer setting to use?
Cooking at 400°F (200°C) for about 8 minutes works perfectly to melt the cheese and crisp the outside without overcooking the pickles.
Final Thoughts
Give this Air Fryer Stuffed Pickles Recipe a try and I promise you’ll be hooked. It’s a fun, flavorful snack that feels indulgent but comes together in no time. Whether for game day, a casual get-together, or just a delicious pick-me-up, these stuffed pickles bring savory, tangy, and cheesy goodness to every bite. Get your air fryer ready and prepare to impress yourself and your friends!
Print
Air Fryer Stuffed Pickles Recipe
- Prep Time: 10 minutes
- Cook Time: 8 minutes
- Total Time: 18 minutes
- Yield: 12 stuffed pickle halves (12 servings)
- Category: Appetizer
- Method: Air Frying
- Cuisine: American
- Diet: Gluten Free
Description
Deliciously creamy and tangy Air Fryer Stuffed Pickles filled with a blend of cream cheese, ranch seasoning, and cheddar cheese, air fried to bubbly perfection for a quick and easy appetizer or snack.
Ingredients
Filling
- 4 oz cream cheese, softened
- 1 tablespoon ranch seasoning mix
- 1/2 cup shredded cheddar cheese
Pickles
- 6 large dill pickles, halved lengthwise and hollowed out
Instructions
- Prepare the filling: In a medium bowl, thoroughly mix together the softened cream cheese, ranch seasoning, and shredded cheddar cheese until all ingredients are well combined and creamy.
- Hollow out the pickles: Slice each pickle in half lengthwise and carefully scoop out the centers using a small spoon to create enough space for stuffing, ensuring the outer pickle flesh remains intact.
- Stuff the pickles: Using a spoon, fill each hollowed-out pickle half with the prepared cheese mixture, packing it in tightly to fill the cavity completely.
- Air fry the stuffed pickles: Arrange the stuffed pickles in a single layer in the air fryer basket. Cook at 400°F (200°C) for 8 minutes or until the cheese is melted, bubbly, and slightly golden.
Notes
- For best results, use firm dill pickles that hold their shape well when scooped.
- If you prefer a spicier filling, add a pinch of cayenne pepper or finely chopped jalapeños.
- Serve immediately for the best texture and flavor; leftovers can be refrigerated and reheated briefly in the air fryer.
- Adjust air frying time slightly based on your air fryer model and pickle size.

